How to Make a Lightbox for Photographing Jewelry? If you are a jewelry photographer, you know that jewelry photography can be a challenging and time-consuming process. With so many different pieces to photograph, it can be hard to find a good lighting setup that will produce quality images. Luckily, there is now a lightbox tool that can help make your job a lot easier. { "@context": "https://schema.org/", "@type": "FAQPage", "mainEntity": [ { "@type": "Question", "name": "WHAT IS THE BEST COLOR FOR PHOTOS OF JEWELRY?", "acceptedAnswer": { "@type": "Answer", "text": "White is the most used background in jewelry photography. And there is a good reason why. White background images eliminate any distractions and pinpoint your audience’s focus on your subject matter." } }, { "@type": "Question", "name": "WHAT APERTURE IS THE BEST FOR JEWELRY PHOTOGRAPHY?", "acceptedAnswer": { "@type": "Answer", "text": "For jewelry photography, the best aperture value is between 16 and 22 depending on the jewel or stone being photographed." } }, { "@type": "Question", "name": "HOW DO YOU TAKE PROFESSIONAL PICTURES OF JEWELRY?", "acceptedAnswer": { "@type": "Answer", "text": "There are a few things to consider when photographing jewelry. First, you want to make sure that the jewelry is the focus of the photo. You can do this by using a shallow depth of field or by placing the jewelry against a plain background. You also want to make sure that the lighting is consistent and that there are no reflections on the jewelry. Finally, you should use a tripod to avoid a camera shake." } } ] }
Making a lightbox for photographing jewelry is a simple and affordable way to create beautiful images of your pieces. You can find pre-made lightboxes or build your own using simple materials. By following these steps, you’ll be able to create stunning jewelry photos that will make your customers happy!
How to Make a Lightbox for Photographing Jewelry
Here are the steps to how to make a lightbox for photographing jewelry:
The Basic Setup for Making Jewelry Lightbox
1) Find some cardboard or foam core board at your local craft store
2) Cut it into any shape you want (rectangle or square shapes work best)
3) Tape up all four sides of one side with clear packing tape
4) Trace the outside of your frame onto another piece of cardboard, cut out this piece, and tape it inside your frame on top of where you taped up the first side.
Step 1. Select a Cardboard Box
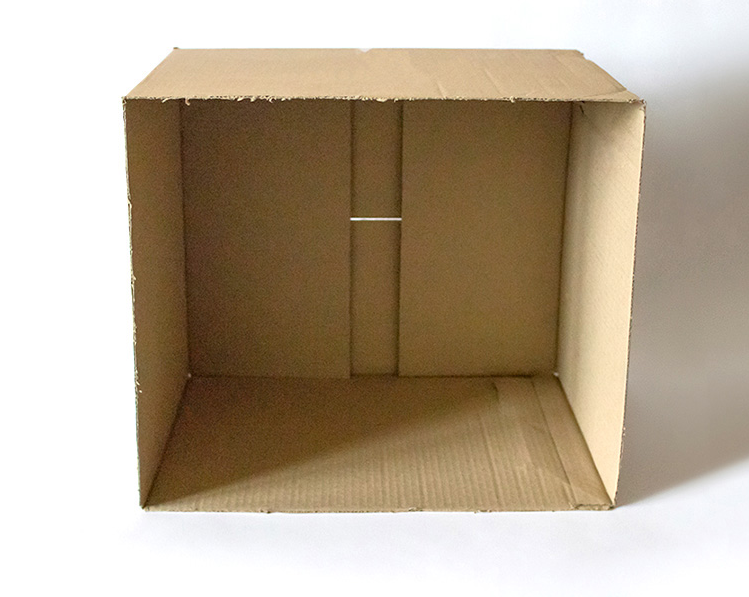
To make a proper jewelry lightbox display, you need a cardboard box. Ask workers at nearby stores for unnecessary boxes or buy the most suitable one from a storage enterprise. { "@context": "https://schema.org/", "@type": "HowTo", "name": "How to Make a Lightbox for Photographing Jewelry", "description": "How to Make a Lightbox for Photographing Jewelry? If you are a jewelry photographer, you know that jewelry photography can be a challenging and time-consuming process. With so many different pieces to photograph, it can be hard to find a good lighting setup that will produce quality images. Luckily, there is now a lightbox tool that can help make your job a lot easier.", "image": "https://photolightboxes.net/wp-content/uploads/2021/09/How-to-Make-a-Lightbox-for-Photographing-Jewelry-1.png", "totalTime": "PT10M", "estimatedCost": { "@type": "MonetaryAmount", "currency": "USA", "value": "$10" }, "supply": [ { "@type": "HowToSupply", "name": "cardboard" } ], "tool": [ { "@type": "HowToTool", "name": "packing tape" } ], "step": [ { "@type": "HowToStep", "text": "To make a proper jewelry lightbox display, you need a cardboard box. Ask workers at nearby stores for unnecessary boxes or buy the most suitable one from a storage enterprise.", "image": "https://photolightboxes.net/wp-content/uploads/2021/09/Step-1.-Choose-a-Cardboard-Box-1.png", "name": "Select a Cardboard Box", "url": "https://photolightboxes.net/steps-to-make-lightbox-for-jewelry-photography/#Step_1_Select_a_Cardboard_Box" }, { "@type": "HowToStep", "text": "To put a piece of fabric or paper over your window, you will need to cut the size down. I would recommend that window should be covered with fabric or a sheet of parchment paper if this is not possible then it’s best for both parties involved if they scale back on what was originally planned so there are no issues with execution.", "image": "https://photolightboxes.net/wp-content/uploads/2021/09/Step-2.-Mark-Windows-on-Every-Side-of-the-Box-1.png", "name": "Mark Windows on Each Side of the Box", "url": "https://photolightboxes.net/steps-to-make-lightbox-for-jewelry-photography/#Step_2_Mark_Windows_on_Each_Side_of_the_Box" }, { "@type": "HowToStep", "text": "Cut along the lines of your box with a razor or sharp knife. You will see that once you’ve finished, there is an open area in which pieces of cardboard can be extracted and discarded without damaging them too much; these make great templates for cutting more boxes!\n\nYou must cut carefully following any given guidelines so as not to damage either yourself or any remaining usable material leftover from previous projects as I did here when making this small folding table.", "image": "https://photolightboxes.net/wp-content/uploads/2021/09/Step-3.-Make-the-Windows-on-the-Box-1.png", "name": "Make the Windows on the Box", "url": "https://photolightboxes.net/steps-to-make-lightbox-for-jewelry-photography/#Step_3_Make_the_Windows_on_the_Box" }, { "@type": "HowToStep", "text": "Locate the white poster board or a thick sheet of paper on top of your jewelry lightbox. In order to fit precisely into its casing, get rid of any unnecessary edges using either scissors or a cutter the latter will result in an even more precise cut that’s easier for you as well! The material should be nearly twice as large as what is visible from outside (like those pictured) and equal width-wise too; these dimensions work best when cutting around curves with straight lines like my example above.", "image": "https://photolightboxes.net/wp-content/uploads/2021/09/Step-4.-Cut-a-Piece-of-White-Poster-Board-Identical-to-the-Box-1.png", "name": "Cut a Piece of White Poster Board", "url": "https://photolightboxes.net/steps-to-make-lightbox-for-jewelry-photography/#Step_4_Cut_a_Piece_of_White_Poster_Board" }, { "@type": "HowToStep", "text": "To make a window installation for your photo lightbox, begin by laying out the upper edge of material over one side. Next, fasten it with glue or tape and then move it onto opposite sides while letting hanging down from each corner over an open space in front as well.", "image": "https://photolightboxes.net/wp-content/uploads/2021/09/Step-5.-Cover-the-Windows-1.png", "name": "Cover the Windows", "url": "https://photolightboxes.net/steps-to-make-lightbox-for-jewelry-photography/#Step_5_Cover_the_Windows" }, { "@type": "HowToStep", "text": "Now the last step! Fasten the duct tape to one side of your lightbox photography and then gradually move towards where you want it, making sure not too much pressure gets onto its surface as this might cause wrinkles or creases.\n\nThis is going to keep your lightbox from slipping while you’re taking pictures. Take a large piece of duct tape then fasten the sides together so that nothing moves when posing for pictures", "image": "https://photolightboxes.net/wp-content/uploads/2021/09/Step-6.-Fasten-the-Poster-Board-Inside-of-the-Box-1.png", "name": "Fasten the Poster Board Inside the Box", "url": "https://photolightboxes.net/steps-to-make-lightbox-for-jewelry-photography/#Step_6_Fasten_the_Poster_Board_Inside_the_Box" }, { "@type": "HowToStep", "text": "One of the best ways to get that perfect lighting is with a photo lightbox! You can place it on any smooth surface and make sure you have enough space for lights. Place your item in the middle point white area when using this type of equipment, then simply take one shot out there – done deal! If you want to buy your own photo lightbox have a look at our website Photo Light Boxes.", "image": "https://photolightboxes.net/wp-content/uploads/2021/09/Step-6.-Fasten-the-Poster-Board-Inside-of-the-Box-1.png", "name": "Now Use Lightbox for Photographing Jewelry", "url": "https://photolightboxes.net/steps-to-make-lightbox-for-jewelry-photography/#Now_Use_Lightbox_for_Photographing_Jewelry" } ] }
Step 2. Mark Windows on Each Side of the Box
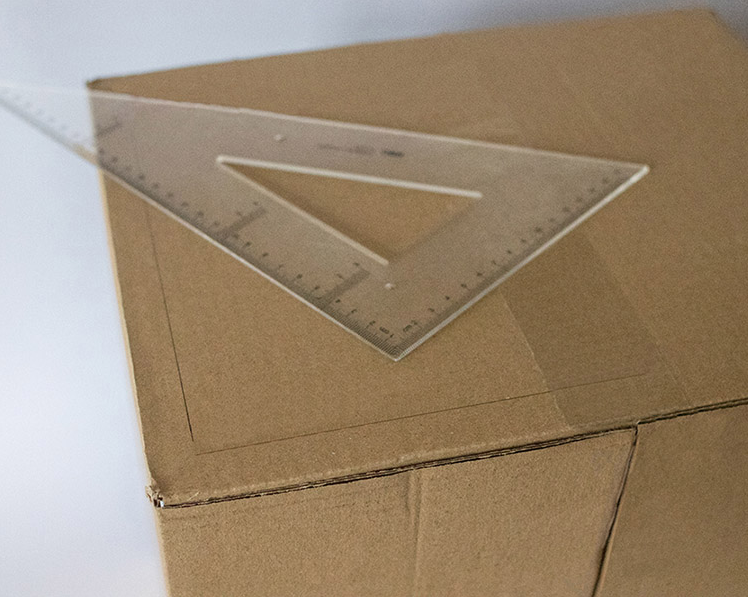
To put a piece of fabric or paper over your window, you will need to cut the size down. I would recommend that window should be covered with fabric or a sheet of parchment paper if this is not possible then it’s best for both parties involved if they scale back on what was originally planned so there are no issues with execution.
Step 3. Make the Windows on the Box
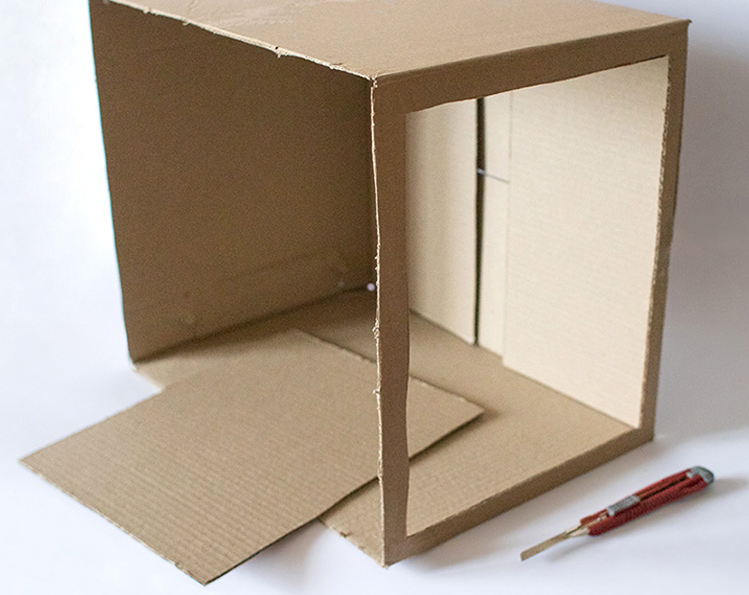
Cut along the lines of your box with a razor or sharp knife. You will see that once you’ve finished, there is an open area in which pieces of cardboard can be extracted and discarded without damaging them too much; these make great templates for cutting more boxes!
You must cut carefully following any given guidelines so as not to damage either yourself or any remaining usable material leftover from previous projects as I did here when making this small folding table.
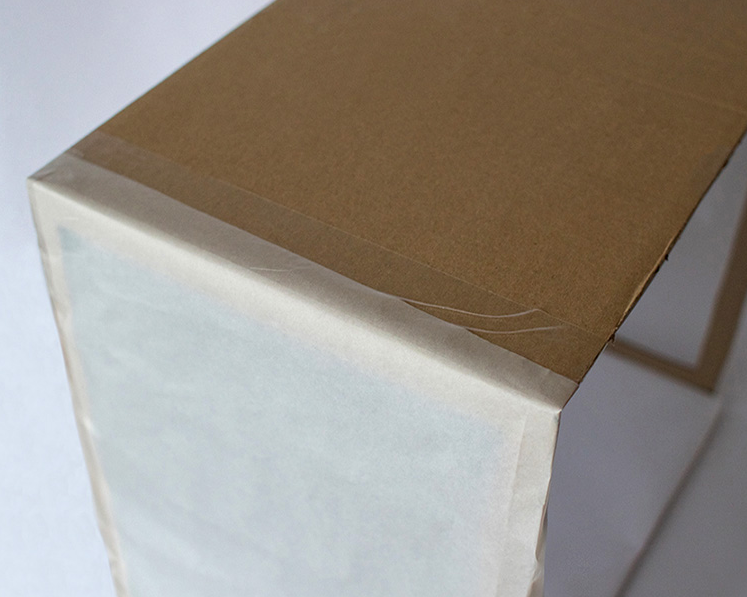
Step 4. Cut a Piece of White Poster Board
Locate the white poster board or a thick sheet of paper on top of your jewelry lightbox. In order to fit precisely into its casing, get rid of any unnecessary edges using either scissors or a cutter the latter will result in an even more precise cut that’s easier for you as well! The material should be nearly twice as large as what is visible from outside (like those pictured) and equal width-wise too; these dimensions work best when cutting around curves with straight lines like my example above.
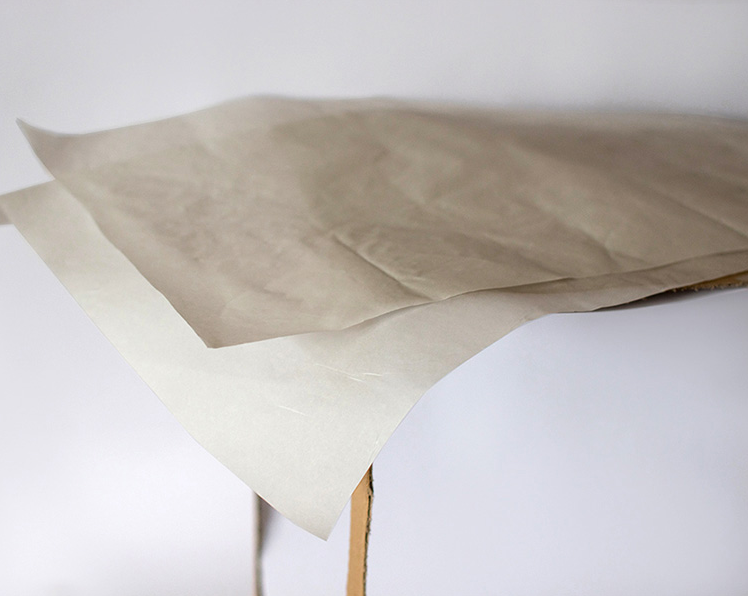
Step 5. Cover the Windows
To make a window installation for your photo lightbox, begin by laying out the upper edge of material over one side. Next, fasten it with glue or tape and then move it onto opposite sides while letting hanging down from each corner over an open space in front as well.
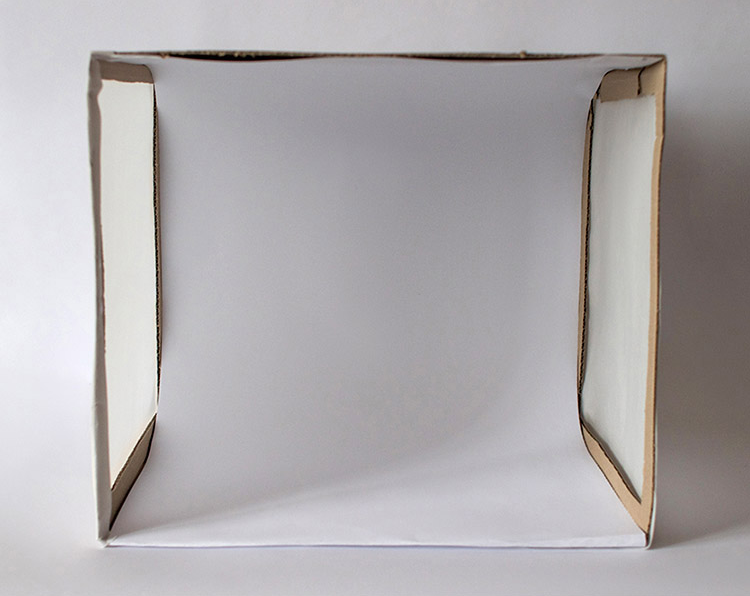
Step 6. Fasten the Poster Board Inside the Box
Now the last step! Fasten the duct tape to one side of your lightbox photography and then gradually move towards where you want it, making sure not too much pressure gets onto its surface as this might cause wrinkles or creases.
This is going to keep your lightbox from slipping while you’re taking pictures. Take a large piece of duct tape then fasten the sides together so that nothing moves when posing for pictures
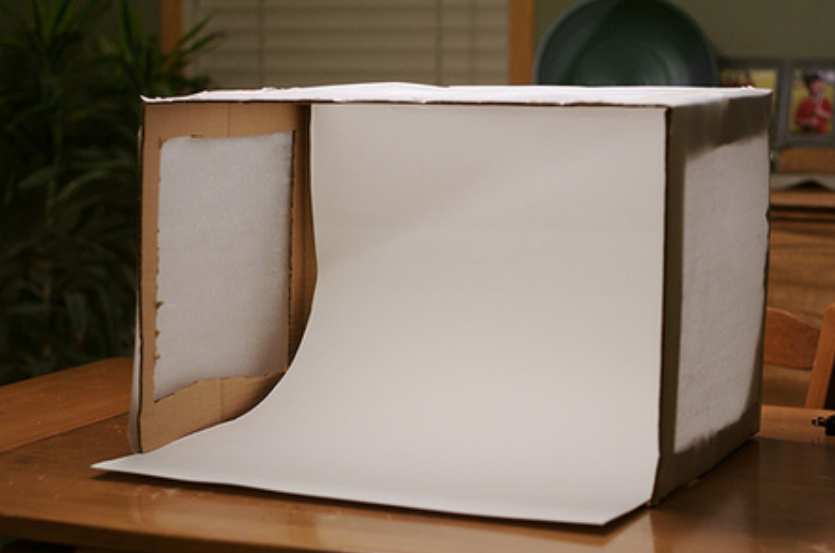
Step 7. Now Use Lightbox for Photographing Jewelry
One of the best ways to get that perfect lighting is with a photo lightbox! You can place it on any smooth surface and make sure you have enough space for lights. Place your item in the middle point white area when using this type of equipment, then simply take one shot out there – done deal! If you want to buy your own photo lightbox have a look at our website Photo Light Boxes.
Conclusion
In conclusion, by following the simple steps listed in this article, you can easily create your own lightbox for photographing jewelry. This will allow you to capture the best images of your pieces possible, and help you better showcase your work to potential customers.
Frequently Asked Questions
What is the best color for photos of jewelry?
White is the most used background in jewelry photography. And there is a good reason why. White background images eliminate any distractions and pinpoint your audience’s focus on your subject matter.
What aperture is the best for jewelry photography?
For jewelry photography, the best aperture value is between 16 and 22 depending on the jewel or stone being photographed.
How do you take professional pictures of jewelry?
There are a few things to consider when photographing jewelry. First, you want to make sure that the jewelry is the focus of the photo. You can do this by using a shallow depth of field or by placing the jewelry against a plain background. You also want to make sure that the lighting is consistent and that there are no reflections on the jewelry. Finally, you should use a tripod to avoid a camera shake.


