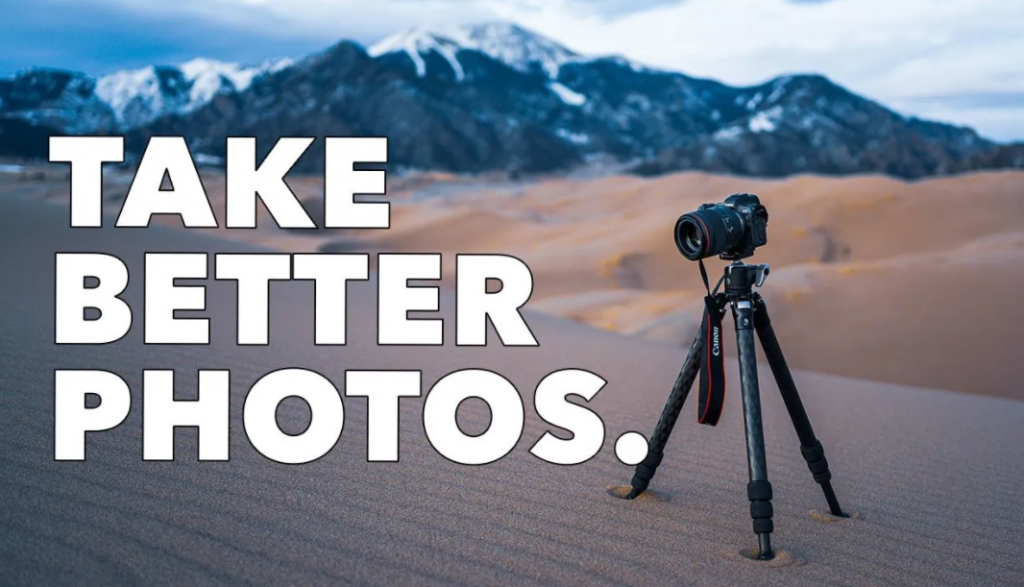
Digital Photography Tips! Digital photography is a lot of fun! Digital cameras have come a long way in the past decade, and it seems like every day there is something new to learn. You can take pictures in RAW or JPEG format, shoot at different shutter speeds, and much more!
Digital photography is becoming more popular in today’s society. Digital cameras are cheaper and easier to use for many people, but there are still some aspects of digital photography that can be difficult to master. Digital Photography Tips will help you learn how to take better photos with your digital camera, so you can share them with friends and family online!
Having a Digital Camera is cool and all, but to be honest, it can be really frustrating. Your camera might not turn on when you need it to, or your battery could die at the worst possible time! Digital Photography Tips will help you avoid these pitfalls and make sure that your Digital Camera works for you instead of against you.
Digital Photography Tips
Here are some tips for digital photography
Tip #1: Shoot in Raw Format
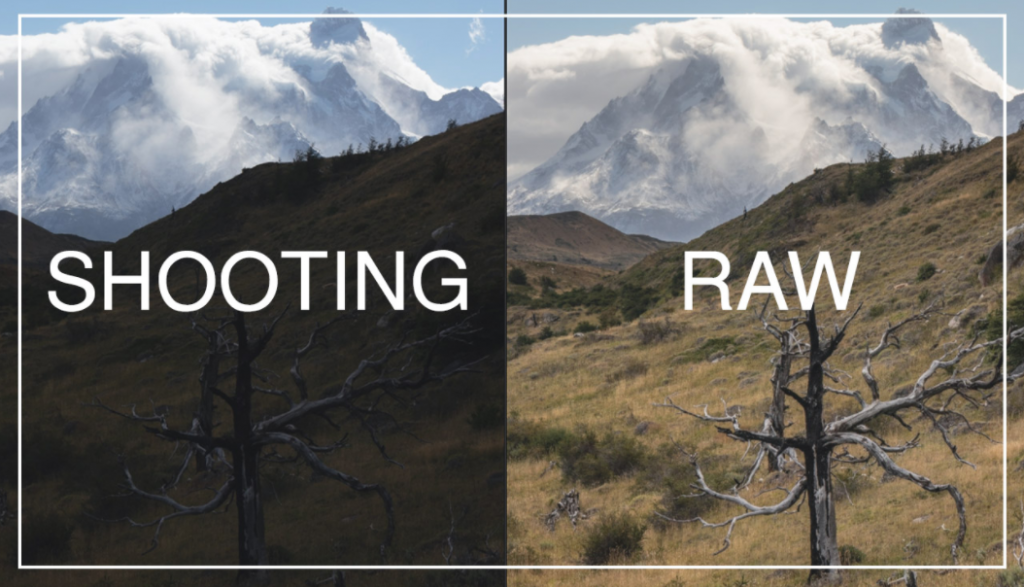
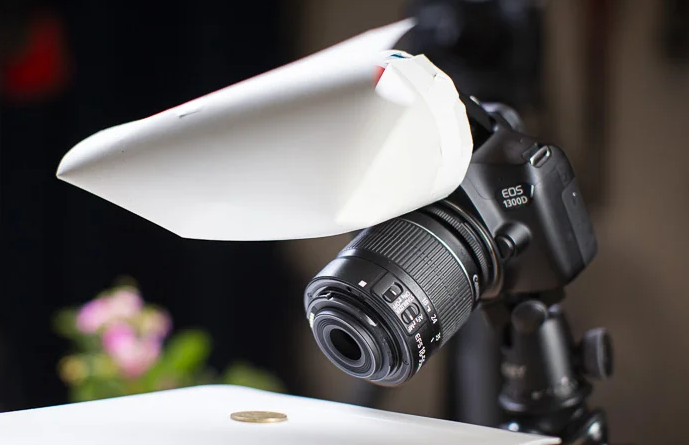
If you plan on printing your pictures larger than 8 inches by 12 inches, then I recommend that you shoot in RAW instead of JPEG. This will give you more flexibility when editing your pictures to compensate for exposure problems, white balance issues, and so on. If you can’t shoot in RAW format because of your camera’s limited capability, then invest in a better one that has this option. In the example above, I could have taken a picture with an exposure time as long as 1/15th sec to give me enough ambient light to get a sharp image, but I would have had to turn on the image stabilization mechanism.
TIP #2: Do Not Use Digital Zoom

This is one of the most common mistakes that people make when taking photos and videos: zooming in with their camera’s built-in lens while it’s mounted on a tripod. If you do this, then you will end up with a magnified image that looks grainy and pixelated. This is the reason why it’s best to use a tripod when shooting at night or in low light conditions.
Tip #3: Clean Your Sensor Regularly
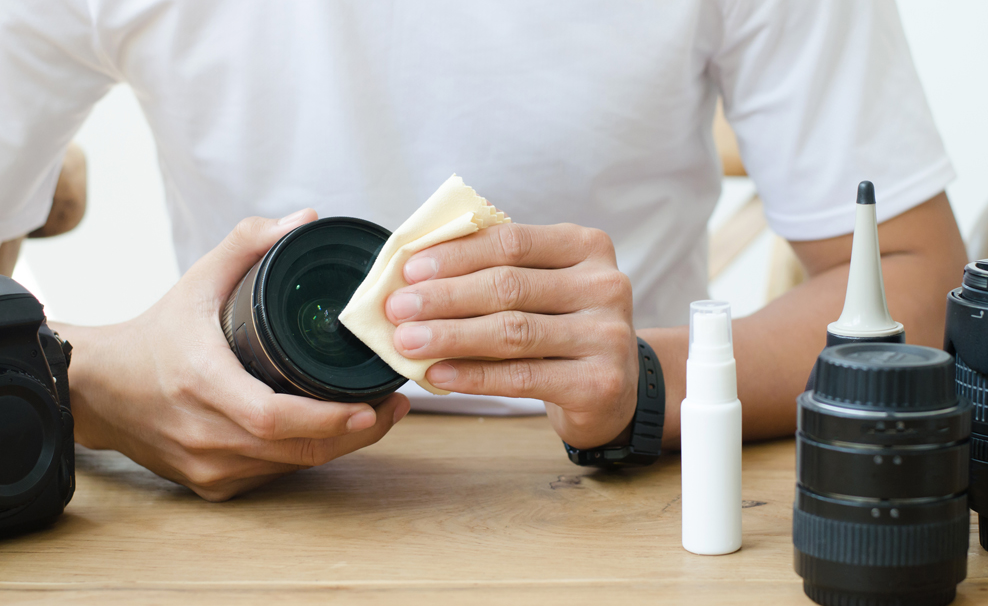
Dust particles on your camera’s sensor usually show up when you photograph darker areas because these specks of dust and dirt reflect light and become more visible (the same thing happens when you point a flashlight at black velvet). I recommend that you clean your camera’s sensor once every few weeks or, better yet, buy yourself an air blower to keep in your camera bag. The picture above shows the effect of having dirty sensors: notice how the dust particles are brighter than the other areas, which are properly exposed.
Tip #4: Use Your Camera’s Manual Preset Mode
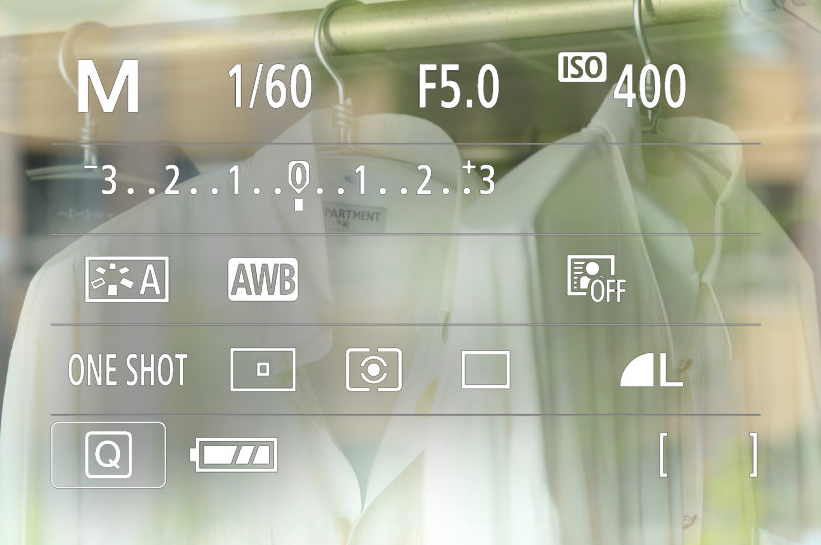
If you want to shoot in aperture priority or shutter priority modes because “mixed lighting” is too complicated for you, then I recommend that you just use the manual preset mode instead. This will allow you to quickly change your exposure settings and your camera’s white balance whenever the light changes. A good example of this is when you’re shooting indoors and the sun comes out after a few minutes (this happens quite often during winter).
Tip #5: Use an External Flash with a Diffuser
If you want to take advantage of your camera’s built-in pop-up flash for taking pictures on a cloudy day or for a small object indoor photography, then I recommend that you point it directly towards the ceiling to bounce the flashlight. This will create softer shadows and eliminate the harsh glare of direct lighting. If you don’t have an external flash with you, then try using your camera’s built-in pop-up flash pointed at the ceiling while you take your pictures. However, make sure that it’s not pointed directly at the subject because this will create hard shadows under their eyes and nose.
Tip #6: Turn off Image Stabilization on Your Lens
Image stabilization allows us to take pictures at slower shutter speeds than what is normally considered safe. If you use a tripod, then it doesn’t matter whether or not your image stabilization is turned on, but if you handhold your camera and shoot above 1/100th sec., then turn it off.
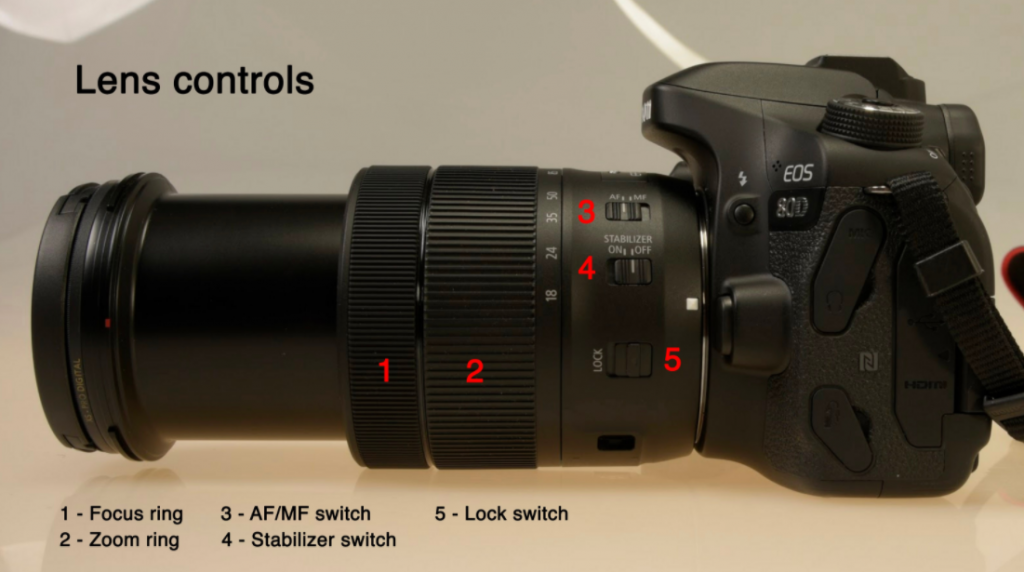
I don’t own a tilt-shift lens, but I do own a 100mm Macro lens with image stabilization. I noticed that the IS mechanism caused the internal elements of the lens to move while focusing. This movement produced an effect similar to what one would get if they focused their point & shoot camera while it was sitting on top of their television set – everything looked curved or warped due to the tiny bit of camera shake.
If you don’t have a tripod, then I recommend that you purchase a monopod, or learn how to steady your arms while handholding the camera. If you absolutely must use slower shutter speeds without a tripod, then turn on the image stabilization mechanism and let it do its job. However, be careful not to bump into your subject while the lens elements are moving around inside your camera. I would rather have sharp pictures than a blurry picture with image stabilization wound up.
Tip #7: Avoid Direct Sunlight, and Never Shoot Without an Nd Filter
Avoid direct sunlight when possible, and never shoot into the sun without an ND filter. If you take a picture in broad daylight and notice that your subject is completely washed out (in other words: overexposed), then chances are that your picture would have turned out better if you had taken it an hour before or afternoon. I know this because I tend to take many pictures of my cousin’s wedding cake right around sunset, and these shots often come out unusable due to the bright sunlight.
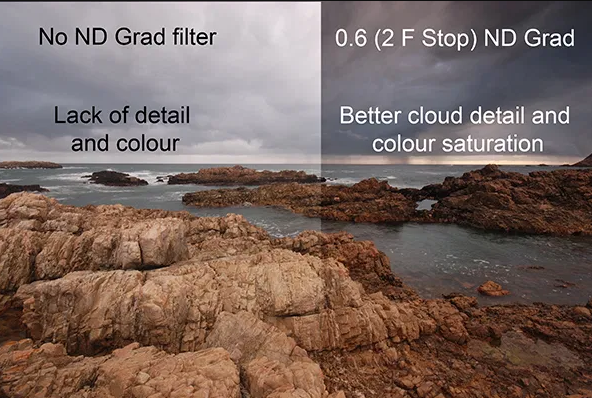
If you shoot in JPEG format, then it’s easier to rescue an overexposed picture than if you shoot in RAW. If you plan on shooting JPEGs, then I recommend that you enable the highlight warning option so it can alert you if any areas of your photo are overexposed (this is found on some cameras under the “exposure” or “histogram” display options). If you shoot in RAW, then I recommend that you purchase a variable ND filter so you can shoot with the correct exposure even if the light changes.
Tip #8: Turn off Auto ISO and Increase Your Camera’s Native Iso Setting Instead
The problem with cameras that have a small sensor is that they usually have a maximum native ISO of only 100-200. If you take a picture in full daylight at ISO 200, then it will probably look just as good as one taken with the camera set to ISO 3200. I recommend that you set your ISO somewhere between 400-800 (the image above was shot at 640) if you want to shoot outdoors during broad daylight without using an ND filter or increasing your exposure time.
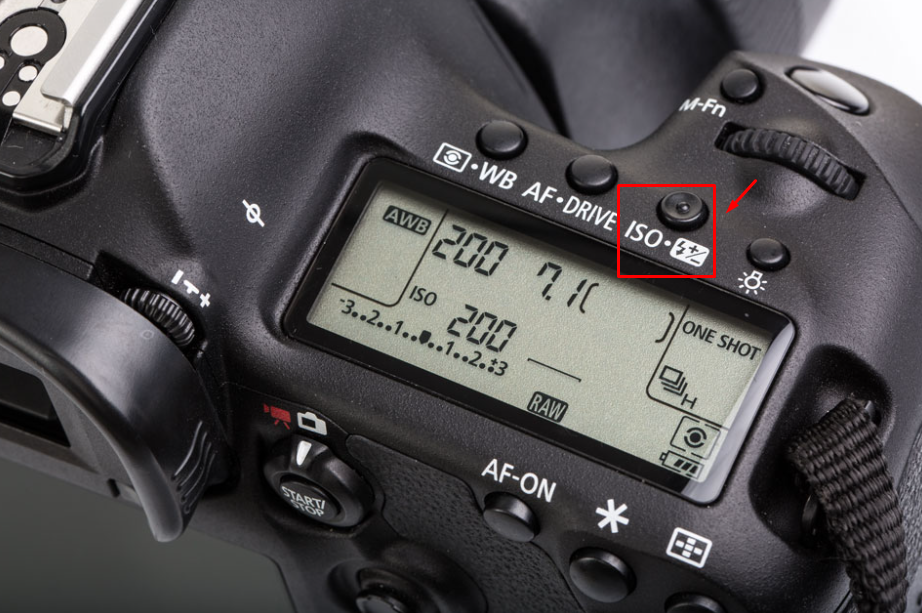
In the picture above, I was using a 35mm lens on a Nikon D700 – a camera that has a maximum native ISO of only 200. The exposure for this picture was 1/10000 sec at f/9 and 640 ISO. If you plan on shooting close-ups in broad daylight without an ND filter, then I recommend that you turn off Auto ISO and set your camera to its native ISO setting (the lowest one available, usually 100-200).
Tip #9: Practice!
The last tip I have for you is to practice, practice, and then keep practicing until you master all of these digital photography tips. Good luck!
Conclusion:
I’m not saying that these settings and techniques will get you amazing photos of the night sky, but they’ll definitely improve your shots. It’s important to learn how to use Adobe Lightroom or some other type of editing software because it will allow you to fix most of the problems in your photos (poor exposure, white balance issues, etc.) and to create amazing effects that will make your pictures really stand out.
Thank you for reading this post…🙂 { "@context": "https://schema.org/", "@type": "HowTo", "name": "Digital Photography Tips", "description": "Digital Photography Tips! Digital photography is a lot of fun! Digital cameras have come a long way in the past decade, and it seems like every day there is something new to learn. You can take pictures in RAW or JPEG format, shoot at different shutter speeds, and much more!", "image": "https://photolightboxes.net/wp-content/uploads/2022/01/Digital-Photography-Tips-1-1024x587.png", "totalTime": "PT10M", "estimatedCost": { "@type": "MonetaryAmount", "currency": "USD", "value": "10$" }, "supply": [ { "@type": "HowToSupply", "name": "camera" } ], "tool": [ { "@type": "HowToTool", "name": "tripod" } ], "step": [ { "@type": "HowToStep", "text": "If you plan on printing your pictures larger than 8 inches by 12 inches, then I recommend that you shoot in RAW instead of JPEG. This will give you more flexibility when editing your pictures to compensate for exposure problems, white balance issues, and so on. If you can’t shoot in RAW format because of your camera’s limited capability, then invest in a better one that has this option. In the example above, I could have taken a picture with an exposure time as long as 1/15th sec to give me enough ambient light to get a sharp image, but I would have had to turn on the image stabilization mechanism.", "image": "https://photolightboxes.net/wp-content/uploads/2022/01/Shoot-in-Raw-Format-1024x587.png", "name": "Shoot in Raw Format", "url": "https://photolightboxes.net/digital-photography-tips/#Tip_1_Shoot_in_Raw_Format" }, { "@type": "HowToStep", "text": "This is one of the most common mistakes that people make when taking photos and videos: zooming in with their camera’s built-in lens while it’s mounted on a tripod. If you do this, then you will end up with a magnified image that looks grainy and pixelated. This is the reason why it’s best to use a tripod when shooting at night or in low light conditions.", "image": "https://photolightboxes.net/wp-content/uploads/2022/01/DO-NOT-USE-DIGITAL-ZOOM.png", "name": "Do Not Use Digital Zoom", "url": "https://photolightboxes.net/digital-photography-tips/#TIP_2_Do_Not_Use_Digital_Zoom" }, { "@type": "HowToStep", "text": "Dust particles on your camera’s sensor usually show up when you photograph darker areas because these specks of dust and dirt reflect light and become more visible (the same thing happens when you point a flashlight at black velvet). I recommend that you clean your camera’s sensor once every few weeks or, better yet, buy yourself an air blower to keep in your camera bag. The picture above shows the effect of having dirty sensors: notice how the dust particles are brighter than the other areas, which are properly exposed.", "image": "https://photolightboxes.net/wp-content/uploads/2022/01/Clean-Your-Sensor-Regularly.png", "name": "Clean Your Sensor Regularly", "url": "https://photolightboxes.net/digital-photography-tips/#Tip_3_Clean_Your_Sensor_Regularly" }, { "@type": "HowToStep", "text": "If you want to shoot in aperture priority or shutter priority modes because “mixed lighting” is too complicated for you, then I recommend that you just use the manual preset mode instead. This will allow you to quickly change your exposure settings and your camera’s white balance whenever the light changes. A good example of this is when you’re shooting indoors and the sun comes out after a few minutes (this happens quite often during winter).", "image": "https://photolightboxes.net/wp-content/uploads/2022/01/Use-Your-Cameras-Manual-Preset-Mode.png", "name": "Use Your Camera’s Manual Preset Mode", "url": "https://photolightboxes.net/digital-photography-tips/#Tip_4_Use_Your_Cameras_Manual_Preset_Mode" }, { "@type": "HowToStep", "text": "If you want to take advantage of your camera’s built-in pop-up flash for taking pictures on a cloudy day or for a small object indoor photography, then I recommend that you point it directly towards the ceiling to bounce the flashlight. This will create softer shadows and eliminate the harsh glare of direct lighting. If you don’t have an external flash with you, then try using your camera’s built-in pop-up flash pointed at the ceiling while you take your pictures. However, make sure that it’s not pointed directly at the subject because this will create hard shadows under their eyes and nose.", "image": "https://photolightboxes.net/wp-content/uploads/2022/01/Use-an-External-Flash-with-a-Diffuser.png", "name": "Use an External Flash with a Diffuser", "url": "https://photolightboxes.net/digital-photography-tips/#Tip_5_Use_an_External_Flash_with_a_Diffuser" }, { "@type": "HowToStep", "text": "Image stabilization allows us to take pictures at slower shutter speeds than what is normally considered safe. If you use a tripod, then it doesn’t matter whether or not your image stabilization is turned on, but if you handhold your camera and shoot above 1/100th sec., then turn it off.", "image": "https://photolightboxes.net/wp-content/uploads/2022/01/Turn-off-Image-Stabilization-on-Your-Lens-1024x572.png", "name": "Turn off Image Stabilization on Your Lens", "url": "https://photolightboxes.net/digital-photography-tips/#Tip_6_Turn_off_Image_Stabilization_on_Your_Lens" }, { "@type": "HowToStep", "text": "Avoid direct sunlight when possible, and never shoot into the sun without an ND filter. If you take a picture in broad daylight and notice that your subject is completely washed out (in other words: overexposed), then chances are that your picture would have turned out better if you had taken it an hour before or afternoon. I know this because I tend to take many pictures of my cousin’s wedding cake right around sunset, and these shots often come out unusable due to the bright sunlight.", "image": "https://photolightboxes.net/wp-content/uploads/2022/01/Avoid-Direct-Sunlight-and-Never-Shoot-Without-an-Nd-Filter.png", "name": "Avoid Direct Sunlight, and Never Shoot Without an Nd Filter", "url": "https://photolightboxes.net/digital-photography-tips/#Tip_7_Avoid_Direct_Sunlight_and_Never_Shoot_Without_an_Nd_Filter" }, { "@type": "HowToStep", "text": "The problem with cameras that have a small sensor is that they usually have a maximum native ISO of only 100-200. If you take a picture in full daylight at ISO 200, then it will probably look just as good as one taken with the camera set to ISO 3200. I recommend that you set your ISO somewhere between 400-800 (the image above was shot at 640) if you want to shoot outdoors during broad daylight without using an ND filter or increasing your exposure time.", "image": "https://photolightboxes.net/wp-content/uploads/2022/01/Turn-off-Auto-ISO-and-Increase-Your-Cameras-Native-Iso-Setting-Instead.png", "name": "Turn off Auto ISO and Increase Your Camera’s Native Iso Setting Instead", "url": "https://photolightboxes.net/wp-content/uploads/2022/01/Turn-off-Auto-ISO-and-Increase-Your-Cameras-Native-Iso-Setting-Instead.png" }, { "@type": "HowToStep", "text": "The last tip I have for you is to practice, practice, and then keep practicing until you master all of these digital photography tips. Good luck!", "image": "https://photolightboxes.net/wp-content/uploads/2022/01/Turn-off-Auto-ISO-and-Increase-Your-Cameras-Native-Iso-Setting-Instead.png", "name": "Practice!", "url": "https://photolightboxes.net/digital-photography-tips/#Tip_9_Practice" } ] }
Note: Interested to know about Lighting Setup for Indoor Photography? Read here.


