Jewelry Product Photography Tips! Are you tired of your jewellery products looking lacklustre and dull in photographs? Do you need help to capture the intricate details and sparkling brilliance that make your pieces shine? Well, fret no more. This article will unveil a treasure trove of jewellery product photography tips to help you showcase your creations in all their glory. From lighting techniques that enhance the lustre of gemstones to composition tricks that highlight delicate craftsmanship, these insider tips will elevate your jewellery photography game to new heights.
Jewelry Product Photography Tips
Let’s take a look at how Jewelry Product Photography Tips can help!
1. Lighting Is Key When Photographing Jewelry

You want to create a bright and sparkling effect so use a lot of natural light if possible or place your lights in such a way as to reflect off the jewelry and make it glow.
2. Think about Your Backdrop
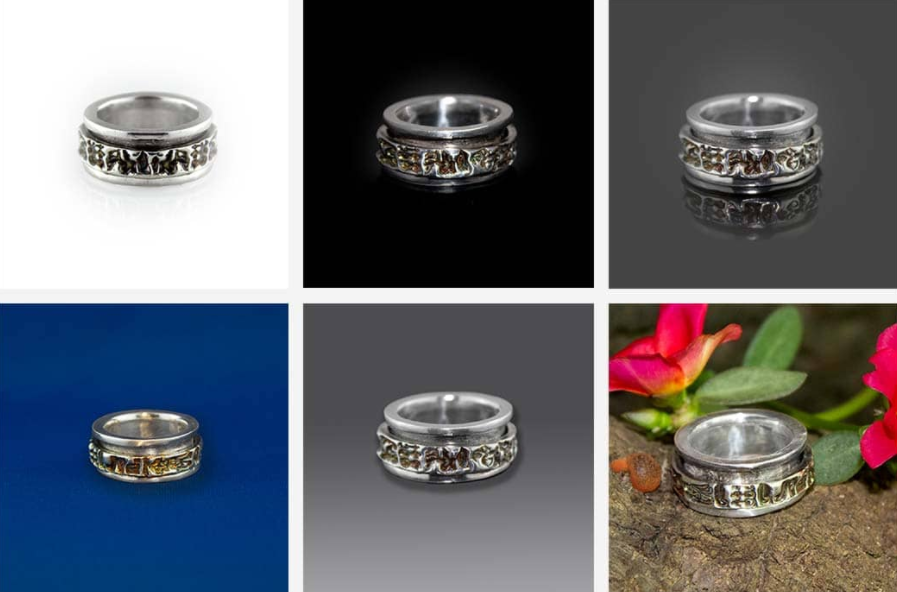
A plain white or black background will help the pieces stand out, but a dark brown or black backdrop will make them recede into the image. This is good for pieces that have a lot of detail and you want to highlight this. A white or light-colored background will help to accentuate the details in your jewelry while avoiding distractions from other parts of the photo.
3. Avoid Reflections
This can be tricky when photographing jewelry it is often shiny, but you don’t want reflections of the camera or photographer in your shot. Try to use a matte surface for your jewelry and avoid using glossy surfaces or backgrounds.
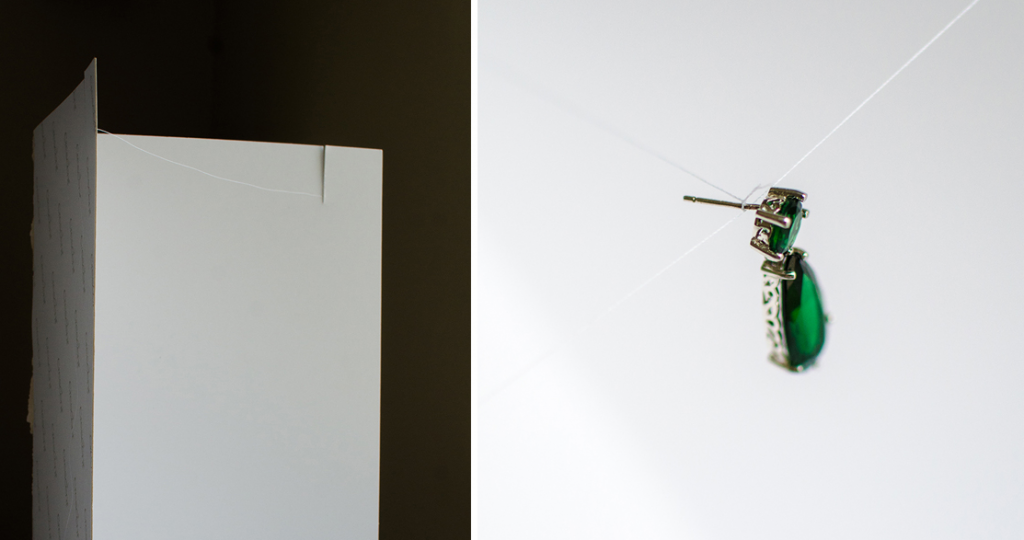
4. Use Props to Add Interest
Sometimes a simple shot of a piece of jewelry can be a little bit boring. Try using props to add interest and visual appeal. Think about what the jewelry could be used for or what it might represent and find props that fit this theme.
5. Use Different Angles
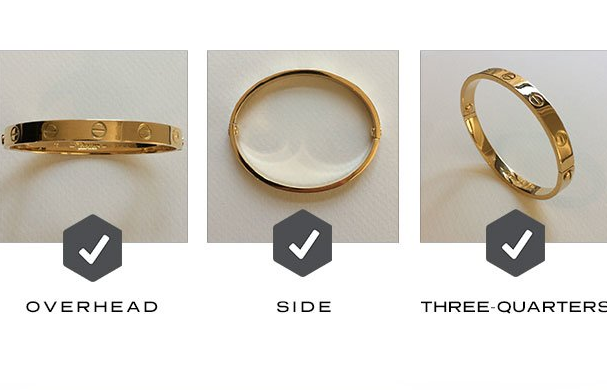
Don’t always shoot your jewelry from the front experiment with different angles to see what works best. Angling the jewelry so that the light hits it from different directions can create some really beautiful effects.
6. Think about the Best Time to Photograph Jewelry
Most people like to photograph jewelry in natural daylight (if you can) because this is when it sparkles the most and shows up well against a white backdrop. However, if you are photographing more delicate, vintage, or costume jewelry you may want to avoid sunlight which can often be too harsh.
7. Be Creative
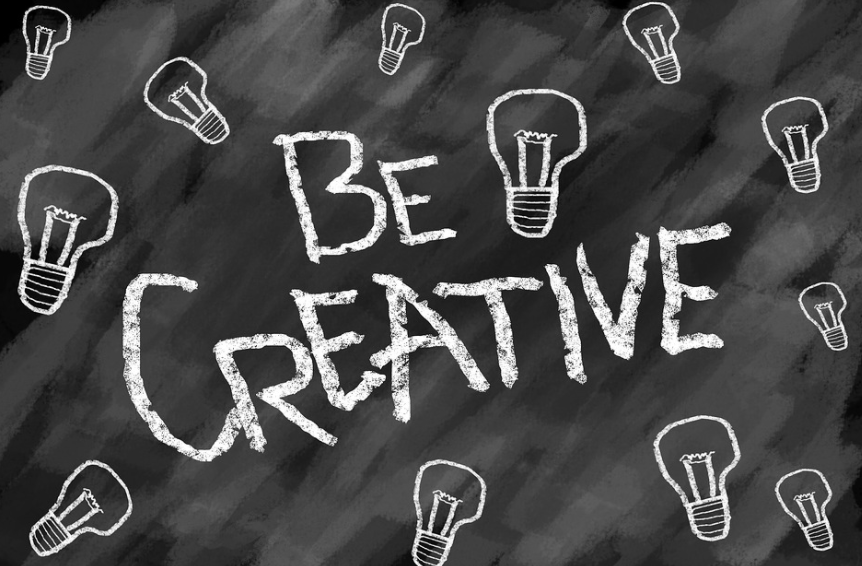
Don’t just stick with the shots you think look like the best experiment and see what works. You might have a great backdrop but not so great lighting changing your position, angle, or equipment could result in a very different-looking image.
8. Think about the Final Use of Your Photos
Will you be using them for a website? If so, they will need to be a certain size and a particular file format (more on that later). Will it be printed in a catalog or brochure? The print quality may not be as high so you might want to adjust your images slightly.
9. Edit the Background
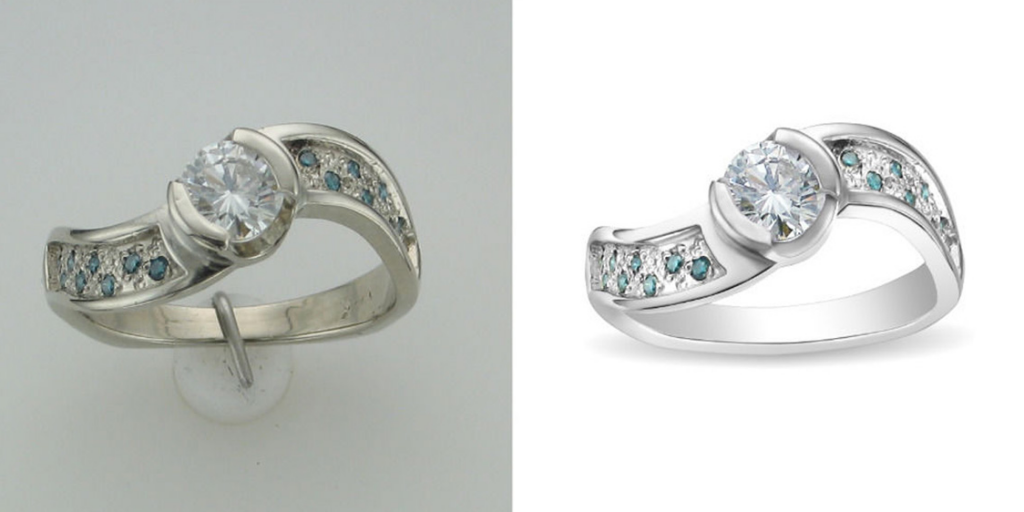
This is rather a general tip that applies not just to Jewelry Photography but can be used in many other types of photography as well. You could consider editing out any background distractions and replacing them with a plain black or white backdrop, or another color that works well with your jewelry.
10. Use a Tripod
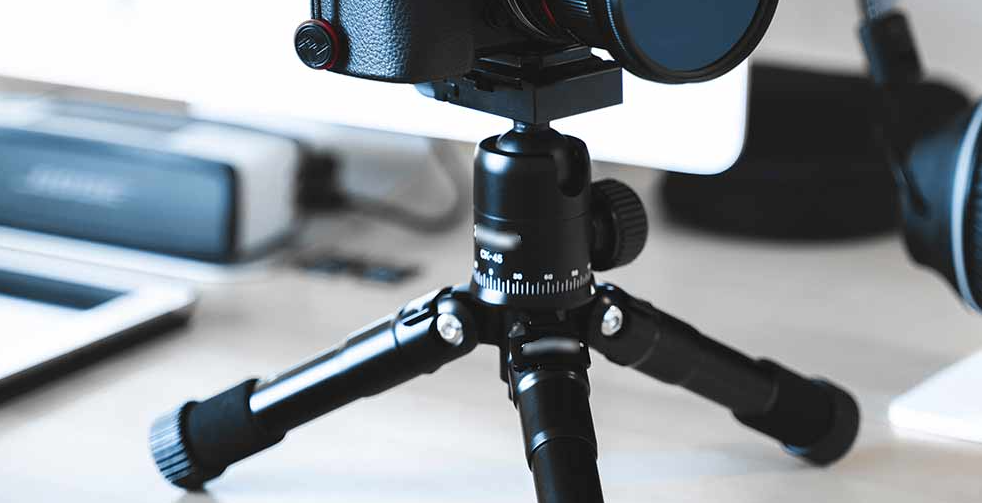
Tripods can be essential when photographing jewelry because they will help to ensure that the shot stays steady and you get a sharp image of your piece. A tripod is also useful if you are using studio lighting or some other type of more complicated lighting equipment as it will keep everything in place.
11. Pay Attention to the Model
If you are photographing a one-of-a-kind piece of jewelry, you want to make sure it doesn’t get lost in the photo and that is easily identifiable in both thumbnails and final images. Try using a plain white backdrop so any detail against this will stand out. { "@context": "https://schema.org/", "@type": "HowTo", "name": "Jewelry Product Photography Tips", "description": "Jewelry Product Photography Tips! Do you need Jewelry Product Photography Tips? Jewelry is a product that many people love to buy, and if you’re in the business of selling it, then Jewelry Product Photography Tips can be an invaluable resource for your company. Jewelry needs to be lit from all angles evenly in order to show off the beauty of the Jewelry and not just one side of it. The tips we’ll discuss will help you create professional-looking photos for your products and increase sales.", "image": "https://photolightboxes.net/wp-content/uploads/2021/12/Jewelry-Product-Photography-Tips--680x350.jpg", "totalTime": "PT10M", "estimatedCost": { "@type": "MonetaryAmount", "currency": "USD", "value": "10$" }, "supply": [ { "@type": "HowToSupply", "name": "camera" } ], "tool": [ { "@type": "HowToTool", "name": "ND Filter" } ], "step": [ { "@type": "HowToStep", "text": "You want to create a bright and sparkling effect so use a lot of natural light if possible or place your lights in such a way as to reflect off the jewelry and make it glow.", "image": "https://photolightboxes.net/wp-content/uploads/2021/12/Lighting-Is-Key-When-Photographing-Jewelry.png", "name": "Lighting Is Key When Photographing Jewelry", "url": "https://photolightboxes.net/jewelry-product-photography-tips/#1_Lighting_Is_Key_When_Photographing_Jewelry" }, { "@type": "HowToStep", "text": "A plain white or black background will help the pieces stand out, but a dark brown or black backdrop will make them recede into the image. This is good for pieces that have a lot of detail and you want to highlight this. A white or light-colored background will help to accentuate the details in your jewelry while avoiding distractions from other parts of the photo.", "image": "https://photolightboxes.net/wp-content/uploads/2021/12/Think-about-Your-Backdrop-.png", "name": "Think about Your Backdrop", "url": "https://photolightboxes.net/jewelry-product-photography-tips/#2_Think_about_Your_Backdrop" }, { "@type": "HowToStep", "text": "This can be tricky when photographing jewelry it is often shiny, but you don’t want reflections of the camera or photographer in your shot. Try to use a matte surface for your jewelry and avoid using glossy surfaces or backgrounds.", "image": "https://photolightboxes.net/wp-content/uploads/2021/12/Avoid-Reflections-1024x540.png", "name": "Avoid Reflections", "url": "https://photolightboxes.net/jewelry-product-photography-tips/#3_Avoid_Reflections" }, { "@type": "HowToStep", "text": "Sometimes a simple shot of a piece of jewelry can be a little bit boring. Try using props to add interest and visual appeal. Think about what the jewelry could be used for or what it might represent and find props that fit this theme.", "image": "https://photolightboxes.net/wp-content/uploads/2021/12/Jewelry-Product-Photography-Tips--680x350.jpg", "name": "Use Props to Add Interest", "url": "https://photolightboxes.net/jewelry-product-photography-tips/#4_Use_Props_to_Add_Interest" }, { "@type": "HowToStep", "text": "Don’t always shoot your jewelry from the front experiment with different angles to see what works best. Angling the jewelry so that the light hits it from different directions can create some really beautiful effects.", "image": "https://photolightboxes.net/wp-content/uploads/2021/12/Use-Different-Angles-e1640355563969.png", "name": "Use Different Angles", "url": "https://photolightboxes.net/jewelry-product-photography-tips/#5_Use_Different_Angles" }, { "@type": "HowToStep", "text": "Most people like to photograph jewelry in natural daylight (if you can) because this is when it sparkles the most and shows up well against a white backdrop. However, if you are photographing more delicate, vintage, or costume jewelry you may want to avoid sunlight which can often be too harsh.", "image": "https://photolightboxes.net/wp-content/uploads/2021/12/Jewelry-Product-Photography-Tips--680x350.jpg", "name": "Think about the Best Time to Photograph Jewelry", "url": "https://photolightboxes.net/jewelry-product-photography-tips/#6_Think_about_the_Best_Time_to_Photograph_Jewelry" }, { "@type": "HowToStep", "text": "Don’t just stick with the shots you think look like the best experiment and see what works. You might have a great backdrop but not so great lighting changing your position, angle, or equipment could result in a very different-looking image.", "image": "https://photolightboxes.net/wp-content/uploads/2021/12/Be-Creative.png", "name": "Be Creative", "url": "https://photolightboxes.net/jewelry-product-photography-tips/#7_Be_Creative" }, { "@type": "HowToStep", "text": "Will you be using them for a website? If so, they will need to be a certain size and a particular file format (more on that later). Will it be printed in a catalog or brochure? The print quality may not be as high so you might want to adjust your images slightly.", "image": "https://photolightboxes.net/wp-content/uploads/2021/12/Jewelry-Product-Photography-Tips--680x350.jpg", "name": "Think about the Final Use of Your Photos", "url": "https://photolightboxes.net/jewelry-product-photography-tips/#8_Think_about_the_Final_Use_of_Your_Photos" }, { "@type": "HowToStep", "text": "This is rather a general tip that applies not just to Jewelry Photography but can be used in many other types of photography as well. You could consider editing out any background distractions and replacing them with a plain black or white backdrop, or another color that works well with your jewelry.", "image": "https://photolightboxes.net/wp-content/uploads/2021/12/Edit-the-Background-1024x512.png", "name": "Edit the Background", "url": "https://photolightboxes.net/jewelry-product-photography-tips/#9_Edit_the_Background" }, { "@type": "HowToStep", "text": "Tripods can be essential when photographing jewelry because they will help to ensure that the shot stays steady and you get a sharp image of your piece. A tripod is also useful if you are using studio lighting or some other type of more complicated lighting equipment as it will keep everything in place.", "image": "https://photolightboxes.net/wp-content/uploads/2021/12/Use-a-Tripod-2.png", "name": "Use a Tripod", "url": "https://photolightboxes.net/jewelry-product-photography-tips/#10_Use_a_Tripod" }, { "@type": "HowToStep", "text": "If you are photographing a one-of-a-kind piece of jewelry, you want to make sure it doesn’t get lost in the photo and that is easily identifiable in both thumbnails and final images. Try using a plain white backdrop so any detail against this will stand out.", "image": "https://photolightboxes.net/wp-content/uploads/2021/12/Jewelry-Product-Photography-Tips--680x350.jpg", "name": "Pay Attention to the Model", "url": "https://photolightboxes.net/jewelry-product-photography-tips/#11_Pay_Attention_to_the_Model" }, { "@type": "HowToStep", "text": "If you want to get really close-up shots of your jewelry (and you probably do), then using a macro lens will allow you to capture all the fine details in amazing clarity, color, and sharpness.", "image": "https://photolightboxes.net/wp-content/uploads/2021/12/Jewelry-Product-Photography-Tips--680x350.jpg", "name": "Use a Macro Lens", "url": "https://photolightboxes.net/jewelry-product-photography-tips/#12_Use_a_Macro_Lens" }, { "@type": "HowToStep", "text": "Jewelry photography can be quite a slow process, so be prepared to spend some time getting the perfect shot. This is especially true if you’re using studio lighting as it can take a while to set everything up just right. But it will be worth it in the end when you have a collection of amazing jewelry images.", "image": "https://photolightboxes.net/wp-content/uploads/2021/12/Be-Patient.png", "name": "Be Patient", "url": "https://photolightboxes.net/jewelry-product-photography-tips/#13_Be_Patient" }, { "@type": "HowToStep", "text": "Remember that it is perfectly okay to use photo editing software like Adobe Lightroom to edit your photos so they are exactly how you want them. This may include cropping, editing light and contrast levels, adjusting colors, etc., so don’t be afraid to try different things to achieve the best result.", "image": "https://photolightboxes.net/wp-content/uploads/2021/12/Edit-the-Photo-to-Suit-Your-Needs.png", "name": "Edit the Photo to Suit Your Needs", "url": "https://photolightboxes.net/jewelry-product-photography-tips/#14_Edit_the_Photo_to_Suit_Your_Needs" } ] }
12. Use a Macro Lens
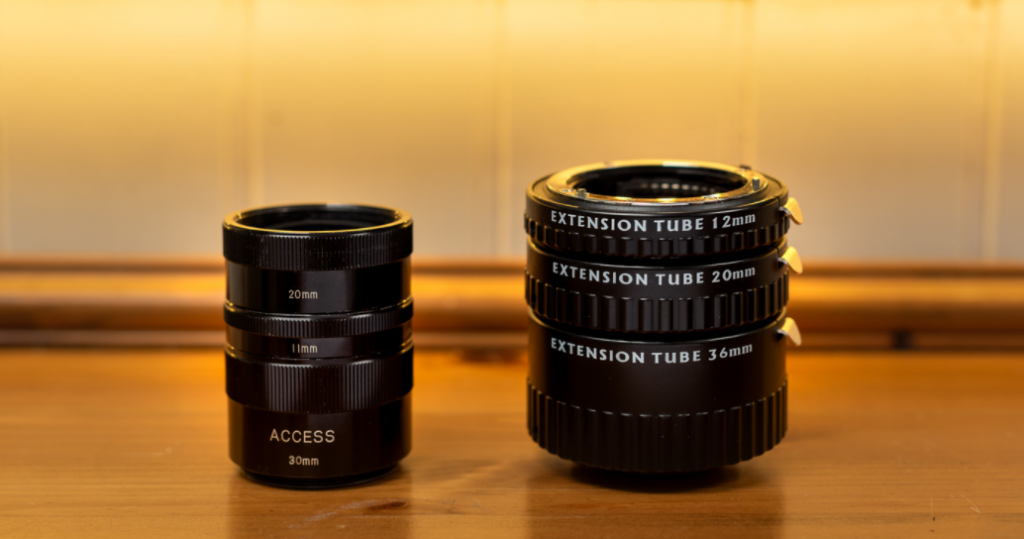
If you want to get really close-up shots of your jewelry (and you probably do), then using a macro lens will allow you to capture all the fine details in amazing clarity, color, and sharpness.
This type of lens is also useful for photographing smaller items that are difficult to shoot from a distance.
13. Be Patient

Jewelry photography can be quite a slow process, so be prepared to spend some time getting the perfect shot. This is especially true if you’re using studio lighting as it can take a while to set everything up just right. But it will be worth it in the end when you have a collection of amazing jewelry images.
14. Edit the Photo to Suit Your Needs
Remember that it is perfectly okay to use photo editing software like Adobe Lightroom to edit your photos so they are exactly how you want them. This may include cropping, editing light and contrast levels, adjusting colors, etc., so don’t be afraid to try different things to achieve the best result.
Conclusion
As you can see, there is a lot that goes into taking great jewelry photos more than most might think at first. But it doesn’t have to be too difficult or intimidating once your know-how, the next time will be a breeze! So hopefully this guide has given you a better insight into photographing jewelry and give you some ideas on how to take your own amazing shots. You can also use lightboxes for jewelry photography to get better results.
Thank you for reading! I hope that this article was helpful in giving you some tips on how to take good pictures of jewelry…🙂
Note: Interested to know about jewelry Photography Lighting Setup? Read here.
Frequently Asked Questions
Q1:How do you shoot product photography for jewellery?
A1:To shoot product photography for jewellery, use a macro lens for close-up shots, set up a controlled lighting environment to minimize reflections, and employ a plain backdrop to emphasize the jewellery. Ensure precise focusing, use a tripod for stability, and consider using additional props or angles to showcase the jewellery’s details and design. Post-processing can enhance the final images for a polished look.
Q2:What are the best camera settings for photographing jewellery?
A2:The best camera settings for photographing jewellery typically include using a narrow aperture (high f-number) to achieve a greater depth of field, ensuring the entire piece is focused. A tripod is essential for stability, and using a low ISO setting helps maintain image quality. Manual mode allows precise control over exposure settings, and custom white balance settings help accurately capture the jewellery’s colours. Additionally, shooting in RAW format provides flexibility during post-processing for fine-tuning.
Q3:What is the best colour to photograph jewellery on?
A:3The best colour to photograph jewellery is typically a neutral background, such as white, grey, or black. These colours provide a clean and unobtrusive backdrop that allows the jewellery to stand out and its colours and details to be accurately represented. The choice of background colour can also depend on the specific look and branding you want for your jewellery photography, but neutral backgrounds are commonly used for their versatility.
Q4:How do you make jewellery sparkle in photography?
A4:To make jewellery sparkle in photography, focus on soft, diffused lighting, ensure cleanliness, use selective focus with a wide aperture, utilize reflective surfaces, and enhance brilliance in post-processing.