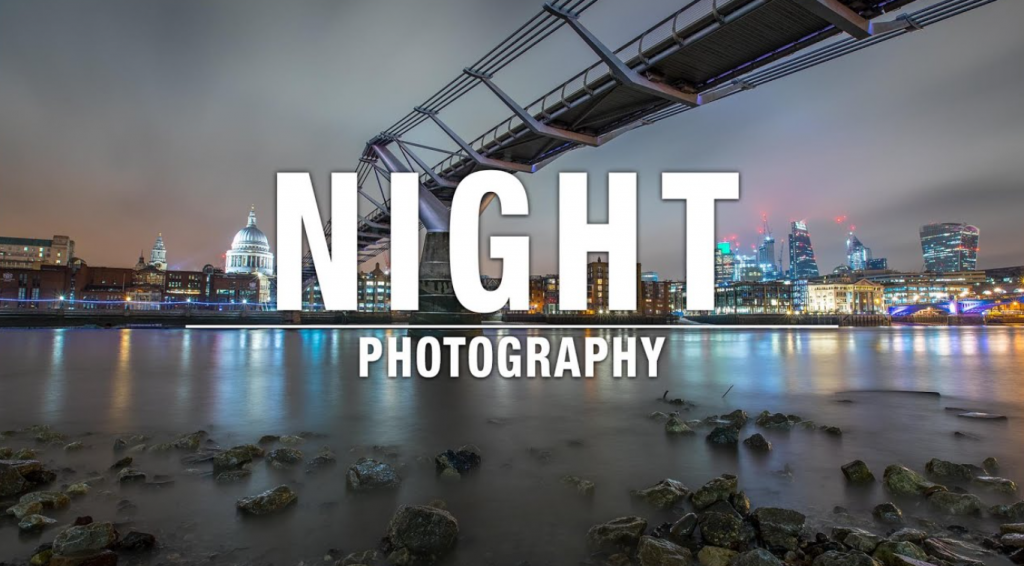
Night Photography Tips! There are many different types of photography, but one of the most popular is a night photography. Night photography allows you to take photos at night when the light is low and the scenery appears more vivid. You can also get great photos of stars and other objects in the sky.
There is something about night photography that just feels magical. Maybe it’s the sense of mystery that lies in the darkness, or the way that objects and landscapes look different when illuminated by only a fraction of the natural light that day provides. Whatever the reason, night photography can be a wonderfully creative way to capture memories and experiences. Here are five tips to help you get started with this unique type of photography:
Night Photography Tips
Here are some tips that can help you capture beautiful images at night.
1. Scout Your Location
There are a few things to take into account when scouting your location for night photography. The first is finding an area with interesting features that will make for an interesting photo. The second is making sure that the area is safe to shoot in, and that you won’t be disturbed by people or cars passing by. The last thing to consider is the availability of light. Try to find an area that has a lot of natural light, or if you’re shooting in a city, find an area with buildings that will create interesting reflections.
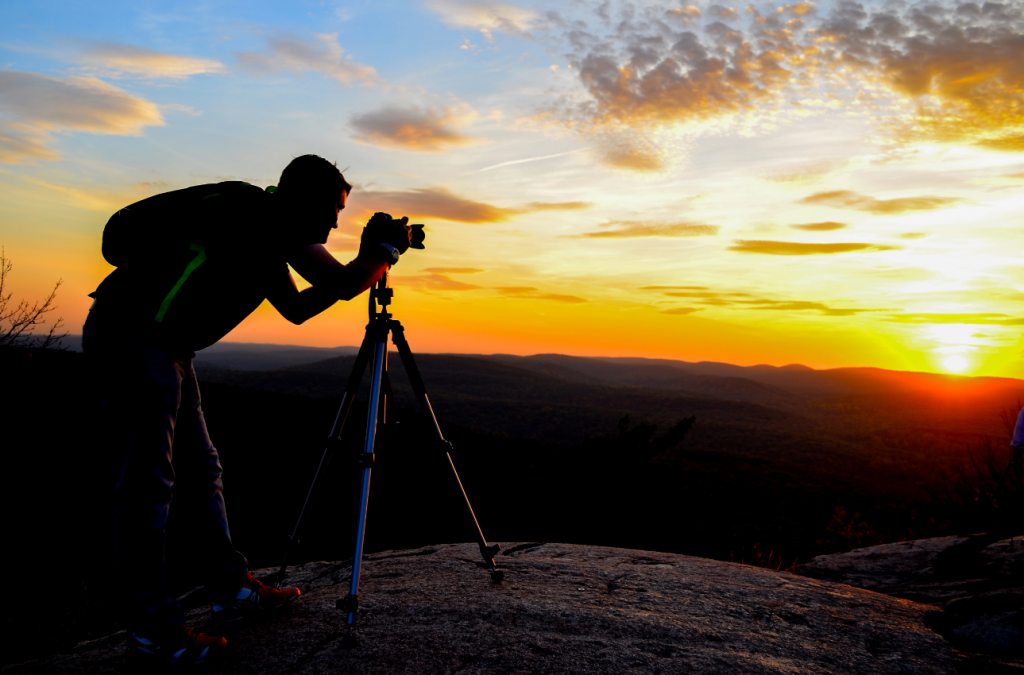
2. Use a Tripod
When photographing at night, it is important to use a tripod to ensure sharp images. This is because a camera shake is more noticeable in low-light situations and can cause your photos to be blurry. A tripod will also allow you to slow down your shutter speed, which is necessary for capturing light trails and other nighttime scenes.
3. Shoot in Raw
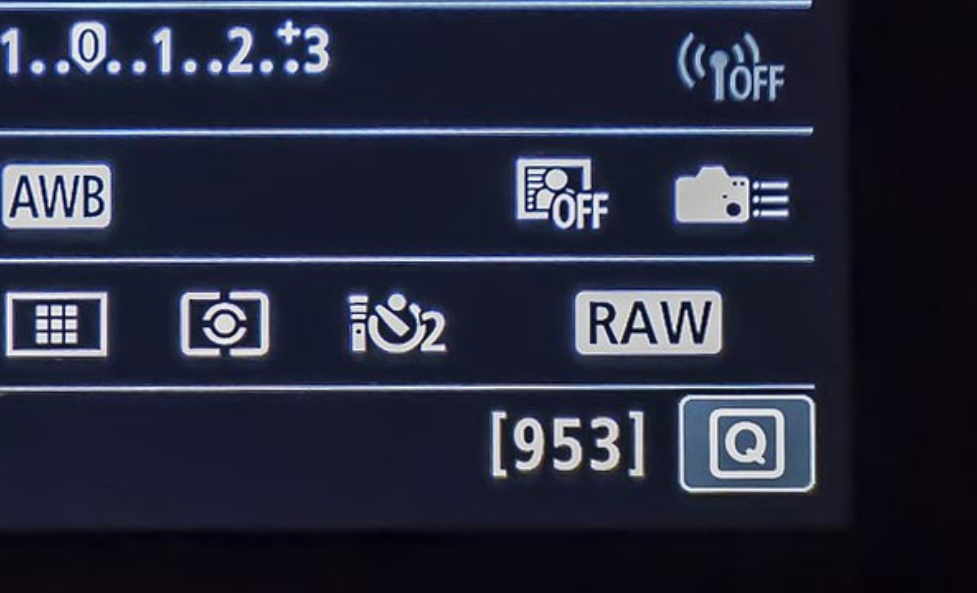
Shoot in RAW for better night photography results. Shooting in RAW gives you more flexibility when editing your photos because you have more data to work with. This is especially important when it comes to night photography, where even the slightest adjustment can make a big difference.
4. Use Manual Mode
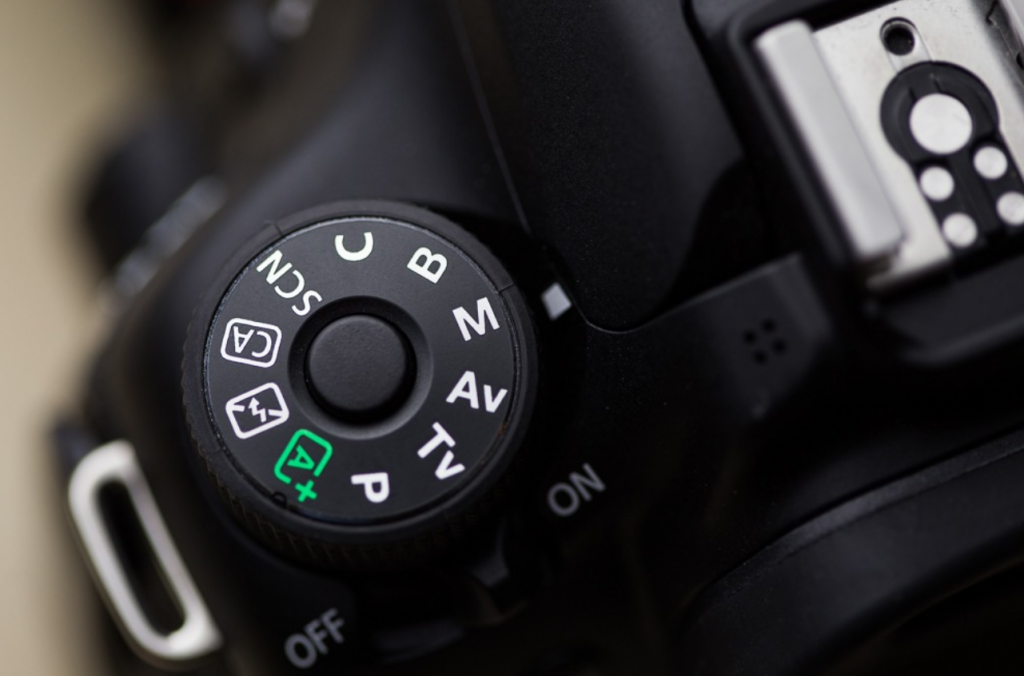
When you’re photographing at night, using manual mode is key to getting the best results. This allows you to control the shutter speed, aperture, and ISO for the perfect exposure. Shooting in automatic mode can often lead to blurry photos or images with too much noise. By using manual mode, you can ensure that each photo is correctly exposed and looks great.
4. Experiment with Bulb Mode
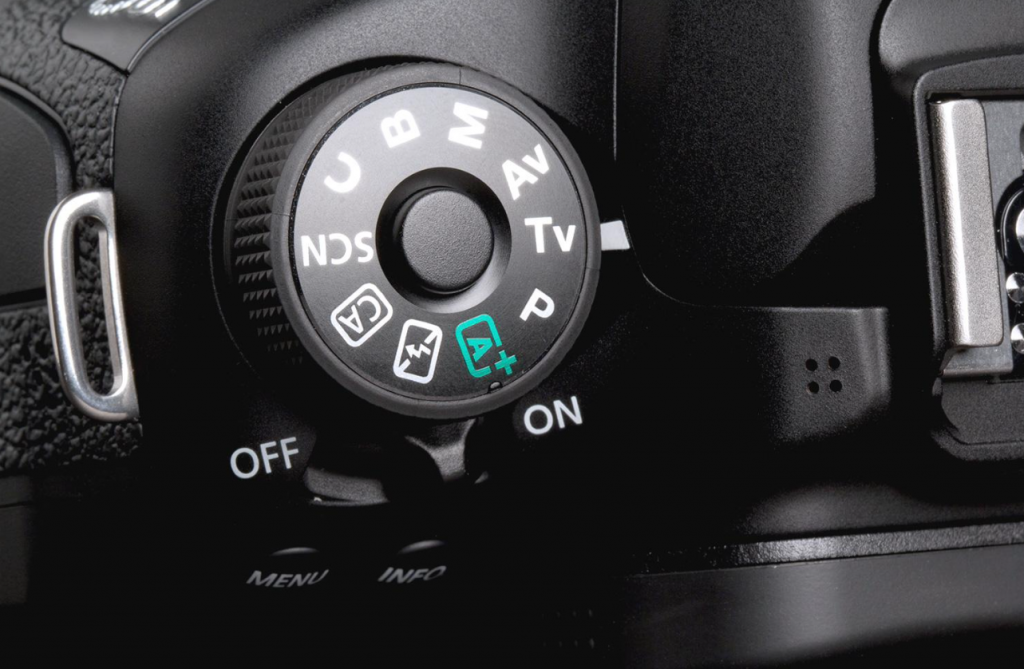
If you’re just starting out in night photography, one way to get comfortable with the process is to experiment with bulb mode. This setting allows you to manually control the length of time that the shutter is open, which can be a great way to experiment with different light sources and compositions. By playing around with different shutter speeds, you can create all sorts of unique images that wouldn’t be possible in other modes.
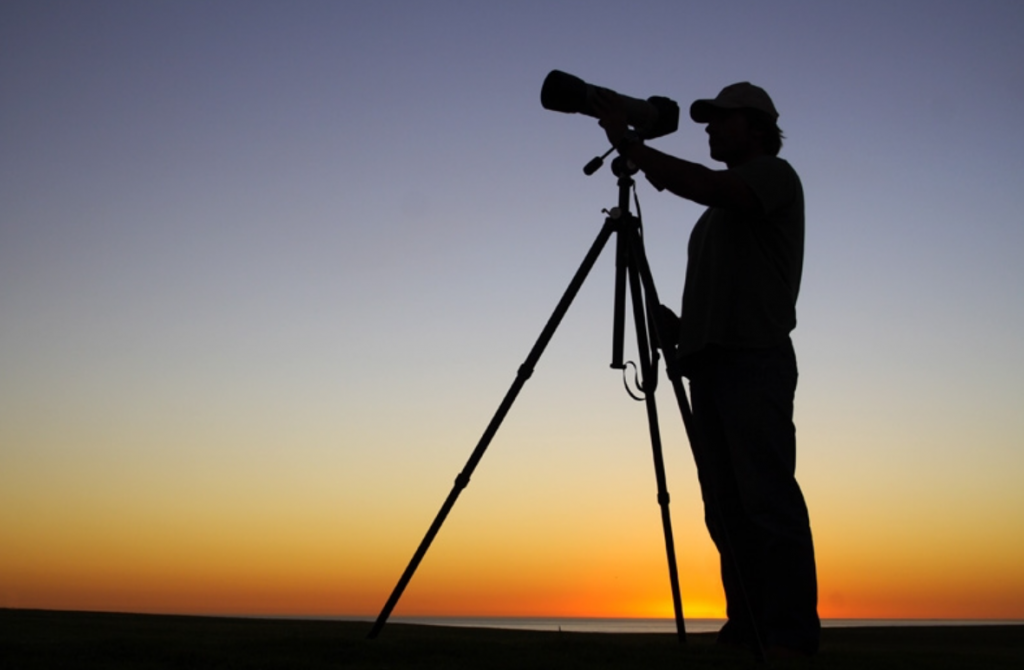
5. Use a Remote Shutter Release
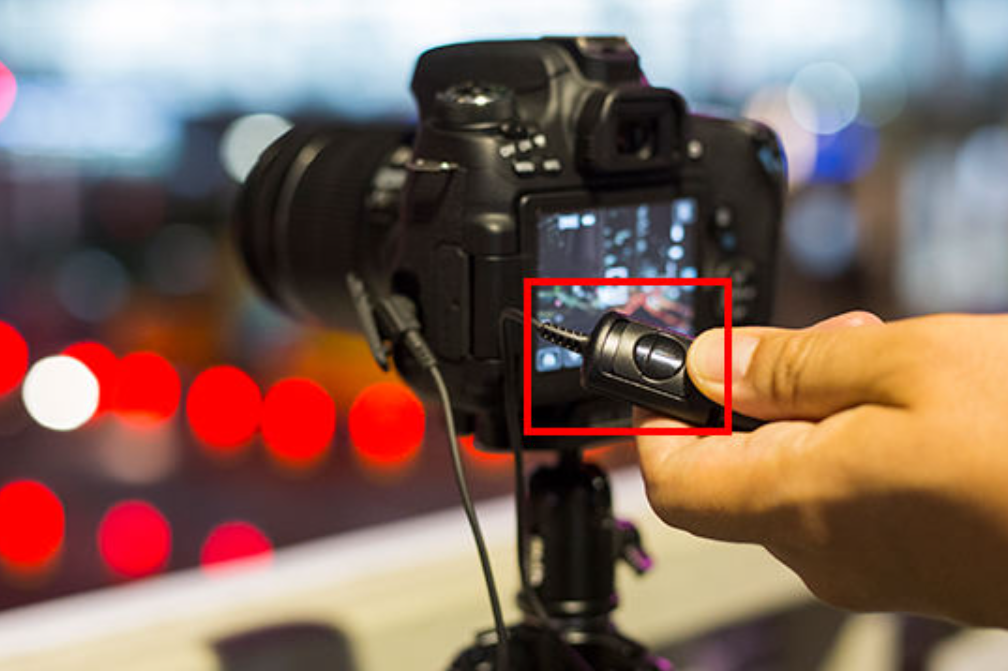
When photographing at night, it is often necessary to use a remote shutter release to avoid camera shake. This is especially true when using a long exposure time. A remote shutter release can be purchased inexpensively online or at your local camera store. The remote allows you to trigger the shutter without having to touch the camera, which minimizes any chance of vibration.
6. Post-Processing Your Images
Post-processing is an important part of night photography. It can help you to fix mistakes, improve your photos, and make them look more like the scene you saw in person. There are many different post-processing programs available, but Adobe Lightroom is one of the most popular.
In Photoshop, there are a few things that you can do to improve your night photos. First, you can adjust the levels and contrast to make the photo brighter and more colorful. You can also add a filter to give it a warmer or cooler tone. Finally, you can crop and resize the photo to make it look better. { "@context": "https://schema.org/", "@type": "HowTo", "name": "Night Photography Tips", "description": "Night Photography Tips! There are many different types of photography, but one of the most popular is a night photography. Night photography allows you to take photos at night when the light is low and the scenery appears more vivid. You can also get great photos of stars and other objects in the sky.", "image": "https://photolightboxes.net/wp-content/uploads/2022/07/Night-Photography-Tips-1-1024x566.png", "totalTime": "PT10M", "estimatedCost": { "@type": "MonetaryAmount", "currency": "USD", "value": "10$" }, "supply": [ { "@type": "HowToSupply", "name": "tripod" } ], "tool": [ { "@type": "HowToTool", "name": "remote" } ], "step": [ { "@type": "HowToStep", "text": "There are a few things to take into account when scouting your location for night photography. The first is finding an area with interesting features that will make for an interesting photo. The second is making sure that the area is safe to shoot in, and that you won’t be disturbed by people or cars passing by. The last thing to consider is the availability of light. Try to find an area that has a lot of natural light, or if you’re shooting in a city, find an area with buildings that will create interesting reflections.", "image": "https://photolightboxes.net/wp-content/uploads/2022/07/Scout-Your-Location-1024x675.png", "name": "Scout Your Location", "url": "https://photolightboxes.net/night-photography-tips/#1_Scout_Your_Location" }, { "@type": "HowToStep", "text": "When photographing at night, it is important to use a tripod to ensure sharp images. This is because a camera shake is more noticeable in low-light situations and can cause your photos to be blurry. A tripod will also allow you to slow down your shutter speed, which is necessary for capturing light trails and other nighttime scenes.", "image": "https://photolightboxes.net/wp-content/uploads/2022/07/Use-a-Tripod-1-1024x670.png", "name": "Use a Tripod", "url": "https://photolightboxes.net/night-photography-tips/#2_Use_a_Tripod" }, { "@type": "HowToStep", "text": "Shoot in RAW for better night photography results. Shooting in RAW gives you more flexibility when editing your photos because you have more data to work with. This is especially important when it comes to night photography, where even the slightest adjustment can make a big difference.", "image": "https://photolightboxes.net/wp-content/uploads/2022/07/Shoot-in-Raw-.png", "name": "Shoot in Raw", "url": "https://photolightboxes.net/night-photography-tips/#3_Shoot_in_Raw" }, { "@type": "HowToStep", "text": "When you’re photographing at night, using manual mode is key to getting the best results. This allows you to control the shutter speed, aperture, and ISO for the perfect exposure. Shooting in automatic mode can often lead to blurry photos or images with too much noise. By using manual mode, you can ensure that each photo is correctly exposed and looks great.", "image": "https://photolightboxes.net/wp-content/uploads/2022/07/Use-Manual-Mode--1024x676.png", "name": "Use Manual Mode", "url": "https://photolightboxes.net/night-photography-tips/#4_Use_Manual_Mode" }, { "@type": "HowToStep", "text": "If you’re just starting out in night photography, one way to get comfortable with the process is to experiment with bulb mode. This setting allows you to manually control the length of time that the shutter is open, which can be a great way to experiment with different light sources and compositions. By playing around with different shutter speeds, you can create all sorts of unique images that wouldn’t be possible in other modes.", "image": "https://photolightboxes.net/wp-content/uploads/2022/07/Experiment-with-Bulb-Mode-1024x669.png", "name": "Experiment with Bulb Mode", "url": "https://photolightboxes.net/night-photography-tips/#4_Experiment_with_Bulb_Mode" }, { "@type": "HowToStep", "text": "When photographing at night, it is often necessary to use a remote shutter release to avoid camera shake. This is especially true when using a long exposure time. A remote shutter release can be purchased inexpensively online or at your local camera store. The remote allows you to trigger the shutter without having to touch the camera, which minimizes any chance of vibration.", "image": "https://photolightboxes.net/wp-content/uploads/2022/07/Use-a-Remote-Shutter-Release.png", "name": "Use a Remote Shutter Release", "url": "https://photolightboxes.net/night-photography-tips/#5_Use_a_Remote_Shutter_Release" }, { "@type": "HowToStep", "text": "Post-processing is an important part of night photography. It can help you to fix mistakes, improve your photos, and make them look more like the scene you saw in person. There are many different post-processing programs available, but Adobe Lightroom is one of the most popular.\n\nIn Photoshop, there are a few things that you can do to improve your night photos. First, you can adjust the levels and contrast to make the photo brighter and more colorful. You can also add a filter to give it a warmer or cooler tone. Finally, you can crop and resize the photo to make it look better.", "image": "https://photolightboxes.net/wp-content/uploads/2022/07/Night-Photography-Tips-1-1024x566.png", "name": "Post-Processing Your Images", "url": "https://photolightboxes.net/night-photography-tips/#6_Post-Processing_Your_Images" } ] }
Conclusion
In conclusion, night photography can be a lot of fun and can produce some beautiful results. To get the best results, make sure to follow the tips in this article and experiment with different techniques. Have fun and happy shooting!