Lighting Tips for Product Photography! The Lighting Tips for Product Photography is an article that will show you the tips and tricks of photography so your products are looking their best. Lighting can be tricky, but with these tips, you’ll have a better understanding of how to get the perfect shot of your product!
I want to write a post about Lighting Tips for Product Photography. Even though lighting is very important for product photography. It goes without saying that not many photographers give enough attention to light, and what kind of light they’re using. I’m going to show some examples and talk about how I lit my subject and maybe we’ll learn something new together. As always – there’s more than one way of doing things and what works for me might not work for you.
The first thing I do is decide on the mood or feeling I want to convey with my photograph. Once I have that in my head, it’s a lot easier to choose the right light and settings. For example, if I want to create a bright and airy mood, I’m going to use a lot of white reflectors and light from above. But if I want a more dramatic mood, I’m going to use mostly shadow lights from below.
I always try to diffuse the light as much as possible, either with softboxes or umbrellas. That way there won’t be any harsh shadows on my subject.
Lighting Tips for Product Photography
Here are some of the props and light modifiers I use:
-
Natural Light
This is probably the most basic way to light a product, and it’s also the most difficult to control. You have to find a spot where the sun is shining directly on your subject, and it can be tricky to get the exposure right. But if you can manage to do it, it’s a great way to get natural-looking light.
-
Studio Lights
These are the standard lights you see in most studios. You can control the intensity, angle, and direction of the light, which makes it a very versatile tool.
-
Reflectors
These are great for adding more light to your subject, and they come in all shapes and sizes. I usually use white reflectors, but you can also use silver or gold reflectors for different effects.
-
Softboxes
These are my favorite type of light modifiers. They diffuse the light evenly, which creates a very flattering effect.
-
Umbrellas
They are less effective than softboxes, but they are much cheaper and easier to transport.
-
Camera Settings
I’m using a Canon 24-70mm f/2.8 L lens. I usually shoot at ISO 100 or 200 for the best quality, but in this case, I used ISO 400 because there were a lot of dark shadows and I wanted to make sure my image would be bright enough.
The camera settings for product photography were 1/200 sec at f/4 and ISO 400. The white balance was set to direct sunlight and the exposure compensation was turned down by -0.7 in order to get more detail in the shadows areas.
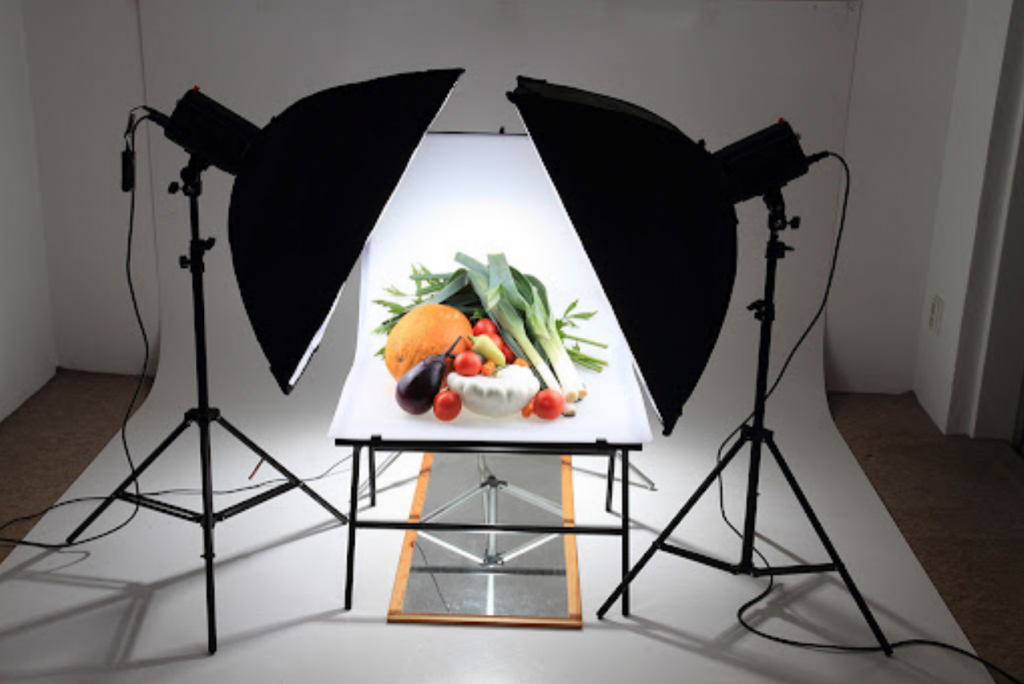
My main light was a softbox to the right of my subject, and I used another white reflector on the top left corner. The second light was an umbrella with silver lining which created hard shadows underneath my box. At first, I tried indirect lighting but it didn’t work well for this image because there was too much dark shadow between the subject and the background.
Lighting Setups
Here are some other examples of lighting setups that I’ve used in the past:
-
Top-Lighting:
This is a very popular way to light a product because it creates a very bright and airy look. You can use studio lights or natural light for this setup.
-
Side-Lighting:
This is the most common way to light a product and it’s very effective. It allows you to see all sides of your subject and it doesn’t create strong shadows.
-
Back-Lighting:
I use this when I want my subject to stand out or pop from the background. When you use the backlight, make sure to increase the exposure compensation by at least +1 or 2 stops.
-
Rim Lighting:
This is a very dramatic way to light a product and it’s perfect for portraits. You need to use studio lights for this setup.
Conclusion
As you can see, there are many different ways to light a product. It all depends on the mood or feeling you want to create. experimentation is the key to finding the right setup for your photograph. So don’t be afraid to try new things and see what works best for you. Product photography can be a lot of fun, but it can also be quite challenging. The main challenge is finding the right angle and lighting to make your product stand out without overshadowing it.
You can also use a photo lightbox for product photography, which gives us a bright electric setup. If you want to buy a photo lightbox and learn more about product photography, Take a look at our site photo lightboxes.
Thank you for reading this post…🙂


