Ring Photography Tips! Ring photography is a popular way to capture the beauty of your engagement ring. Ring images are often used for social media posts, in advertisements, and on wedding blogs because they provide an intimate glimpse into this special time in your life.
The Ring may seem like a simple subject but it is quite complex. Ring photography can be tricky and take some time to master, but once you do, your pictures will start looking amazing! In this article, we’ll discuss the main things that you need to remember when photographing rings so that they look as good as possible.
Ring Photography Tips
Here are some tips that will help you take better photos.
1. Get a good Lens
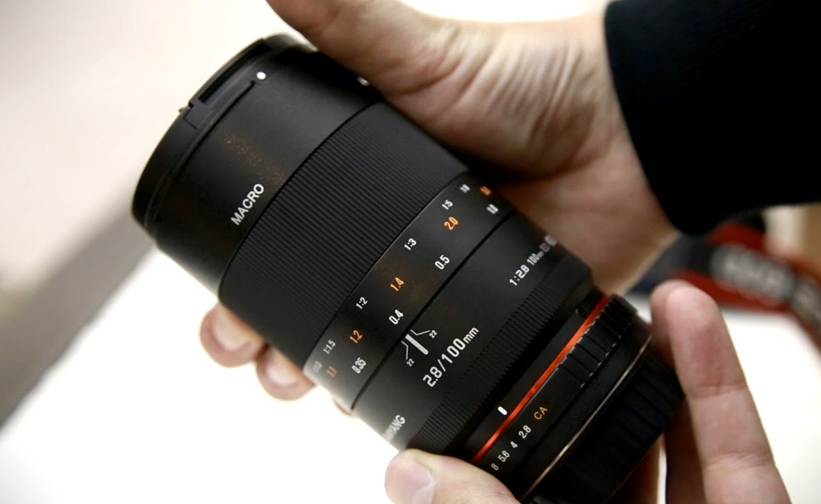
A good lens is the key to success. I recommend using a lens with an aperture of at least f/2.8 because it lets you create images with depth-of-field effects and makes your images look less busy because you can blur the surroundings.
2. Use a Tripod for Ring Photography
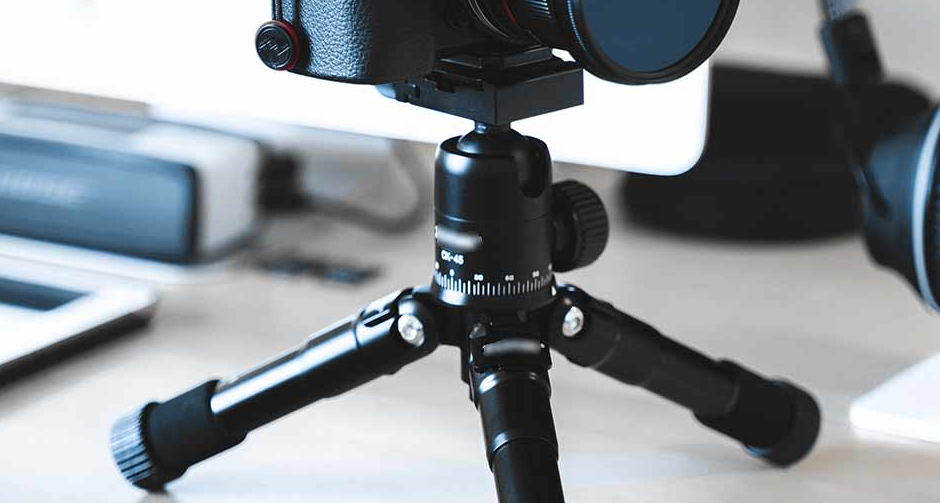
The lenses are heavy and you don’t want to hold them in your hands the whole time, so please use a tripod! This is an absolute must! Product photography needs long exposure times (about 1 second or more) which means that the slightest movement will result in blurry photos. I recommend using mirror lock-up to reduce shaking even more!
3. Add some water drops
Water drops are perfect for Ring Photography because they create circles and emphasize the fragility of your object. You can use a pipette or you can just let the drop fall off the edge of a stone or something like that. When I create my images, I do lots of different tests with water drops and stones to find out what fits best for the photo series I am working on.
4. Use some kind of prop
One of the most important things in ring photography is to use some kind of prop. Props can add depth, emotion, and perspective that might go unnoticed otherwise!
5. Find your style
Don’t try to copy someone else’s style of Ring Photography (unless it suits you of course). Ring Photography is about being creative and experimenting. The biggest compliment for me is when somebody tells me that I have my style of Ring Photography.
6. Use the right Post Processing Software

You will need some kind of post-processing software to enhance your images. If you are on a budget, I recommend using Photoshop or Adobe Lightroom.
7. Play with Angles
This was the most challenging part for me because I didn’t think about it and at the beginning, I was trying to create images looking straight on and not from an angle. But please try not to do that. It will make your image less interesting because you will get rid of the depth-of-field effect that is created by tilting the lens.
8. Think about Backgrounds
Backgrounds for jewellery are something amazing when it comes to Ring Photography. There are so many things that can be used as a background and you can create some pretty unique images. Some examples:
- Natural backgrounds, like stones, twigs, and leaves
- Old books with pages of different colours
- Paper with a drawing on it or other kinds of paper that have a design printed on it. Also, wrapping papers can be nice for your images!
- Fabric – I love to use fabric as a background because it creates a nice texture and often patterns. I love to use silk fabric of different colours.
9. Use a real Ring and not a key chain!
This is very important, especially if you want to create close-up images of rings. Please use big rings because small ones will look like cheap toys that are only fit for that kind of photo or macro shot. It always looks much better with real rings and not key chains. { "@context": "https://schema.org/", "@type": "HowTo", "name": "Black and White Photography Tips", "description": "Black and White Photography Tips! Black and white photography is a great way to create an old-fashioned or vintage feel. Black and white photos are also popular for portraits because the lack of color helps emphasize the person’s features. Black and white photographs can be very powerful, but they do require some skill in order to produce good results.", "image": "https://photolightboxes.net/wp-content/uploads/2022/01/Black-and-White-Photography-Tip.png", "totalTime": "PT10M", "estimatedCost": { "@type": "MonetaryAmount", "currency": "USD", "value": "10$" }, "supply": [ { "@type": "HowToSupply", "name": "camera" } ], "tool": [ { "@type": "HowToTool", "name": "ND Filter" } ], "step": [ { "@type": "HowToStep", "text": "A good lens is a key to success. I recommend using a lens with an aperture of at least f/2.8 because it lets you create images with depth-of-field effects and makes your images look less busy because you can blur the surroundings.", "image": "https://photolightboxes.net/wp-content/uploads/2022/01/Get-a-good-Lens.png", "name": "Get a good Lens", "url": "https://photolightboxes.net/ring-photography-tips/#1_Get_a_good_Lens" }, { "@type": "HowToStep", "text": "The lenses are heavy and you don’t want to hold them in your hands the whole time, so please use a tripod! This is an absolute must! Product photography needs long exposure times (about 1 second or more) which means that the slightest movement will result in blurry photos. I recommend using mirror lock-up to reduce shaking even more!", "image": "https://photolightboxes.net/wp-content/uploads/2022/01/Use-a-tripod-1.png", "name": "Use a Tripod for Ring Photography", "url": "https://photolightboxes.net/ring-photography-tips/#2_Use_a_Tripod_for_Ring_Photography" }, { "@type": "HowToStep", "text": "Water drops are perfect for Ring Photography because they create circles and emphasize the fragility of your object. You can use a pipette or you can just let the drop fall off the edge of a stone or something like that. When I create my images, I do lots of different tests with water drops and stones to find out what fits best for the photo series I am working on.", "image": "https://photolightboxes.net/wp-content/uploads/2022/01/Black-and-White-Photography-Tip.png", "name": "Add some water drops", "url": "https://photolightboxes.net/ring-photography-tips/#3_Add_some_water_drops" }, { "@type": "HowToStep", "text": "One of the most important things in rings photography is to use some kind of prop. Props can add depth, emotion, and perspective that might go unnoticed otherwise!", "image": "https://photolightboxes.net/wp-content/uploads/2022/01/Black-and-White-Photography-Tip.png", "name": "Use some kind of prop", "url": "https://photolightboxes.net/ring-photography-tips/#4_Use_some_kind_of_prop" }, { "@type": "HowToStep", "text": "Don’t try to copy someone else’s style of Ring Photography (unless it suits you of course). Ring Photography is about being creative and experimenting. The biggest compliment for me is when somebody tells me that I have my own style of Ring Photography.", "image": "https://photolightboxes.net/wp-content/uploads/2022/01/Black-and-White-Photography-Tip.png", "name": "Find your own style", "url": "https://photolightboxes.net/ring-photography-tips/#5_Find_your_own_style" }, { "@type": "HowToStep", "text": "You will need some kind of post-processing software to enhance your images. If you are on a budget, I recommend using Photoshop or Adobe Lightroom.", "image": "https://photolightboxes.net/wp-content/uploads/2022/01/Use-the-right-Post-Processing-Software.png", "name": "Use the right Post Processing Software", "url": "https://photolightboxes.net/ring-photography-tips/#6_Use_the_right_Post_Processing_Software" }, { "@type": "HowToStep", "text": "This was the most challenging part for me because I didn’t think about it and at the beginning, I was trying to create images looking straight on and not from an angle. But please try not to do that. It will make your image less interesting because you will get rid of the depth-of-field effect that is created by tilting the lens.", "image": "https://photolightboxes.net/wp-content/uploads/2022/01/Black-and-White-Photography-Tip.png", "name": "Play with Angles", "url": "https://photolightboxes.net/ring-photography-tips/#7_Play_with_Angles" }, { "@type": "HowToStep", "text": "Backgrounds for jewelry are something amazing when it comes to Ring Photography. There are so many things that can be used as a background and you can create some pretty unique images. Some examples:", "image": "https://photolightboxes.net/wp-content/uploads/2022/01/Black-and-White-Photography-Tip.png", "name": "Think about Backgrounds", "url": "https://photolightboxes.net/ring-photography-tips/#8_Think_about_Backgrounds" }, { "@type": "HowToStep", "text": "This is very important, especially if you want to create close-up images of rings. Please use big rings because small ones will look like cheap toys that are only fit for that kind of photo or macro shot. It always looks much better with real rings and not key chains.", "image": "https://photolightboxes.net/wp-content/uploads/2022/01/Black-and-White-Photography-Tip.png", "name": "Use a real Ring and not a key chain!", "url": "https://photolightboxes.net/ring-photography-tips/#9_Use_a_real_Ring_and_not_a_key_chain" }, { "@type": "HowToStep", "text": "This is the most important thing in Ring Photography. If you are not creative, then it won’t matter how much equipment you have or if your post-processing software is great – you will still create images that are boring. So be creative, try new things, and think outside of the box! There are no rules in Ring Photography – you can do whatever you want to create amazing images!", "image": "https://photolightboxes.net/wp-content/uploads/2022/01/Black-and-White-Photography-Tip.png", "name": "Be creative!", "url": "https://photolightboxes.net/ring-photography-tips/#10_Be_creative" } ] }
We all know that life is about the little things, like a ring or a smile. However, I think we all agree that life is much more than just those two things – no matter how important they might be to us individually. And this makes it possible to take great images of those two things as well.
10. Be creative!
This is the most important thing in Ring Photography. If you are not creative, then it won’t matter how much equipment you have or if your post-processing software is great – you will still create boring images. So be creative, try new things, and think outside of the box! There are no rules in Ring Photography – you can do whatever you want to create amazing images!
Conclusion
I hope you liked my article. I wrote this article because at the beginning of my Ring Photography journey, I had a lot of questions and nobody could help me or give me a clear answer to all of them. So please don’t forget that the best way to learn is by trying by yourself! Don’t be afraid to make several attempts before creating a good image. You can also use photo lightboxes to photograph your jewellery to get better results.
Note: Interested to know How to Photograph Rings?
Frequently Asked Questions
Q1. How do you take good pictures of rings?
A1. To take good pictures of rings, use soft and diffused lighting, select a clean background, use a tripod for stability, focus on capturing details, experiment with angles, and consider using props or hands for creative displays. Post-processing can also enhance the final image.
Q2. What camera settings for jewellery photography?
A2. For jewellery photography, use these camera settings as a starting point:
Aperture (f-stop): Use a narrow aperture (high f-number, e.g., f/11 or higher) to maximize depth of field and ensure the entire piece is in focus.
ISO: Keep ISO as low as possible (e.g., ISO 100 or 200) to minimize noise and maintain image quality.
Shutter Speed: Use a tripod and longer shutter speed to compensate for the narrow aperture and low ISO. This minimizes camera shake and blurriness.
White Balance: Set the white balance to match the lighting conditions, such as daylight or tungsten, to achieve accurate colours.
Focus: Use manual focus to ensure precise control over what part of the jewellery is sharp. Zoom in on the LCD screen to confirm focus accuracy.
RAW Format: Shoot in RAW format to retain maximum image data for post-processing adjustments.
Lighting: Use soft and diffused lighting to minimize reflections and shadows. Consider using a lightbox or reflectors to achieve even illumination.
These settings provide a good starting point for jewellery photography but don’t hesitate to adjust them based on your specific lighting conditions and creative preferences.
Q3.How do you make a ring stand for a picture?
A3. To make a ring stand for a picture, you can use a variety of materials like a small piece of clay, putty, or a clear adhesive tack. Simply shape the material into a small mound or base, press the ring into it, and position it upright for photography. This helps display the ring and keeps it steady for a clear shot of the jewellery.
Q4. How do you make a ring sparkle in pictures?
A4. To make a ring sparkle in pictures:
- Use soft, diffused lighting to minimize harsh reflections.
- Clean the ring thoroughly to remove smudges and fingerprints.
- Position the ring at an angle to catch and reflect light.
- Use a narrow aperture (high f-number) for a deeper depth of field.
- Consider adding a small, directed light source to create highlights.
- Edit the image in post-processing to enhance contrast and brightness.
- These techniques can help capture the sparkle and brilliance of a ring in your photographs.
Q5. What is the best light for jewellery photography?
A5. The best light for jewellery photography is soft and diffused natural light or artificial light that mimics natural daylight. This type of lighting minimizes harsh shadows and reflections, allowing the jewellery’s details and sparkle to be captured effectively. You can achieve this with a lightbox, diffusers, or shooting near a large window with indirect sunlight.


