Have you ever spent hours trying to capture the true essence of a ring, only to end up with lacklustre photos that fail to do justice to its beauty? If so, it’s time for a photography intervention! Whether you’re an aspiring jewellery photographer or want to improve your skills for personal reasons, this article is here to rescue you from mediocre ring photography. We’ll teach you how lighting can make or break a shot, how angles can enhance the allure of any ring, and how props can add a touch of creativity and storytelling. So grab your camera and prepare for an enlightening journey into photographing rings like never before!
How to Photograph Rings
Ring shots are among the trickiest to execute correctly, as we all know. The secret is to have just the right amount of patience—never too much! What you need for this timeless piece is as follows:
Macro Lens
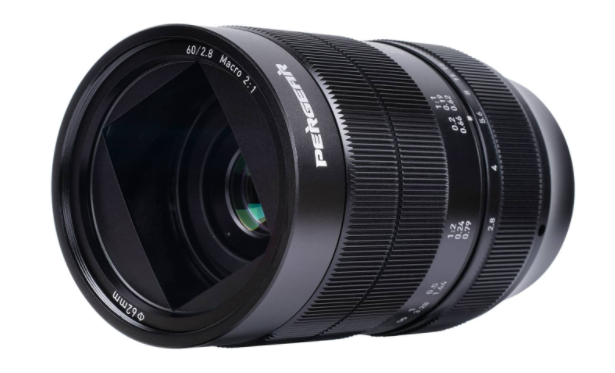
You may dramatically improve your ring photographs by using macro lenses. In this vast world of digital film scanners, smartphone cameras, point-and-shoots, you name it; they help you get up close and personal with the little details that would otherwise be lost!
LightBox or Shooting Tent
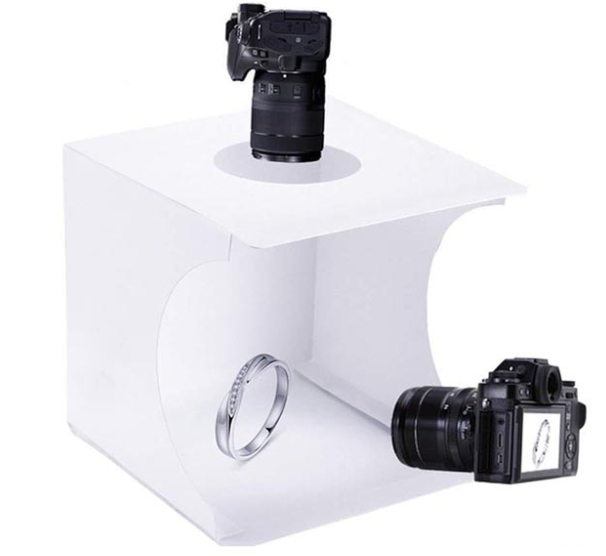
You can choose between two styles of photography tents for your ring photos. If you have a large room with windows, a jewelry lightbox is ideal, but it takes up more area than other solutions and can be pricey to buy or rent in some circumstances (depending on region). Additionally, shooting tents are portable and come in various sizes and forms.
White Tile
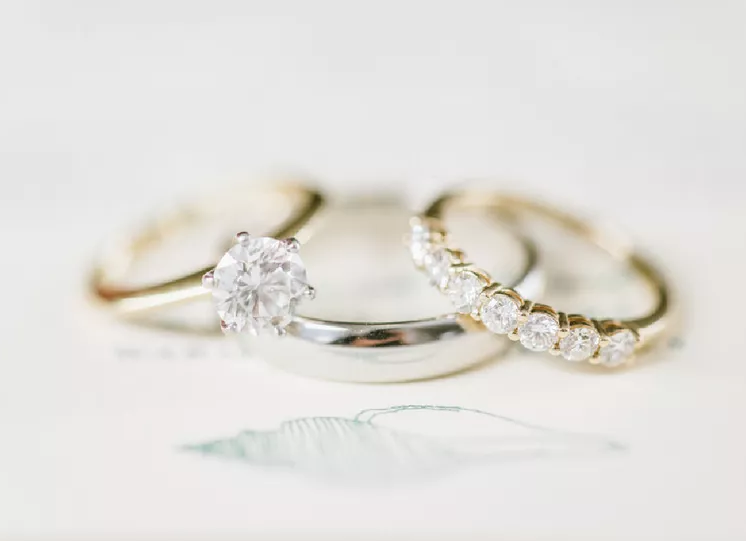
Because it provides a fantastic contrast to the rings, white Tile is a standard background for photographs of engagement rings.
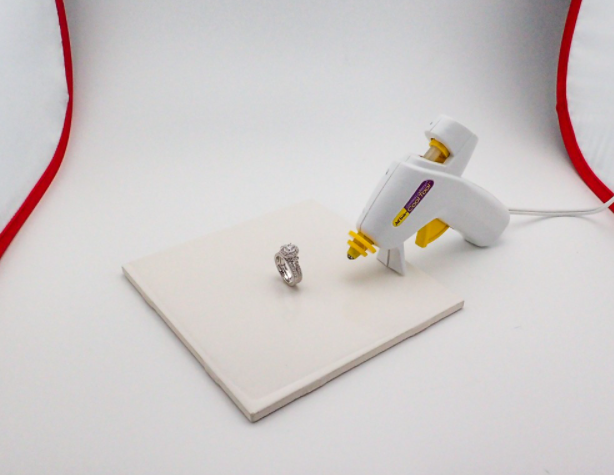
Hot Glue Gun
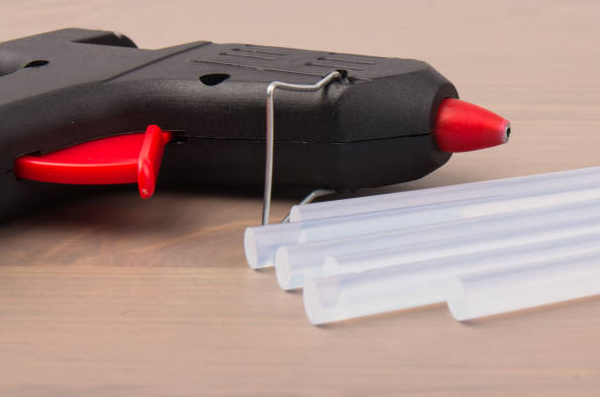
While you’re shooting, the hot glue gun will hold your rings in place, preventing them from falling off or becoming tangled.
Small Mirror
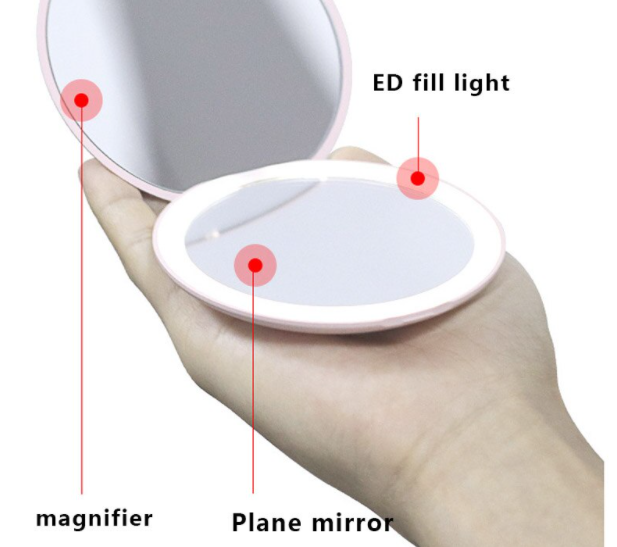
Your jewelry will look particularly sparkling when viewed in a small mirror.
White Reflectors
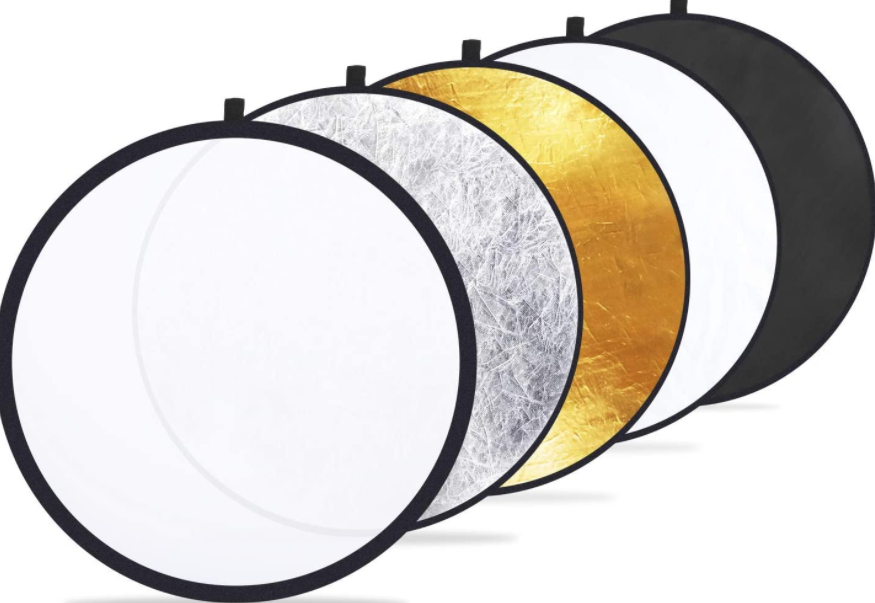
White reflectors are frequently employed for ring photography since they produce an even light source that doesn’t draw attention to any particular feature of the Ring.
LED Lights
If you like taking pictures of their wedding or engagement ring, LED lights can be the ideal choice for you!
Time to Shoot Your Rings
1. Position the Ring on the Tile

The white Tile will aid in creating a spotless backdrop for jewelry photography and improve the light reflecting off the stones on your Ring. Use jeweler’s putty or hot glue to keep it in place on ceramic tiles so potential purchasers can see its beautiful features.
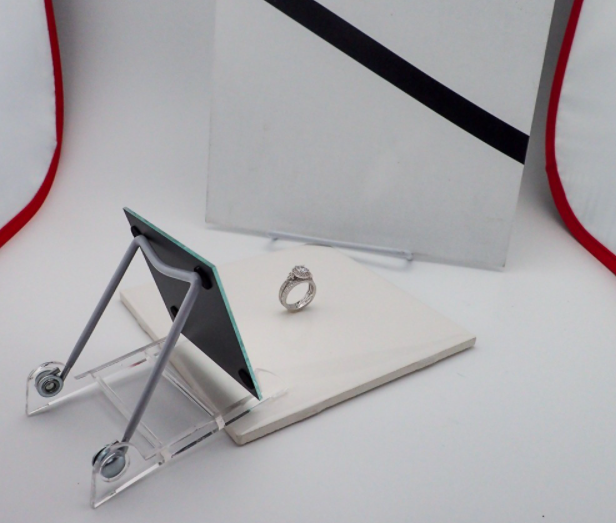
2. Position the Mirror
Set the Ring in place on the Tile. Position the mirror to see your reflection after setting it upright on top of a white tile.
3. Use a LED Light for Sparkle
These contemporary lighting options produce stunning photographs without requiring an expensive setup and are perfect for highlighting jewelry on people!
4. Use a Gray Card!
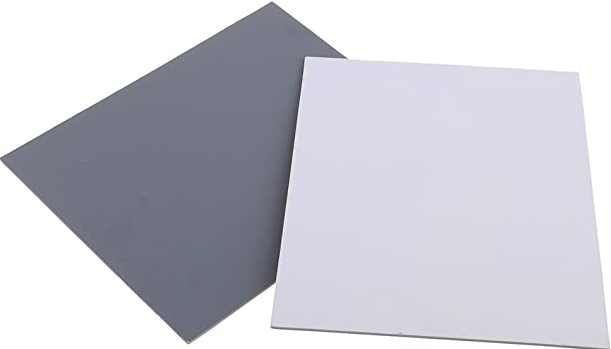
Using a grey card is the ideal method for capturing lovely rings. It produces the perfect shade of shadows and greys that highlight the beauty of each environment.
Conclusion
In conclusion, photographing rings can be a challenging yet rewarding experience. By following the tips and techniques outlined in this article, you can capture stunning images that showcase the beauty and intricacy of these precious jewellery pieces. Remember to focus on the lighting composition and highlight the ring’s details and sparkle. Experiment with different angles and backgrounds to add variety and interest to your photographs. With practice and patience, you can master capturing captivating images of rings that truly make them shine. So grab your camera, find a beautiful ring, and start snapping away – you won’t be disappointed with the results!
Thank you for reading this post…🙂
Note: Interested to know about Ring Photography Tips?


