How to Use a Ring Light for Product Photography! A ring light is a type of photographic lighting that is shaped like a ring and attaches to the lens of a camera. It is used to create evenly lit photographs with a soft, diffused light. Ring lights are often used by professional photographers for portrait photography, but they can also be used for other types of photography, such as product shots or food photography.
Product photography can be a challenging and time-consuming task, but with the help of a ring light, it can be made much easier. This simple lighting tool can be used to create flattering shadows and highlights on your products, making them look more realistic and inviting for shoppers. In this article, we will give you tips on how to use a ring light for product photography.
How to Use a Ring Light for Product Photography
Ring lights are a popular tool for photographing small objects and products. Ring lights create a uniform and soft light which is perfect for small objects. They are also great for creating a clean and minimal look in your photos.
Here are some tips on how to use a ring light for product photography:
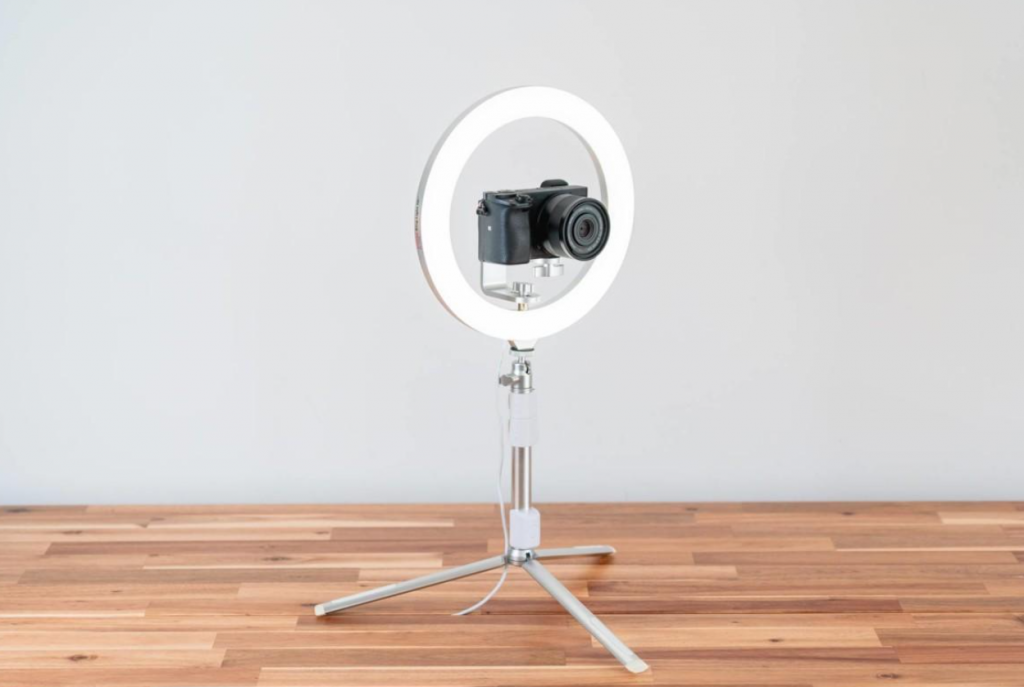
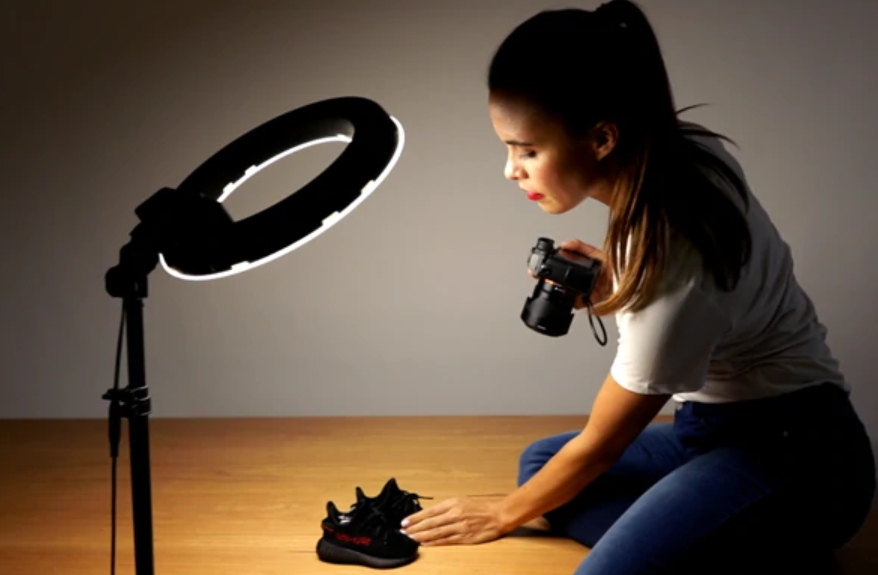
Tip 1: Place Your Object in the Center of the Ring Light
When photographing small objects, it’s important to use a ring light to create even lighting. This will help to avoid any shadows and make the photograph look more professional. By placing the object in the center of the ring light, you can ensure that it is properly illuminated. You may also want to consider using keywords when naming your file so that it is easier to find online.
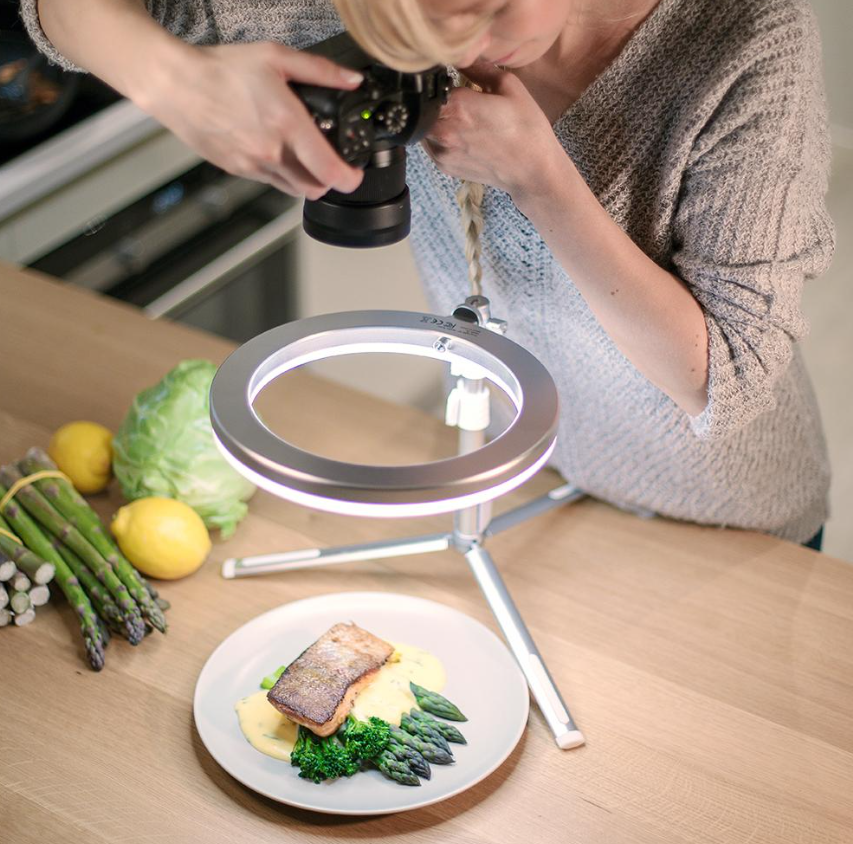
Tip 2: Use a Tripod to Ensure That Your Object Is Steady and in Focus
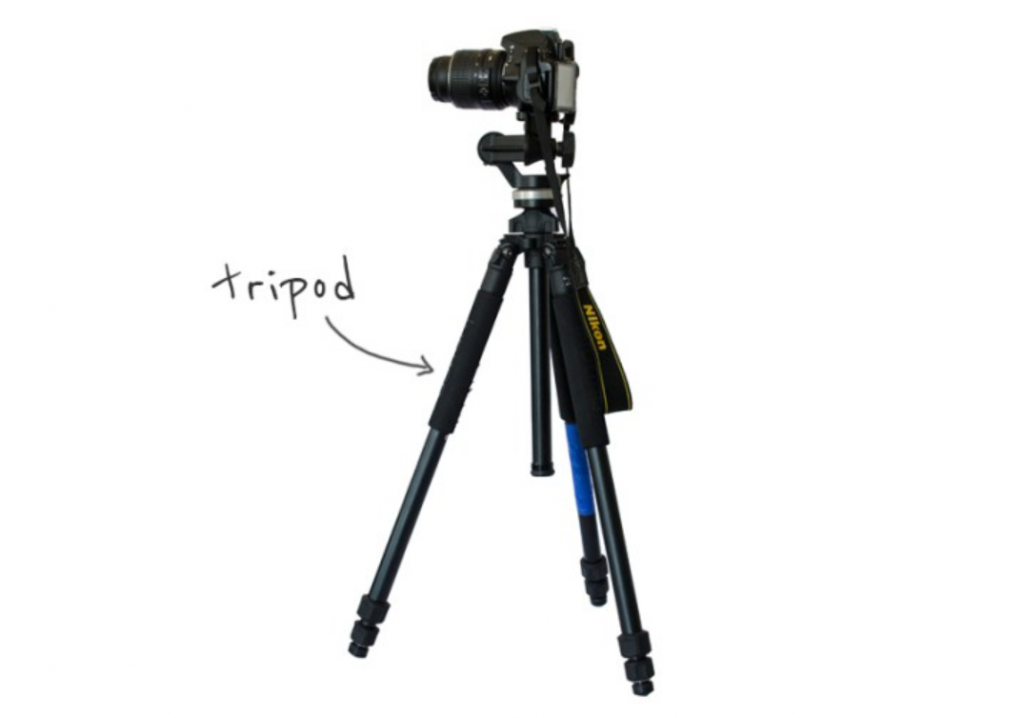
A tripod is a must for any product photography. By using a tripod, you can ensure that your object is steady and in focus. This is especially important when using a ring light, as the light can cause your object to move around if it is not stabilized. Make sure to use a tripod with a heavy base so that it will not move when you are adjusting the height or angle of your light.
Tip 3: Adjust the Brightness and Color of Your Ring Light to Achieve the Desired Effect
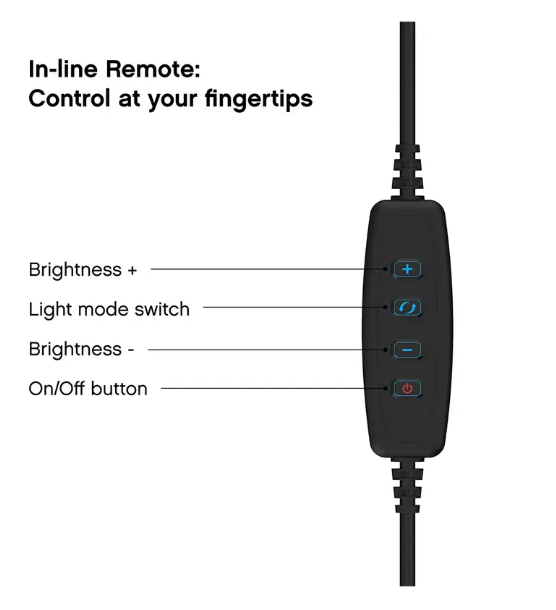
When taking product photos, the brightness and color of your ring light can be adjusted to achieve the desired effect. For example, if you want your product to appear brighter, adjust the brightness of your ring light. If you want your product to have a softer appearance, adjust the color of your ring light. Experiment with different settings to find what works best for you.
Tip 4: Experiment With Different Angles and Perspectives to Find What Works Best for Your Object
When photographing products, it’s important to find the right angle and perspective to make them look their best. You may need to experiment with different angles and perspectives to find what works best for your object. Sometimes a straight-on view will be the most effective, while other times a more angled or creative perspective can work better. The key is to experiment until you find what looks best.
You can also play around with the lighting to create different effects. A ring light can be a great way to add extra brightness and dimension to your product shots. Experiment with different positions and angles for the light until you get the effect you’re looking for. With a little experimentation, you can create photos that really show off your products in the best possible light!
Tip 5: Use Reflectors to Bounce Additional Light Onto Your Object, If Needed
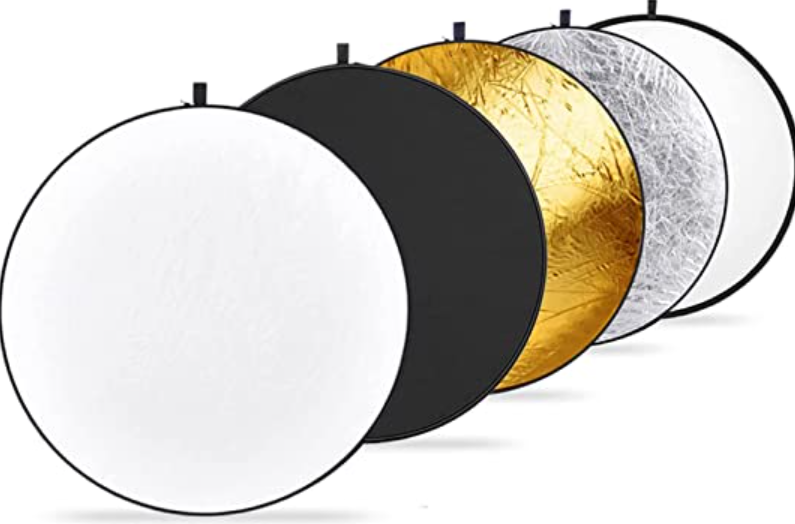
One way to help get more light onto your object is to use a reflector. A reflector will bounce additional light onto your object, which can help to brighten it up and create better images. There are a variety of reflectors available, including those that are white, silver, or gold. You can also use materials such as cardboard or foam board as a makeshift reflector. If you need more light, consider using a ring light in addition to your regular lighting setup. A ring light will help to create even lighting and prevent shadows from appearing on your object.
Conclusion
In conclusion, using a ring light for product photography is a great way to achieve bright and evenly lit photos. It is a simple setup that can be done in any location, and it doesn’t require any expensive equipment. By following these tips, you can create beautiful product shots that will help your business stand out from the competition. { "@context": "https://schema.org/", "@type": "HowTo", "name": "How to Use a Ring Light for Product Photography", "description": "How to Use a Ring Light for Product Photography! A ring light is a type of photographic lighting that is shaped like a ring and attaches to the lens of a camera. It is used to create evenly lit photographs with a soft, diffused light. Ring lights are often used by professional photographers for portrait photography, but they can also be used for other types of photography, such as product shots or food photography.", "image": "https://photolightboxes.net/wp-content/uploads/2022/05/How-to-Use-a-Ring-Light-for-Product-Photography-1024x687.png", "totalTime": "PT10M", "estimatedCost": { "@type": "MonetaryAmount", "currency": "USA", "value": "$10" }, "supply": [ { "@type": "HowToSupply", "name": "Tripod" } ], "tool": [ { "@type": "HowToTool", "name": "camera" } ], "step": [ { "@type": "HowToStep", "text": "When photographing small objects, it’s important to use a ring light to create even lighting. This will help to avoid any shadows and make the photograph look more professional. By placing the object in the center of the ring light, you can ensure that it is properly illuminated. You may also want to consider using keywords when naming your file so that it is easier to find online.", "image": "https://photolightboxes.net/wp-content/uploads/2022/05/Place-Your-Object-in-the-Center-of-the-Ring-Light..png", "name": "Place Your Object in the Center of the Ring Light", "url": "https://photolightboxes.net/how-to-use-a-ring-light-for-product-photography/#Tip_1_Place_Your_Object_in_the_Center_of_the_Ring_Light" }, { "@type": "HowToStep", "text": "A tripod is a must for any product photography. By using a tripod, you can ensure that your object is steady and in focus. This is especially important when using a ring light, as the light can cause your object to move around if it is not stabilized. Make sure to use a tripod with a heavy base so that it will not move when you are adjusting the height or angle of your light.", "image": "https://photolightboxes.net/wp-content/uploads/2022/05/Use-a-Tripod-to-Ensure-That-Your-Object-Is-Steady-and-in-Focus-1024x718.png", "name": "Use a Tripod to Ensure That Your Object Is Steady and in Focus", "url": "https://photolightboxes.net/how-to-use-a-ring-light-for-product-photography/#Tip_2_Use_a_Tripod_to_Ensure_That_Your_Object_Is_Steady_and_in_Focus" }, { "@type": "HowToStep", "text": "When taking product photos, the brightness and color of your ring light can be adjusted to achieve the desired effect. For example, if you want your product to appear brighter, adjust the brightness of your ring light. If you want your product to have a softer appearance, adjust the color of your ring light. Experiment with different settings to find what works best for you.", "image": "https://photolightboxes.net/wp-content/uploads/2022/05/Adjust-the-Brightness-and-Color-of-Your-Ring-Light-to-Achieve-the-Desired-Effect.png", "name": "Adjust the Brightness and Color of Your Ring Light to Achieve the Desired Effect", "url": "https://photolightboxes.net/how-to-use-a-ring-light-for-product-photography/#Tip_3_Adjust_the_Brightness_and_Color_of_Your_Ring_Light_to_Achieve_the_Desired_Effect" }, { "@type": "HowToStep", "text": "When photographing products, it’s important to find the right angle and perspective to make them look their best. You may need to experiment with different angles and perspectives to find what works best for your object. Sometimes a straight-on view will be the most effective, while other times a more angled or creative perspective can work better. The key is to experiment until you find what looks best.\n\nYou can also play around with the lighting to create different effects. A ring light can be a great way to add extra brightness and dimension to your product shots. Experiment with different positions and angles for the light until you get the effect you’re looking for. With a little experimentation, you can create photos that really show off your products in the best possible light!", "image": "https://photolightboxes.net/wp-content/uploads/2022/05/Experiment-With-Different-Angles-and-Perspectives-to-Find-What-Works-Best-for-Your-Object.png", "name": "Experiment With Different Angles and Perspectives to Find What Works Best for Your Object", "url": "https://photolightboxes.net/how-to-use-a-ring-light-for-product-photography/#Tip_4_Experiment_With_Different_Angles_and_Perspectives_to_Find_What_Works_Best_for_Your_Object" }, { "@type": "HowToStep", "text": "One way to help get more light onto your object is to use a reflector. A reflector will bounce additional light onto your object, which can help to brighten it up and create better images. There are a variety of reflectors available, including those that are white, silver, or gold. You can also use materials such as cardboard or foam board as a makeshift reflector. If you need more light, consider using a ring light in addition to your regular lighting setup. A ring light will help to create even lighting and prevent shadows from appearing on your object.", "image": "https://photolightboxes.net/wp-content/uploads/2022/05/Use-Reflectors-to-Bounce-Additional-Light-Onto-Your-Object-If-Needed.png", "name": "Use Reflectors to Bounce Additional Light Onto Your Object, If Needed", "url": "https://photolightboxes.net/how-to-use-a-ring-light-for-product-photography/#Tip_5_Use_Reflectors_to_Bounce_Additional_Light_Onto_Your_Object_If_Needed" } ] }
Note: Interested to know about How to Shoot Product Photography? Read here.


