Indoor Photography Lighting Tips! Are you a photographer looking to take indoor photos? If so, then this article is for you. In photography, indoor lighting can be challenging because there are many variables that go into it. Different types of indoor light sources will affect the way your photo looks and what it appears as. There’s also the issue of shadows from walls or objects in the room which might ruin your shot if not taken care of properly beforehand. We have compiled some tips below on how to photograph indoor scenes with different types of indoor light sources as well as how to deal with tricky indoor lighting issues such as shadows and reflections.
The indoor light can be tricky for photography. If you are looking to take indoor pictures, it is important to know how to use the indoor lights so that your picture comes out well. This article will discuss indoor photography lighting tips and tricks for better indoor pictures.
Indoor Photography Lighting Tips
When you are taking pictures indoors, natural light is not always an option. You may need to use artificial light to get the perfect picture. Here are some tips for getting great indoor photography lighting:
1 . Use Window Light to Your Advantage
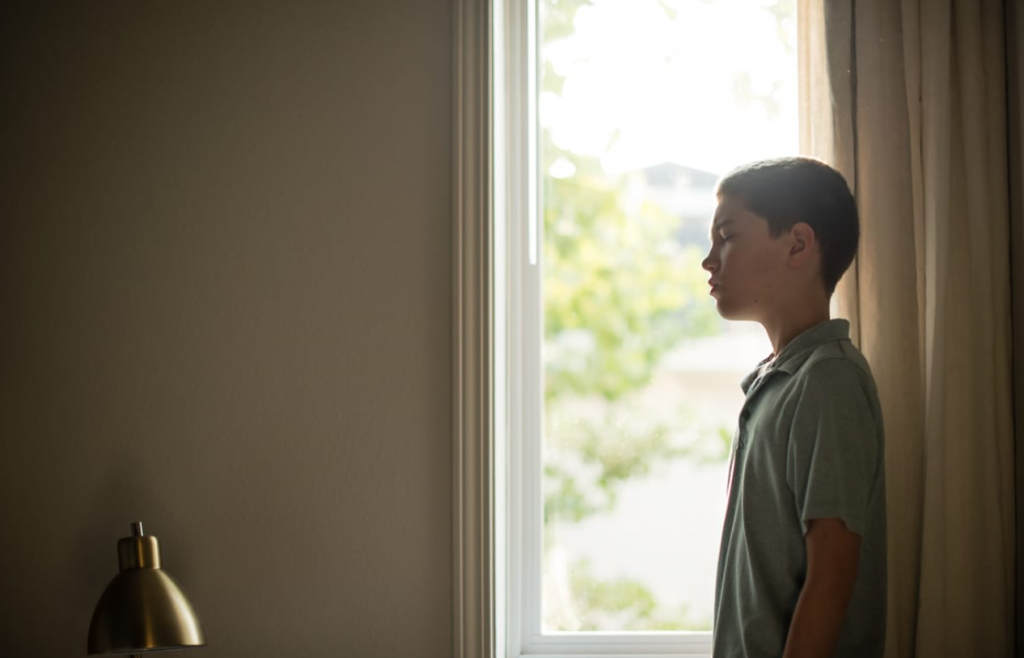
If there is already a window in the room you can use it to your best advantage. Most windows are pointing towards the sun, so if you shoot with the light coming from behind your back your subject will be easy lit and well visible!
2. Position Yourself Properly
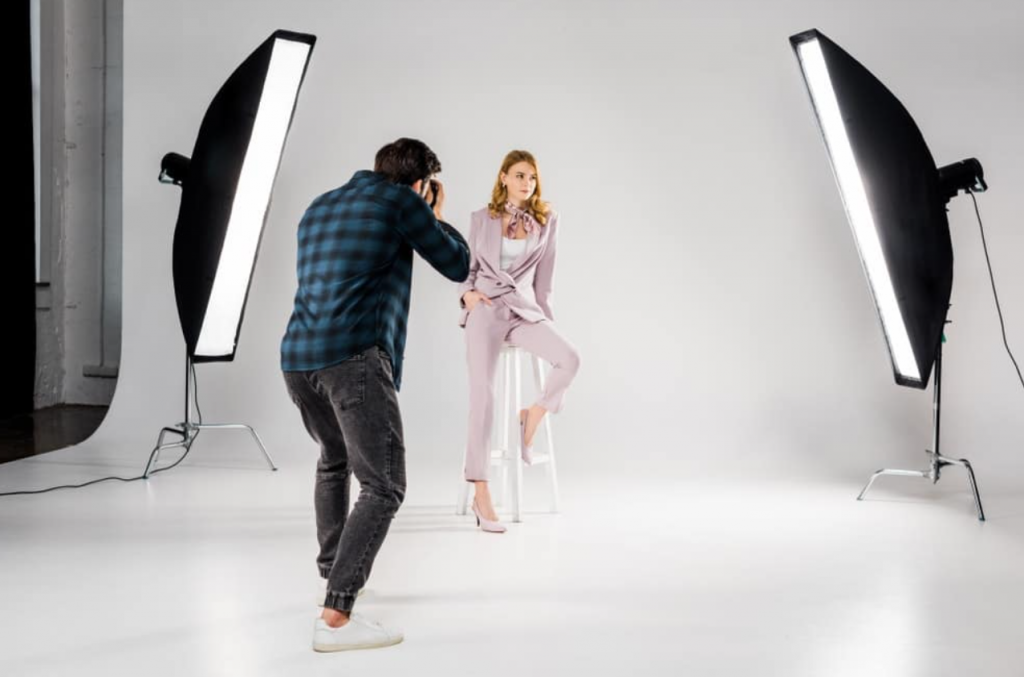
This is very important for two reasons: Your subject will look better and you will avoid harsh shadows. If you place yourself opposite the light source you will get harsh shadows on one side of your subject. Try to position yourself at a 45-degree angle to the light source instead. This will also help if you are using artificial light, as it will be less likely to create harsh shadows then.
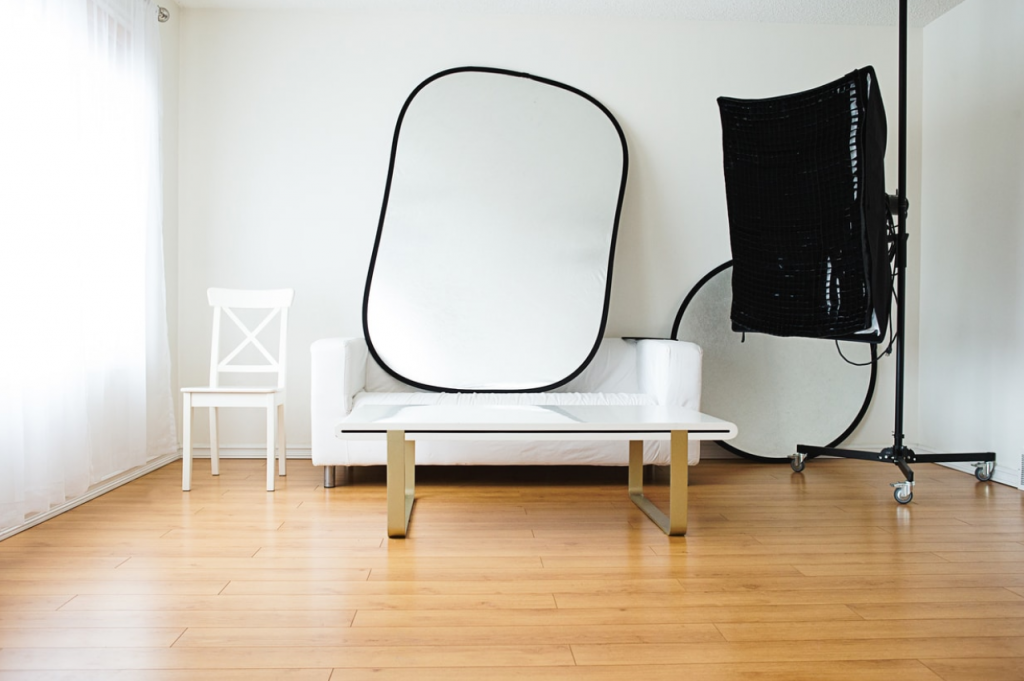
3. Use Reflectors
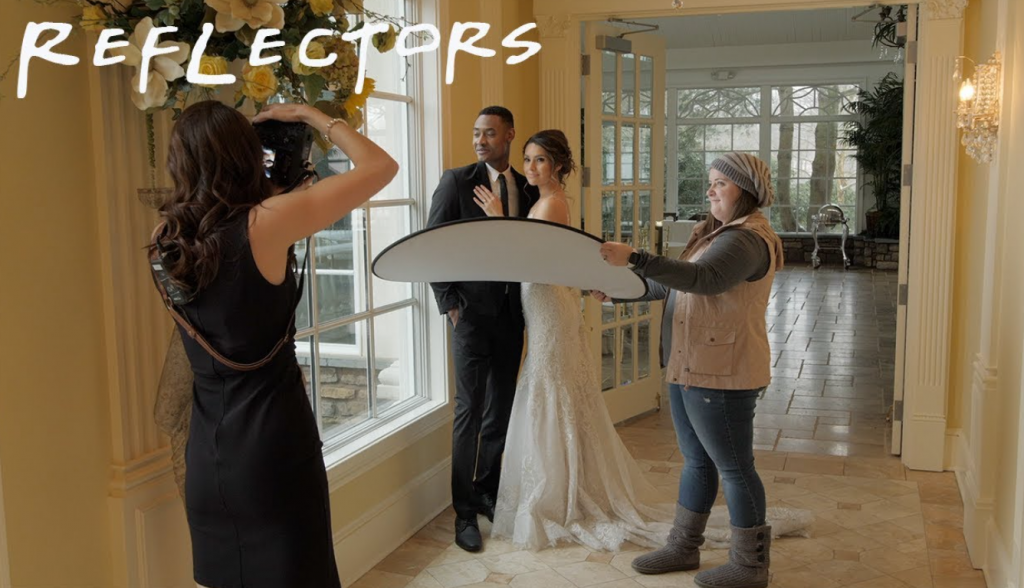
Reflectors are cheap and very helpful, so grab one as soon as you can. Reflectors help to fill in the shadows of your subject. This is great if natural light isn’t the best choice for lighting your scene or if there is no window available. You can even go out with a reflector to shoot on location! However, keep in mind that the reflector needs to be white or silver to be effective.
4. Choose the Right Time of Day

The best time of day to take pictures indoors is often in the morning or evening when the light is softer and more mellow. This will help you avoid harsh shadows and create a more pleasing image.
5. Use a Tripod
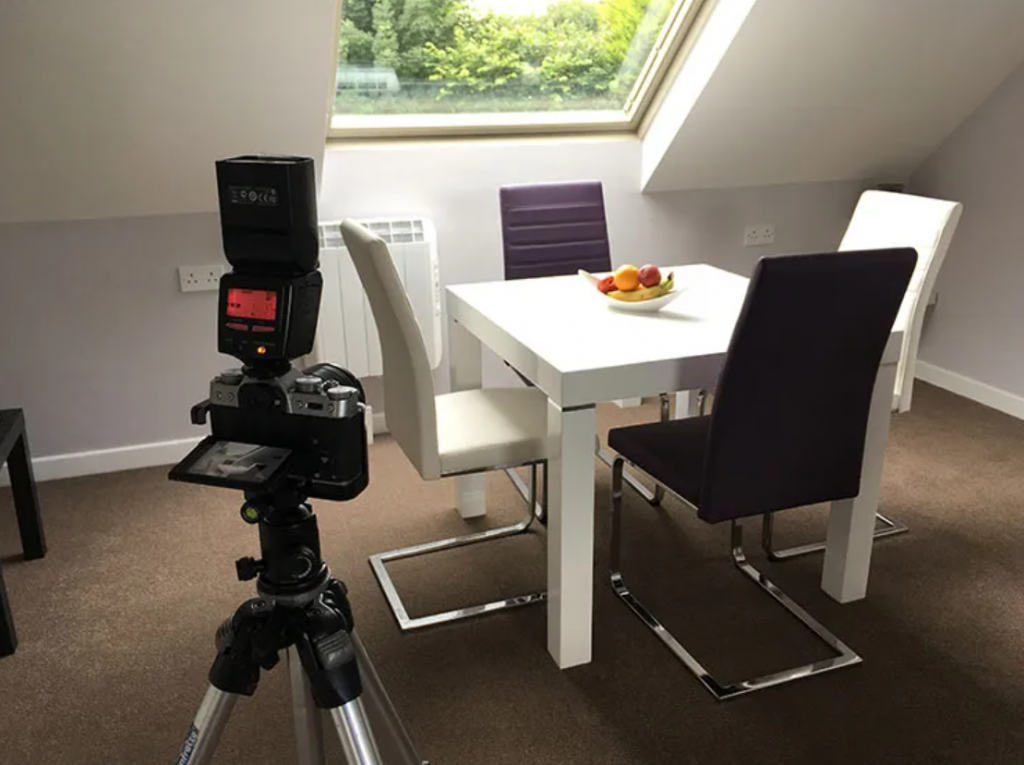
A tripod is not always necessary, but it can come in handy if you want to use long exposure times or if you are using artificial light. This will help to keep your camera stable and avoid blurry images.
6. Diffuse Artificial Light
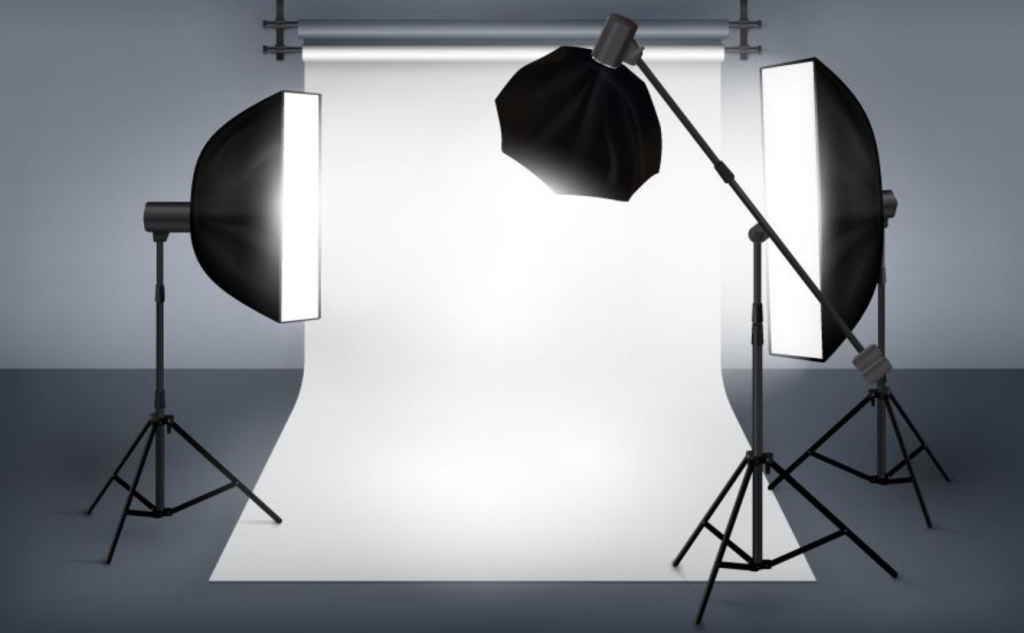
If you are using artificial light, try to diffuse it as much as possible. This will help to avoid harsh shadows and create a more pleasing image. You can do this by using a diffuser, for example.
7. Use an ND filter
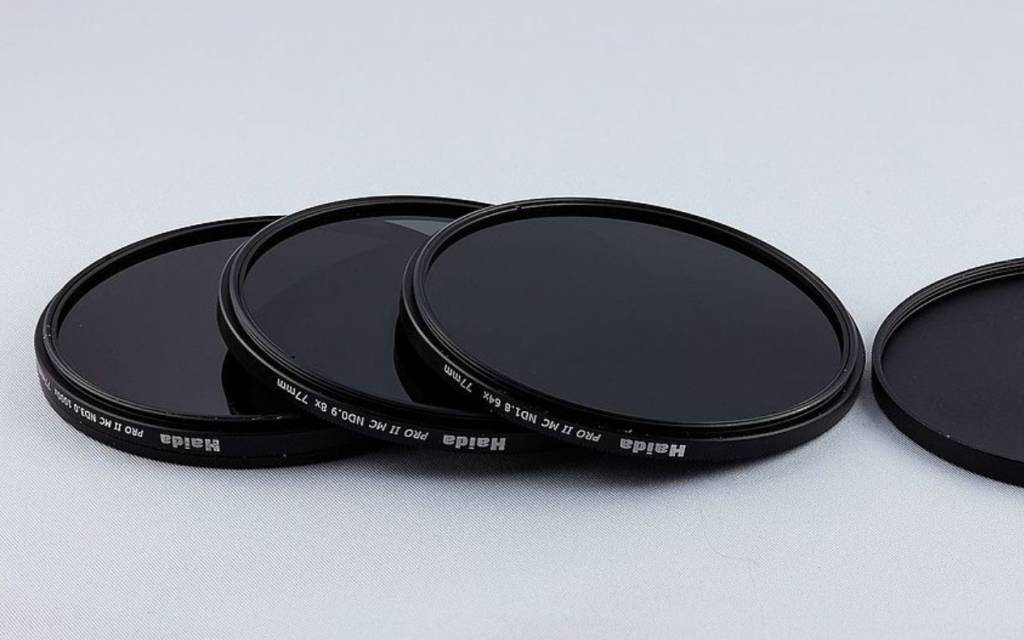
If you are using artificial light and want to use longer exposure times, an ND filter can come in handy. This will help to reduce the amount of light coming into your camera and help you to get the correct exposure. { "@context": "https://schema.org/", "@type": "HowTo", "name": "Indoor Photography Lighting Tips", "description": "Indoor Photography Lighting Tips! Are you a photographer looking to take indoor photos? If so, then this article is for you. In photography, indoor lighting can be challenging because there are many variables that go into it. Different types of indoor light sources will affect the way your photo looks and what it appears as. There’s also the issue of shadows from walls or objects in the room which might ruin your shot if not taken care of properly beforehand. We have compiled some tips below on how to photograph indoor scenes with different types of indoor light sources as well as how to deal with tricky indoor lighting issues such as shadows and reflections.", "image": "https://https://photolightboxes.net/wp-content/uploads/2021/12/Indoor-Photography-Lighting-Tips-1-1024x681.png.net/wp-content/uploads/2021/12/Food-Photography-Lighting-Tips-1024x666.png", "totalTime": "PT10M", "estimatedCost": { "@type": "MonetaryAmount", "currency": "USD", "value": "10$" }, "supply": [ { "@type": "HowToSupply", "name": "camera" } ], "tool": [ { "@type": "HowToTool", "name": "ND Filter" } ], "step": [ { "@type": "HowToStep", "text": "If there is already a window in the room you can use it to your best advantage. Most windows are pointing towards the sun, so if you shoot with the light coming from behind your back your subject will be easy lit and well visible!", "image": "https://photolightboxes.net/wp-content/uploads/2021/12/Use-Window-Light-to-Your-Advantage-1024x658.png", "name": "Use Window Light to Your Advantage", "url": "https://photolightboxes.net/indoor-photography-lighting-tips/#1_Use_Window_Light_to_Your_Advantage" }, { "@type": "HowToStep", "text": "This is very important for two reasons: Your subject will look better and you will avoid harsh shadows. If you place yourself opposite the light source you will get harsh shadows on one side of your subject. Try to position yourself at a 45-degree angle to the light source instead. This will also help if you are using artificial light, as it will be less likely to create harsh shadows then.", "image": "https://photolightboxes.net/wp-content/uploads/2021/12/Position-Yourself-Properly-1024x677.png", "name": "Position Yourself Properly", "url": "https://photolightboxes.net/indoor-photography-lighting-tips/#2_Position_Yourself_Properly" }, { "@type": "HowToStep", "text": "Reflectors are cheap and very helpful, so grab one as soon as you can. Reflectors help to fill in the shadows of your subject. This is great if natural light isn’t the best choice for lighting your scene or if there is no window available. You can even go out with a reflector to shoot on location! However, keep in mind that the reflector needs to be white or silver to be effective.", "image": "https://photolightboxes.net/wp-content/uploads/2021/12/Use-Reflectors-1024x588.png", "name": "Use Reflectors", "url": "https://photolightboxes.net/indoor-photography-lighting-tips/#3_Use_Reflectors" }, { "@type": "HowToStep", "text": "The best time of day to take pictures indoors is often in the morning or evening when the light is softer and more mellow. This will help you avoid harsh shadows and create a more pleasing image.", "image": "https://photolightboxes.net/wp-content/uploads/2021/12/Choose-the-Right-Time-of-Day-1024x673.png", "name": "Choose the Right Time of Day", "url": "https://photolightboxes.net/indoor-photography-lighting-tips/#4_Choose_the_Right_Time_of_Day" }, { "@type": "HowToStep", "text": "A tripod is not always necessary, but it can come in handy if you want to use long exposure times or if you are using artificial light. This will help to keep your camera stable and avoid blurry images.", "image": "https://photolightboxes.net/wp-content/uploads/2021/12/Use-a-Tripod-4-1024x765.png", "name": "Use a Tripod", "url": "https://photolightboxes.net/indoor-photography-lighting-tips/#5_Use_a_Tripod" }, { "@type": "HowToStep", "text": "If you are using artificial light, try to diffuse it as much as possible. This will help to avoid harsh shadows and create a more pleasing image. You can do this by using a diffuser, for example.", "image": "https://photolightboxes.net/wp-content/uploads/2021/12/Diffuse-Artificial-Light--1024x633.png", "name": "Diffuse Artificial Light", "url": "https://photolightboxes.net/indoor-photography-lighting-tips/#6_Diffuse_Artificial_Light" }, { "@type": "HowToStep", "text": "If you are using artificial light and want to use longer exposure times, an ND filter can come in handy. This will help to reduce the amount of light coming into your camera and help you to get the correct exposure.", "image": "https://photolightboxes.net/wp-content/uploads/2021/12/Use-an-ND-filter--1024x640.png", "name": "Use an ND filter", "url": "https://photolightboxes.net/indoor-photography-lighting-tips/#7_Use_an_ND_filter" }, { "@type": "HowToStep", "text": "If you are using a flash, make sure that it is placed as close to your subject as possible. This will help to avoid harsh shadows and create a more pleasing image.", "image": "https://photolightboxes.net/wp-content/uploads/2021/12/Use-a-Flash-1024x700.png", "name": "Use a Flash", "url": "https://photolightboxes.net/indoor-photography-lighting-tips/#8_Use_a_Flash" }, { "@type": "HowToStep", "text": "The best way to learn is to experiment and see what works best for you and your camera. It will take time to learn how to use the light effectively, but with some practice, you will definitely get there!", "image": "https://photolightboxes.net/wp-content/uploads/2021/12/Use-a-Flash-1024x700.png", "name": "Experiment!", "url": "https://photolightboxes.net/indoor-photography-lighting-tips/#9_Experiment" }, { "@type": "HowToStep", "text": "The Rule Of Thirds is a very helpful tool in photography and also applies well to lighting: Try to place your subject or elements in the frame according to the rule of thirds. This will help to create a more pleasing composition.", "image": "https://photolightboxes.net/wp-content/uploads/2021/12/Use-a-Flash-1024x700.png", "name": "The Rule of Thirds", "url": "https://photolightboxes.net/indoor-photography-lighting-tips/#1o_The_Rule_of_Thirds" } ] }
8. Use a Flash
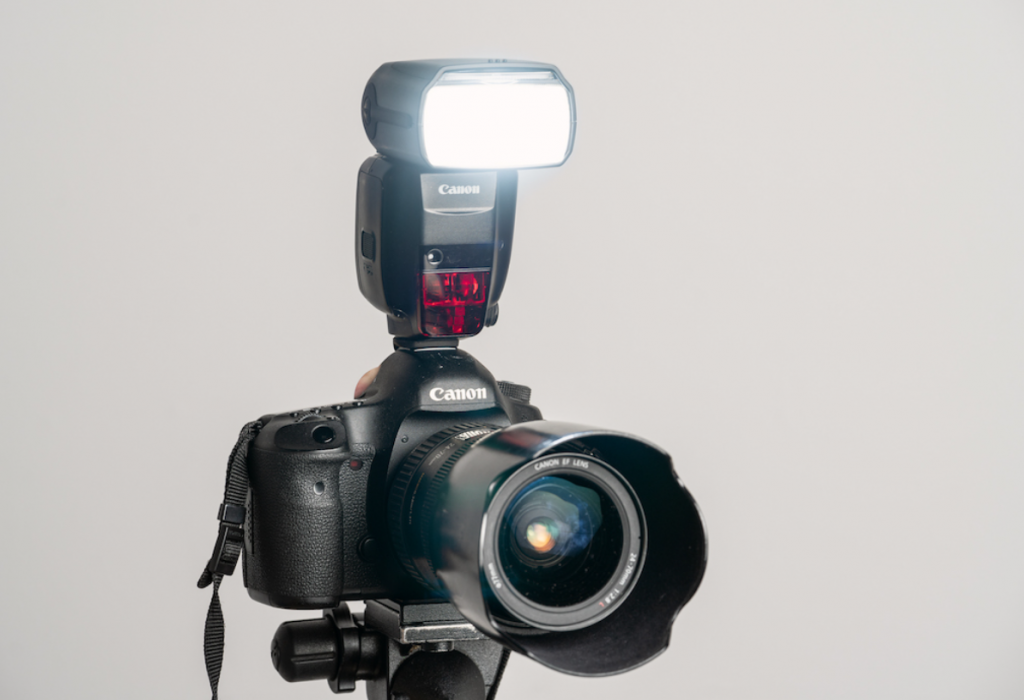
If you are using a flash, make sure that it is placed as close to your subject as possible. This will help to avoid harsh shadows and create a more pleasing image.
9. Experiment!
The best way to learn is to experiment and see what works best for you and your camera. It will take time to learn how to use the light effectively, but with some practice, you will definitely get there!
1o. The Rule of Thirds
The Rule Of Thirds is a very helpful tool in photography and also applies well to lighting: Try to place your subject or elements in the frame according to the rule of thirds. This will help to create a more pleasing composition.
Conclusion
Using light effectively is key in photography. By following these tips you can create better images with beautiful lighting. You could also use a photo lightbox for a small product for indoor photography purposes. Just remember to experiment and find what works best for you!
Note: Interested to know about Lighting Setup for Indoor Photography? Read here.
Frequently Asked Questions
Q1: What is the key to successful indoor photography lighting?
A1: The key to successful indoor photography lighting is achieving balanced and controlled lighting to illuminate your subject effectively.
Q2: How can you make the most of natural light for indoor photography?
A2: You can make the most of natural light by positioning your subject near windows, using diffusers or curtains to soften harsh sunlight, and experimenting with different times of day for optimal lighting conditions.
Q3: What are some standard artificial lighting options for indoor photography?
A3: Common artificial lighting options include continuous lights, speed lights or flashes, and studio strobes, each offering unique advantages for various indoor photography scenarios.
Q4: What is the importance of white balance when working with indoor lighting?
A4: White balance ensures accurate colour reproduction in indoor photography. Adjusting the white balance settings on your camera helps prevent colour casts caused by different types of lighting.
Q5: How can you minimize unwanted shadows and harsh contrasts in indoor photography?
A5: To minimize unwanted shadows and harsh contrasts, use reflectors, diffusers, or additional lights to fill in shadows and create a more even and flattering lighting setup indoors.


