Lighting Setup for Indoor Photography! If you’re a photographer who owns a lighting kit, this article is for you. Here are some tips about lighting setup for indoor photography that will help improve the look of your photos and make them more interesting!
Indoor lighting can be tricky sometimes. It’s often too dark or too bright to take good pictures without relying on natural light from windows. But if you have a lighting kit, it becomes much easier to create great-looking shots in any environment. In this post, I’ll show you how to set up various types of lighting kits as well as their advantages and disadvantages so that no matter what type of photo shoot you’re doing, you know how best to get the most out of your photography equipment!
Many people want to take high-quality photos inside of their homes, but lighting is a problem. This article will teach you how to set up lighting for indoor photography so that your pictures turn out just the way you want them.
Lighting Setup for Indoor Photography
Window Light + Reflector (Two Ways)
I use natural light whenever possible, but when working in a studio that has giant windows I also bring along some lighting gear. This setup is perfect for headshots and indoor portraits because it creates flattering shadows on the skin without being too harsh or intense.

I love using window lights with reflectors – they produce quality professional-looking images while giving off wonderful warm tones which are ideal if your subject matter requires warmth.
When I tried to get a few different shots, the lighting and background were best when shooting from straight on with an assistant holding reflectors below their torsos.
Side Window Light + Reflector Opposite
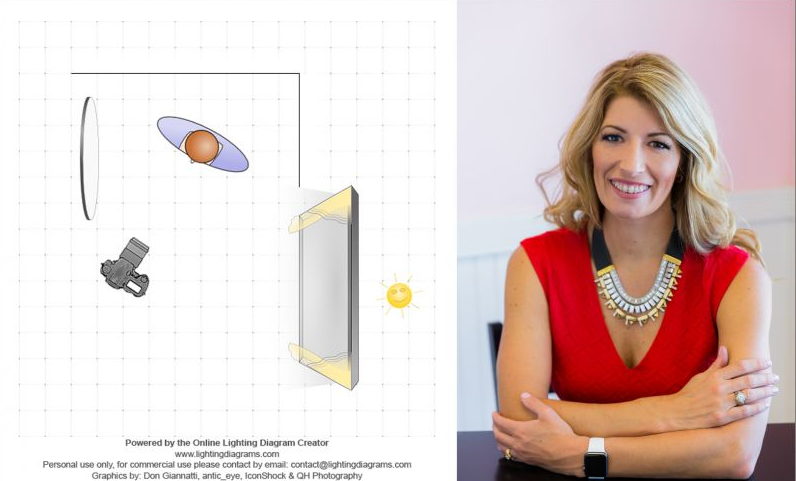
Most people like to use window light coming in from the side and then bouncing it off of one wall with a reflector. Any corner near your windows works great for this type of lighting setup! I took this headshot when working on an interior project that had such beautiful natural light- just perfect timing because my living room has huge glass walls giving us lots of natural afternoon sunlight all day long (and night too!).
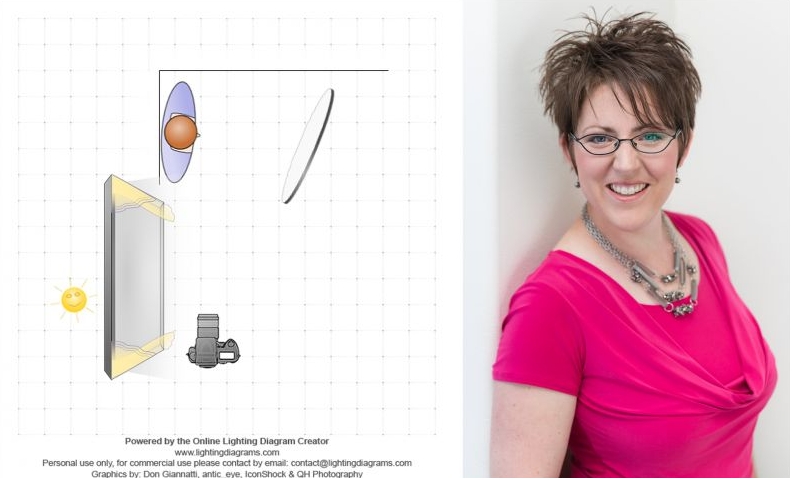
I had an assistant hold the reflector as close to her face as we could get it without showing up in the frame, bouncing some light back onto the shadowed area.
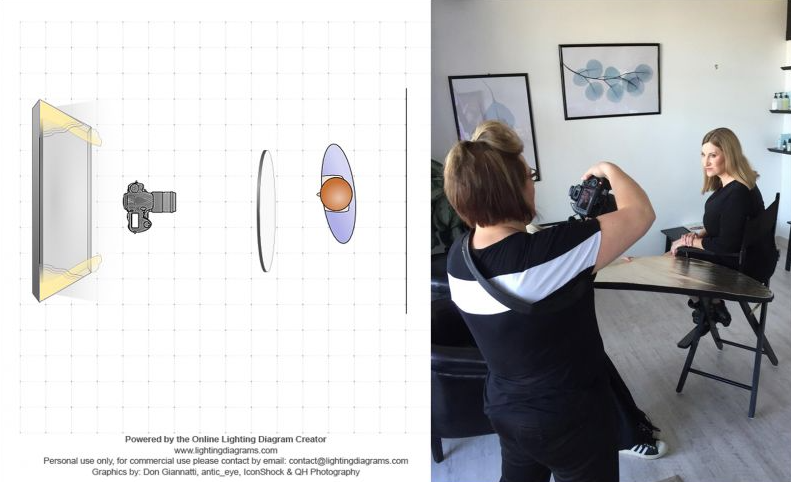
The image above is another example of a similar setup with the subject sitting at an empty table in the corner. I had an assistant hold up my reflector for this photo so that you could see how it looked inside without any fixtures or light sources around them.
On-camera Flash Bounced off Wall or Ceiling
I used a Canon Speedlite to direct my light up and right where there was an available white surface. The wall ended up acting as the perfect softbox, creating even illumination across her face for this portrait shot that’s full of bounced shadows!
One way to avoid color casting is by bouncing your on-camera flash off a reflector. The best time for this technique would be when the lighting conditions are not perfect, such as outdoors in direct sun or with too many lights blazing nearby that could produce an unwanted effect called “monochromatic.” You can also use it indoors if you’re working at night and need more light than what’s coming from just one source will give you – but make sure there aren’t any windows nearby first!
One Light in an Umbrella Softbox
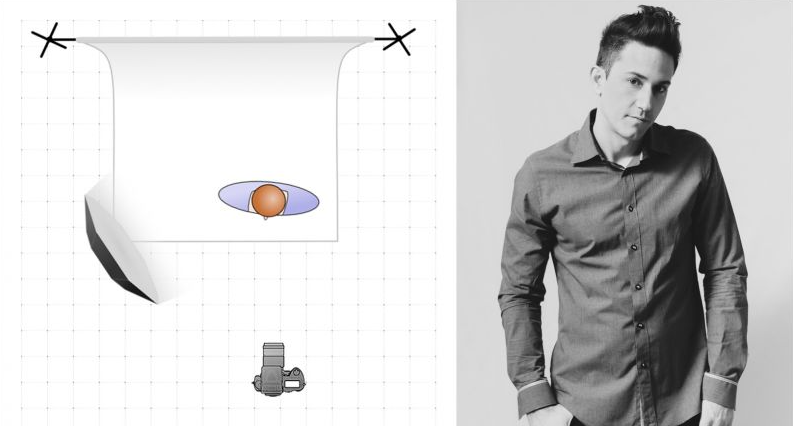
When natural light is not an option, having a Speedlite umbrella that works with your camera can be key to getting the perfect shot. For this shoot, I used Neewer’s affordable line exclusively and it worked perfectly for us in our cramped space!
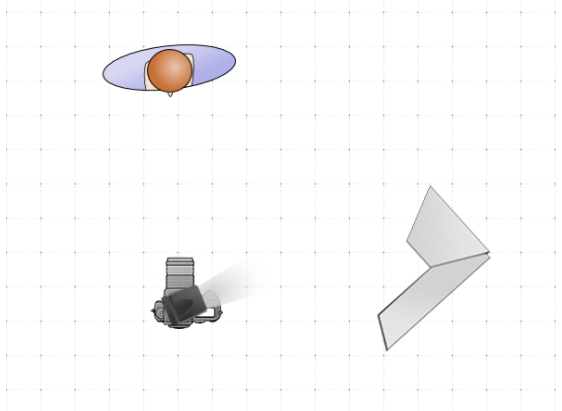
One Light + Reflector
Use a reflector on the opposite side or below your model’s face to add fill for dramatic shadows.
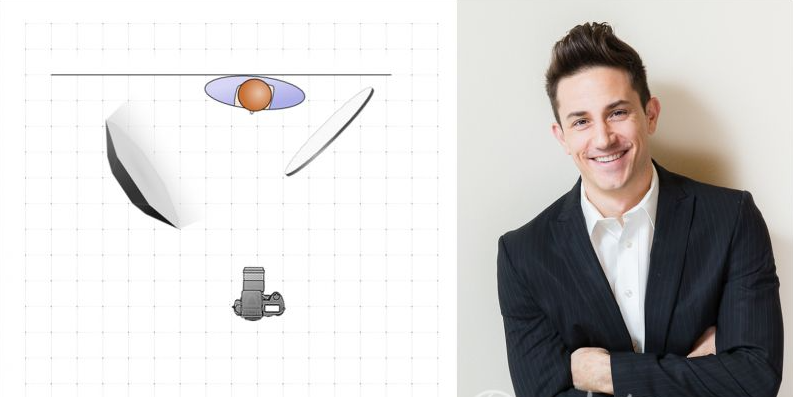
The light from one source will give you an intense highlight while adding fill in other areas with less harshness.
Thank you for reading this post.
No Matter What Type of Lighting You Use, There Are a Few Things That You Need to Keep in Mind:
- The light should be bright but not too bright.
- The light should be soft but not too soft.
- The light should be directional but not too directional.
- The light should be consistent but not too consistent.
- The light should be flattering but not too flattering.
- The light should be interesting but not too interesting.
Note: Interested to know about Indoor Photography Lighting Tips? Read here.


