How To Photograph Trees! In the world of photography, there are many different types of subjects to capture. From people to landscapes, there is no shortage of interesting things to photograph. However, one of the most overlooked and underrated subjects is trees. Trees can be incredibly beautiful and provide a unique perspective for a photograph. Tree photography can be a rewarding and challenging art form.
Photographers must be able to find the right composition and light, as well as be patient in order to capture the perfect shot. Trees can be beautiful subjects and can provide a great opportunity for creative photography. In this article, we will explore the art of tree photography and discuss some tips for capturing stunning images of trees.
How To Photograph Trees
Here are some tips to help you take great tree photos:
1. Find the Right Location
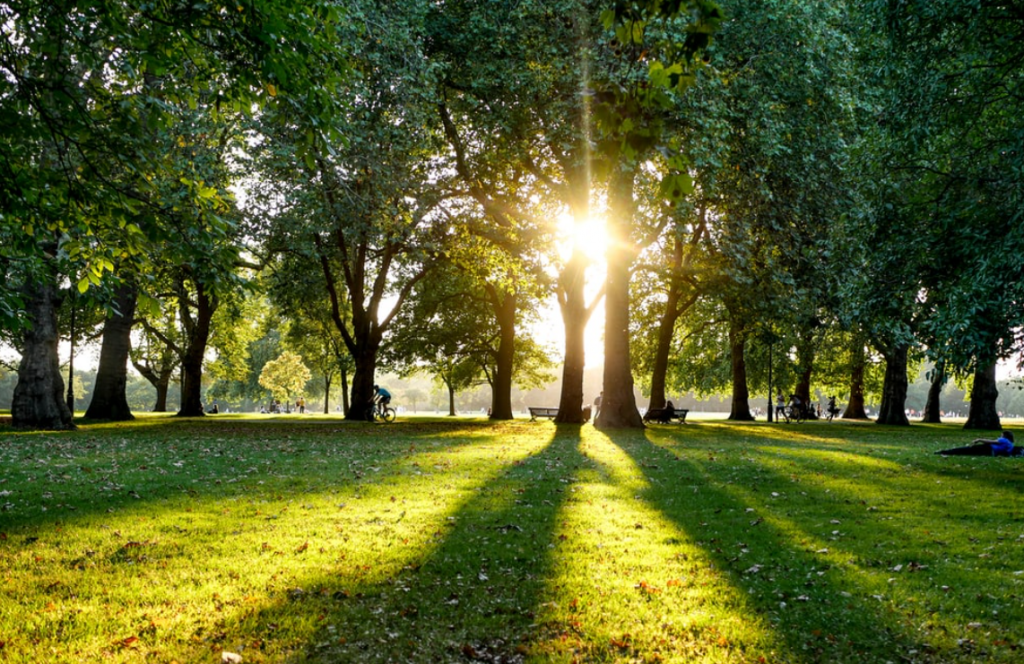
When you are looking to photograph trees, the location is key. You want to find an area with plenty of different types of trees, and that is also a place where you can get some good shots. Try to find an area with rolling hills or a river running through it, as these provide great backgrounds for your photos. Be sure to avoid areas with too much development, as this will take away from the natural beauty of the trees. Once you have found the right location, take some time to explore and find the best spots for photographing each type of tree.
2. Use a Tripod

When photographing trees, it’s important to use a tripod to help you get sharp photos. This is because when you’re photographing a subject that is far away, even the slightest movement can cause your photo to be blurry. By using a tripod, you can keep your camera stable and avoid any unwanted blurriness. In addition to helping you achieve sharper photos, using a tripod can also result in less camera shake, which can lead to cleaner images overall. If you don’t have a tripod, you can try resting your camera on a solid surface or finding an object to stabilize it. However, neither of these methods is as effective as using a tripod. So if you’re looking to take great photos of trees, make sure to bring along your tripod!
3. Use a Wide Angle Lens

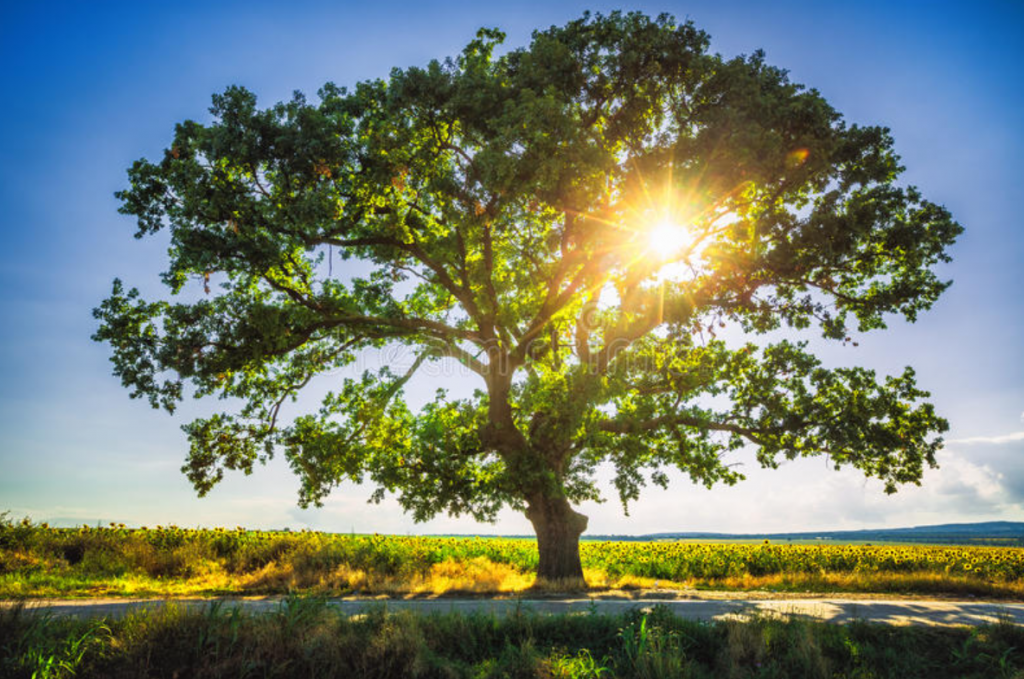
When photographing a tree, it’s important to use a wide-angle lens to capture the whole tree. This will help to show the size and scale of the tree, as well as the surrounding environment. It’s also important to find a good vantage point so that the tree is in the center of the frame. Try to avoid including too much sky or ground in the photograph, as this can make the tree seem small and unimportant. Shoot in the late afternoon or early morning light for best results, when the sun is low in the sky and casts a warm glow on everything.
4. Use a Slow Shutter Speed
If you’re looking to create a peaceful and relaxing photograph, try using a slow shutter speed. This will blur the background and create a smooth look. It’s the perfect technique for photographing trees, as it will help to emphasize their natural beauty and tranquility
To get the best results, find a spot where there is plenty of natural light. After that, you can adjust your shutter speed accordingly. If you’re shooting in daylight, try setting it at 1/60th of a second or slower. If you’re shooting in low light conditions, you may need to set it at 1/15th of a second or slower.
Keep in mind that the slower your shutter speed, the more motion blur will be introduced into your photograph. So if there’s any movement in the scene (such as wind blowing through the trees), it will be captured in the image. { "@context": "https://schema.org/", "@type": "HowTo", "name": "How To Photograph Trees", "description": "How To Photograph Trees! In the world of photography, there are many different types of subjects to capture. From people to landscapes, there is no shortage of interesting things to photograph. However, one of the most overlooked and underrated subjects is trees. Trees can be incredibly beautiful and provide a unique perspective for a photograph. Tree photography can be a rewarding and challenging art form.", "image": "https://photolightboxes.net/wp-content/uploads/2022/07/How-To-Photograph-Trees--1024x679.png", "totalTime": "PT10M", "estimatedCost": { "@type": "MonetaryAmount", "currency": "USD", "value": "10$" }, "supply": [ { "@type": "HowToSupply", "name": "Tree" } ], "tool": [ { "@type": "HowToTool", "name": "a tripod" } ], "step": [ { "@type": "HowToStep", "text": "When you are looking to photograph trees, the location is key. You want to find an area with plenty of different types of trees, and that is also a place where you can get some good shots. Try to find an area with rolling hills or a river running through it, as these provide great backgrounds for your photos. Be sure to avoid areas with too much development, as this will take away from the natural beauty of the trees. Once you have found the right location, take some time to explore and find the best spots for photographing each type of tree.", "image": "https://photolightboxes.net/wp-content/uploads/2022/07/Find-the-Right-Location-1024x664.png", "name": "Find the Right Location", "url": "https://photolightboxes.net/how-to-photograph-trees/#1_Find_the_Right_Location" }, { "@type": "HowToStep", "text": "When photographing trees, it’s important to use a tripod to help you get sharp photos. This is because when you’re photographing a subject that is far away, even the slightest movement can cause your photo to be blurry. By using a tripod, you can keep your camera stable and avoid any unwanted blurriness. In addition to helping you achieve sharper photos, using a tripod can also result in less camera shake, which can lead to cleaner images overall. If you don’t have a tripod, you can try resting your camera on a solid surface or finding an object to stabilize it. However, neither of these methods is as effective as using a tripod. So if you’re looking to take great photos of trees, make sure to bring along your tripod!", "image": "https://photolightboxes.net/wp-content/uploads/2022/07/Use-a-Tripod-2.png", "name": "Use a Tripod", "url": "https://photolightboxes.net/how-to-photograph-trees/#2_Use_a_Tripod" }, { "@type": "HowToStep", "text": "When photographing a tree, it’s important to use a wide-angle lens to capture the whole tree. This will help to show the size and scale of the tree, as well as the surrounding environment. It’s also important to find a good vantage point so that the tree is in the center of the frame. Try to avoid including too much sky or ground in the photograph, as this can make the tree seem small and unimportant. Shoot in the late afternoon or early morning light for best results, when the sun is low in the sky and casts a warm glow on everything.", "image": "https://photolightboxes.net/wp-content/uploads/2022/07/Use-a-Wide-Angle-Lens-1024x355.png", "name": "Use a Wide Angle Lens", "url": "https://photolightboxes.net/how-to-photograph-trees/#3_Use_a_Wide_Angle_Lens" }, { "@type": "HowToStep", "text": "If you’re looking to create a peaceful and relaxing photograph, try using a slow shutter speed. This will blur the background and create a smooth look. It’s the perfect technique for photographing trees, as it will help to emphasize their natural beauty and tranquility\n\nTo get the best results, find a spot where there is plenty of natural light. After that, you can adjust your shutter speed accordingly. If you’re shooting in daylight, try setting it at 1/60th of a second or slower. If you’re shooting in low light conditions, you may need to set it at 1/15th of a second or slower.\n\nKeep in mind that the slower your shutter speed, the more motion blur will be introduced into your photograph. So if there’s any movement in the scene (such as wind blowing through the trees), it will be captured in the image.", "image": "https://photolightboxes.net/wp-content/uploads/2022/07/How-To-Photograph-Trees--1024x679.png", "name": "Use a Slow Shutter Speed", "url": "https://photolightboxes.net/how-to-photograph-trees/#4_Use_a_Slow_Shutter_Speed" }, { "@type": "HowToStep", "text": "When photographing trees, it is important to take multiple photos from different angles. This will help capture the tree in its entirety. Photos taken from different angles can also create an interesting composition. Try to get photos of the tree from different distances and in different light conditions as well. This will give you a variety of photos to choose from when editing.", "image": "https://photolightboxes.net/wp-content/uploads/2022/07/How-To-Photograph-Trees--1024x679.png", "name": "Take Multiple Photos", "url": "https://photolightboxes.net/how-to-photograph-trees/#5_Take_Multiple_Photos" } ] }
5. Take Multiple Photos
When photographing trees, it is important to take multiple photos from different angles. This will help capture the tree in its entirety. Photos taken from different angles can also create an interesting composition. Try to get photos of the tree from different distances and in different light conditions as well. This will give you a variety of photos to choose from when editing.
Conclusion
In conclusion, photographing trees can be a very rewarding experience. By following the tips mentioned in this article, you can create stunning images that capture the beauty and majesty of these natural wonders. So get outside and start snapping some photos!


