How to Take Pictures of Food Professionally! Food photography is a popular and often time challenging genre of photography. It can be difficult to create a striking photo that will convey the taste, texture, and appearance of the food in the dish. There are many different tips and tricks for taking great food photos that will help make your food look appetizing and mouth-watering.
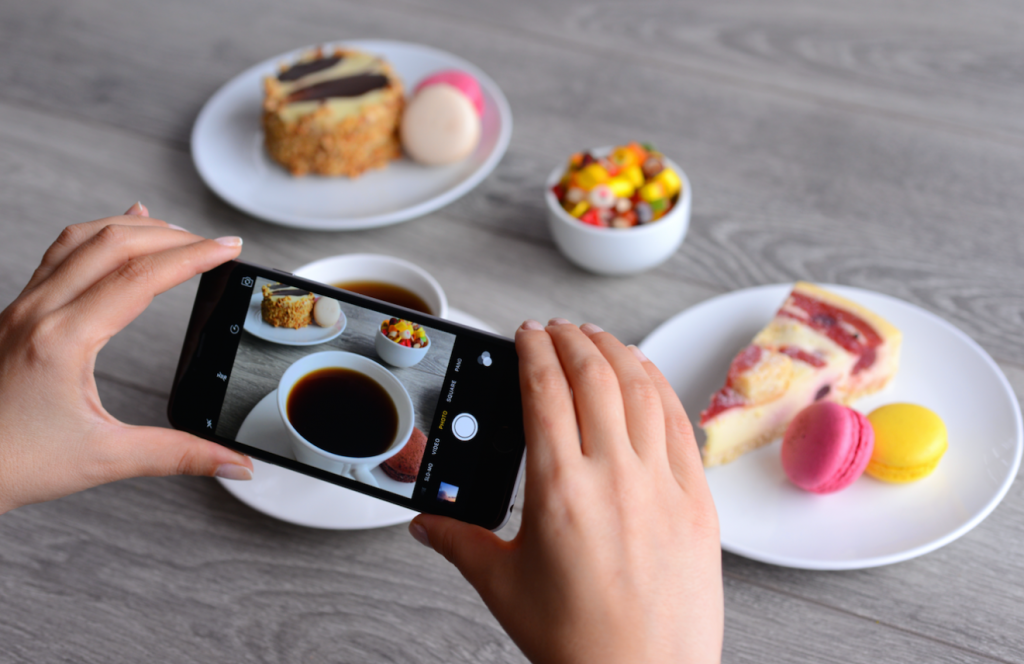
Photographing food professionally can be a fun and rewarding experience. There are a few things you’ll need to keep in mind to get great shots: composition, lighting, exposure, and post-processing. Furthermore, in this article, we will talk about how to take food photography photos.
Tips for Taking Great Food Photos | Food Photography Tips
It’s all about the light! My best lighting tip for beginners is to become aware of the intensity of the light and how it hits the food and learn to adjust accordingly. Here are some tips for getting started!g
1. Shoot In Natural Light
If you’re looking to take your food photography skills up a notch, keep in mind that natural daylight is key. Artificial lighting such as lamps can create an ugly color cast on the foods we love so much! When shooting under artificial lights like those found at restaurants or cafes for example; not only does this make it difficult when capture accurate colors but even worse: white items may turn orange and brown tones if there’s light hitting them from behind (not attractive). The best way around this problem? Shoot using direct sunlight instead which will preserve all-important elements’ true hues without tinting anything too brightly.
2. Take Control Of The Shadows
The importance of shadows can’t be overestimated in photography. They will make or break your image, but sometimes they are very helpful when used correctly and other times dangerous if not dealt with properly. To avoid harsh shadowing on food photos shoot during overcast days to prevent excessive contrast between light & dark areas; use a semi-transparent white curtain (preferably) or move any shaded subjects further away from windows which let direct sunlight shine through into oblivion – the last thing you want is for there to always appear as though someone else is doing it! { "@context": "https://schema.org/", "@type": "HowTo", "name": "How to Take Pictures of Food Professionally", "description": "How to Take Pictures of Food Professionally! Food photography is a popular and often time challenging genre of photography. It can be difficult to create a striking photo that will convey the taste, texture, and appearance of the food in the dish. There are many different tips and tricks for taking great food photos that will help make your food look appetizing and mouth-watering.", "image": "https://photolightboxes.net/wp-content/uploads/2021/09/How-to-Take-Pictures-of-Food-Professionally-2-1024x664.png", "totalTime": "PT10M", "estimatedCost": { "@type": "MonetaryAmount", "currency": "USD", "value": "$10" }, "supply": [ { "@type": "HowToSupply", "name": "lighting" } ], "tool": [ { "@type": "HowToTool", "name": "food" } ], "step": [ { "@type": "HowToStep", "text": "If you’re looking to take your food photography skills up a notch, keep in mind that natural daylight is key. Artificial lighting such as lamps can create an ugly color cast on the foods we love so much! When shooting under artificial lights like those found at restaurants or cafes for example; not only does this make it difficult when capture accurate colors but even worse: white items may turn orange and brown tones if there’s light hitting them from behind (not attractive). The best way around this problem? Shoot using direct sunlight instead which will preserve all-important elements’ true hues without tinting anything too brightly.", "image": "https://photolightboxes.net/wp-content/uploads/2021/09/1.-Shoot-In-Natural-Light-1.png", "name": "Shoot In Natural Light", "url": "https://photolightboxes.net/how-to-take-pictures-of-food-professionally/#1_Shoot_In_Natural_Light" }, { "@type": "HowToStep", "text": "The importance of shadows can’t be overestimated in photography. They will make or break your image, but sometimes they are very helpful when used correctly and other times dangerous if not dealt with properly. To avoid harsh shadowing on food photos shoot during overcast days to prevent excessive contrast between light & dark areas; use a semi-transparent white curtain (preferably) or move any shaded subjects further away from windows which let direct sunlight shine through into oblivion – the last thing you want is for there to always appear as though someone else is doing it!", "image": "https://photolightboxes.net/wp-content/uploads/2021/09/Take-Control-Of-The-Shadows.png", "name": "Take Control Of The Shadows", "url": "https://photolightboxes.net/how-to-take-pictures-of-food-professionally/#2_Take_Control_Of_The_Shadows" }, { "@type": "HowToStep", "text": "One way to make your food photography look more professional is to use a neutral background. This could be a white piece of paper, a black piece of paper, or even just a blank wall. Having a neutral background will help your food stand out and look more appetizing.\n\nAnother benefit of using a neutral background is that it will help you to avoid distractions in your photos. If you have a busy background behind your food, it can be difficult for the viewer to focus on what they’re supposed to be looking at. With a neutral background, there are no distractions and the viewer can focus on the food itself.", "image": "https://photolightboxes.net/wp-content/uploads/2021/09/Use-A-Neutral-Background-1-1024x679.png", "name": "Use A Neutral Background", "url": "https://photolightboxes.net/how-to-take-pictures-of-food-professionally/#3_Use_A_Neutral_Background" }, { "@type": "HowToStep", "text": "Food photography is a great opportunity to play around with color and create an image that will make you feel good. Colors have been proven time after again as one of the most influential elements in art, from classic paintings down to modern-day advertisements or Instagram posts. In this photo below I combined warm earth tones for composition purposes while still maintaining visual interest through contrast – opposites really do attract!", "image": "https://photolightboxes.net/wp-content/uploads/2021/09/4.-Think-About-Color.png", "name": "Think About Color", "url": "https://photolightboxes.net/how-to-take-pictures-of-food-professionally/#4_Think_About_Color" }, { "@type": "HowToStep", "text": "When taking pictures of food, it is important to find the best angle. This means finding a way to make the food look as appetizing as possible. One way to do this is by shooting from above. This makes the food look more like a work of art and less like something that was just eaten. It also helps to show off the texture and colors of the food. Another option is to shoot from the side. This can give a more three-dimensional look to the photograph. It can also highlight certain aspects of the food, such as its shape or color. Whichever angle you choose, make sure that the light is good and that there are no distractions in the background.", "image": "https://photolightboxes.net/wp-content/uploads/2021/09/Shoot-From-The-Best-Angle.png", "name": "Shoot From The Best Angle", "url": "https://photolightboxes.net/how-to-take-pictures-of-food-professionally/#5_Shoot_From_The_Best_Angle" }, { "@type": "HowToStep", "text": "A photo of a messy dinner on the plate is not real food photography. When you are taking photos, always arrange your dish in an interesting way so that balance can be maintained and there’s no unnecessary mess or spills for viewers to see in advance before they feast their eyes upon it all later when viewing its final product.\n\nA good tip would be if possible use similar-shaped items like fruits and vegetables because then people will find patterning among them creating interest within both sight & sound-alike which makes visual appeal much more appealing than just simple lines radiating outward at random angles from one another with nothing else happening whatsoever!? But please remember after making these arrangements–donate any spilled sauces/gravies.", "image": "https://photolightboxes.net/wp-content/uploads/2021/09/6.-Arrange-Your-Food-Neatly.png", "name": "Arrange Your Food Neatly", "url": "https://photolightboxes.net/how-to-take-pictures-of-food-professionally/#6_Arrange_Your_Food_Neatly" }, { "@type": "HowToStep", "text": "Food photography tips are all about balancing the flavors of your dish with a captivating background. But if you want to make sure that both elements aren’t forgotten, consider adding other smaller items like spices or cooking utensils for an extra bit of detail in every photo!", "image": "https://photolightboxes.net/wp-content/uploads/2021/09/Decorate-The-Scene.png", "name": "Decorate The Scene", "url": "https://photolightboxes.net/how-to-take-pictures-of-food-professionally/#7_Decorate_The_Scene" }, { "@type": "HowToStep", "text": "Sometimes the best option is to keep it really simple. If your food subject has a bold color and shape, then don’t use heavy decorations that would distract from this visual impactful point-of-view (POV). For example: if you’re framing an appetizing dish with something like dark green leaves decorating its centerpiece against the light blue sky–that’s attractive enough! But maybe not so much when we take away all other elements in between; leave them out entirely by focusing only on one main element which becomes very clear due to both simplicity and complexity at once because there are multiple colors but also shapes present within those same two categories visible simultaneously as well.", "image": "https://photolightboxes.net/wp-content/uploads/2021/09/Keep-It-Simple.png", "name": "Keep It Simple", "url": "https://photolightboxes.net/how-to-take-pictures-of-food-professionally/#8_Keep_It_Simple" }, { "@type": "HowToStep", "text": "Food is so wonderful, but sometimes your iPhone doesn’t capture the colors quite right. You might want them more vivid or slightly muted- whatever suits you best!\nYou can easily adjust color after taking a photo by using one of my favorite apps for editing photos on an iOS device called VSCO Cambridge court filter kit includes 20 different filters that are easy to use with individual adjustment tools also available if needed.\n\nYou can also use a lightbox for food product photography, which gives us a bright electric setup. If you want to buy a photo lightbox and learn more about food photography, Take a look at our site photo lightboxes.", "image": "https://photolightboxes.net/wp-content/uploads/2021/09/Enhance-The-Colors-With-Editing.png", "name": "Enhance The Colors With Editing", "url": "https://photolightboxes.net/how-to-take-pictures-of-food-professionally/#9_Enhance_The_Colors_With_Editing" } ] }
3. Use A Neutral Background
One way to make your food photography look more professional is to use a neutral background. This could be a white piece of paper, a black piece of paper, or even just a blank wall. Having a neutral background will help your food stand out and look more appetizing.
Another benefit of using a neutral background is that it will help you to avoid distractions in your photos. If you have a busy background behind your food, it can be difficult for the viewer to focus on what they’re supposed to be looking at. With a neutral background, there are no distractions and the viewer can focus on the food itself.
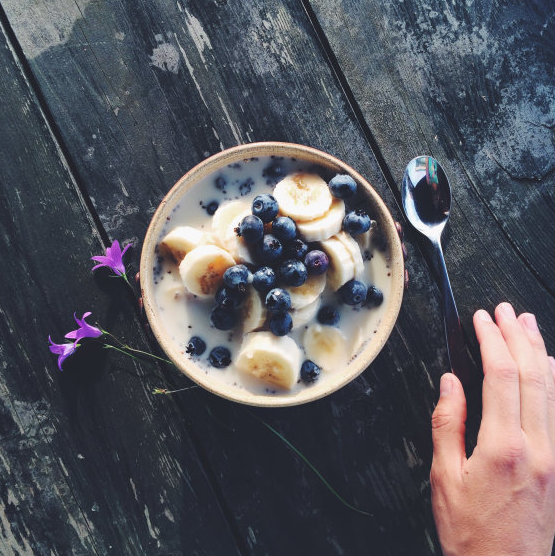
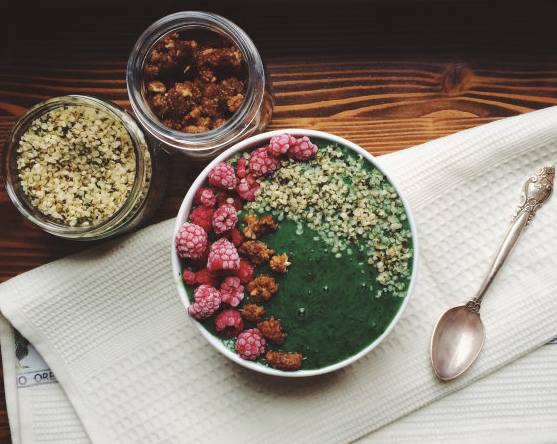
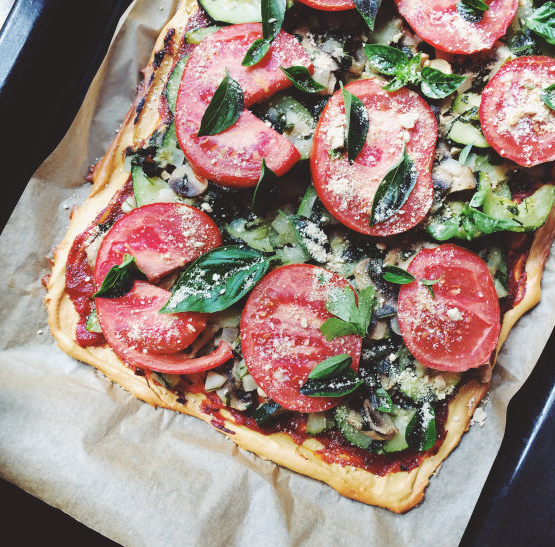
4. Think About Color
Food photography is a great opportunity to play around with color and create an image that will make you feel good. Colors have been proven time after again as one of the most influential elements in art, from classic paintings down to modern-day advertisements or Instagram posts. In this photo below I combined warm earth tones for composition purposes while still maintaining visual interest through contrast – opposites really do attract!
5. Shoot From The Best Angle
When taking pictures of food, it is important to find the best angle. This means finding a way to make the food look as appetizing as possible. One way to do this is by shooting from above. This makes the food look more like a work of art and less like something that was just eaten.
It also helps to show off the texture and colors of the food. Another option is to shoot from the side. This can give a more three-dimensional look to the photograph. It can also highlight certain aspects of the food, such as its shape or color. Whichever angle you choose, make sure that the light is good and that there are no distractions in the background.
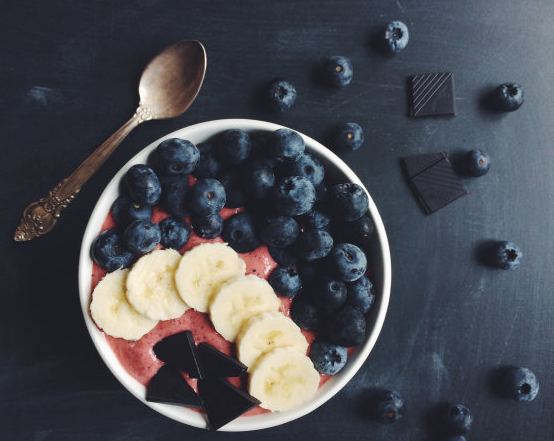
6. Arrange Your Food Neatly
 A photo of a messy dinner on the plate is not real food photography. When you are taking photos, always arrange your dish in an interesting way so that balance can be maintained and there’s no unnecessary mess or spills for viewers to see in advance before they feast their eyes upon it all later when viewing its final product.
A good tip would be if possible use similar-shaped items like fruits and vegetables because then people will find patterning among them creating interest within both sight & sound-alike which makes visual appeal much more appealing than just simple lines radiating outward at random angles from one another with nothing else happening whatsoever!? But please remember after making these arrangements–donate any spilled sauces/gravies.
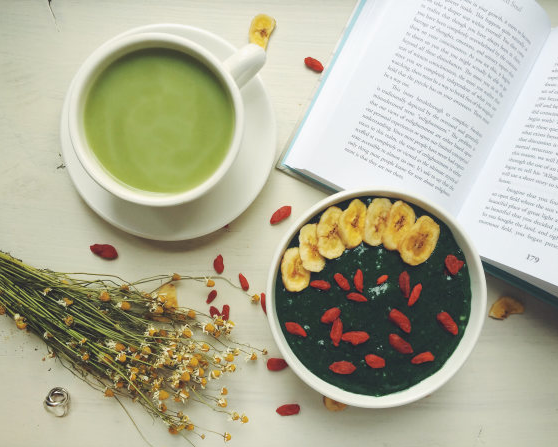
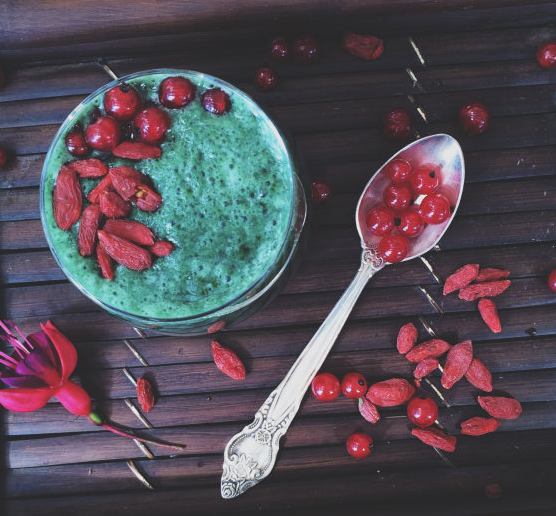
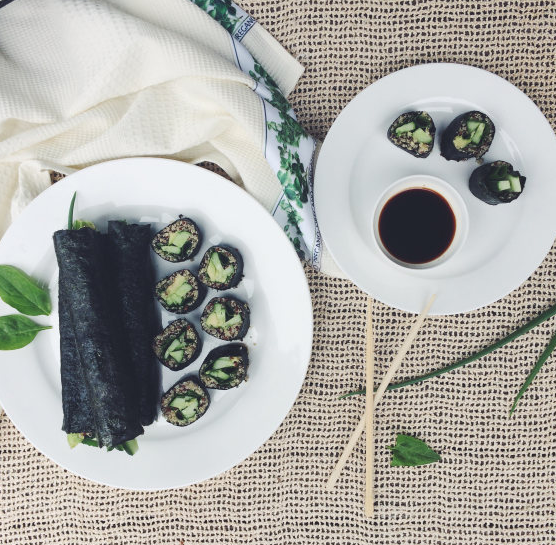
7. Decorate The Scene
Food photography tips are all about balancing the flavors of your dish with a captivating background. But if you want to make sure that both elements aren’t forgotten, consider adding other smaller items like spices or cooking utensils for an extra bit of detail in every photo!
8. Keep It Simple
Sometimes the best option is to keep it really simple. If your food subject has a bold color and shape, then don’t use heavy decorations that would distract from this visual impactful point-of-view (POV). For example: if you’re framing an appetizing dish with something like dark green leaves decorating its centerpiece against the light blue sky–that’s attractive enough!
But maybe not so much when we take away all other elements in between; leave them out entirely by focusing only on one main element which becomes very clear due to both simplicity and complexity at once because there are multiple colors but also shapes present within those same two categories visible simultaneously as well.
9. Enhance The Colors With Editing
Food is so wonderful, but sometimes your iPhone doesn’t capture the colors quite right. You might want them more vivid or slightly muted- whatever suits you best!
You can easily adjust color after taking a photo by using one of my favorite apps for editing photos on an iOS device called VSCO Cambridge court filter kit includes 20 different filters that are easy to use with individual adjustment tools also available if needed.
You can also use a lightbox for food product photography, which gives us a bright electric setup. If you want to buy a photo lightbox and learn more about food photography, Take a look at our site photo lightboxes.
Conclusion
Food photography is an art, not an exact science. While these are some rough guidelines that will help you get better pictures of your food, don’t let them stop you from experimenting with filters, lighting techniques, and composition that can bring a creative edge to your photography.