Do you want to take lacklustre photos of your delicious dishes? Do you want your food photography to make mouths water and inspire cravings from a single glance? Look no further! This article will provide you with top-notch food photography lighting tips that will transform your culinary creations into mouthwatering works of art. We have got you covered from the perfect angles to the ideal use of natural light and artificial lighting techniques. Get ready to take your food photography skills to the next level and leave everyone drooling over your stunning images.
Food Photography Lighting Tips
If you want lighting advice for food photography, keep reading!
{ "@context": "https://schema.org/", "@type": "FAQPage", "mainEntity": [ { "@type": "Question", "name": "How do I make my food look more appetizing in photos?", "acceptedAnswer": { "@type": "Answer", "text": "There are a few things you can do to make your food look more appetizing in photos. First, make sure the food is clean and well-presented. You can also use props to add color and interest to the photo." } }, { "@type": "Question", "name": "What are some tips for taking better food photos?", "acceptedAnswer": { "@type": "Answer", "text": "Some tips for taking better food photos include using natural light whenever possible, cleaning and styling the food carefully, and using interesting props to add color and interest to the photo. Finally, use natural light whenever possible to create a bright and inviting image." } }, { "@type": "Question", "name": "What are some common mistakes people make when photographing food?", "acceptedAnswer": { "@type": "Answer", "text": "Some common mistakes people make when photographing food include using too much flash, not using enough light, and using the wrong props. It's also important to make sure the food is properly framed and composed in the photo." } } ] }1. Find Natural Light
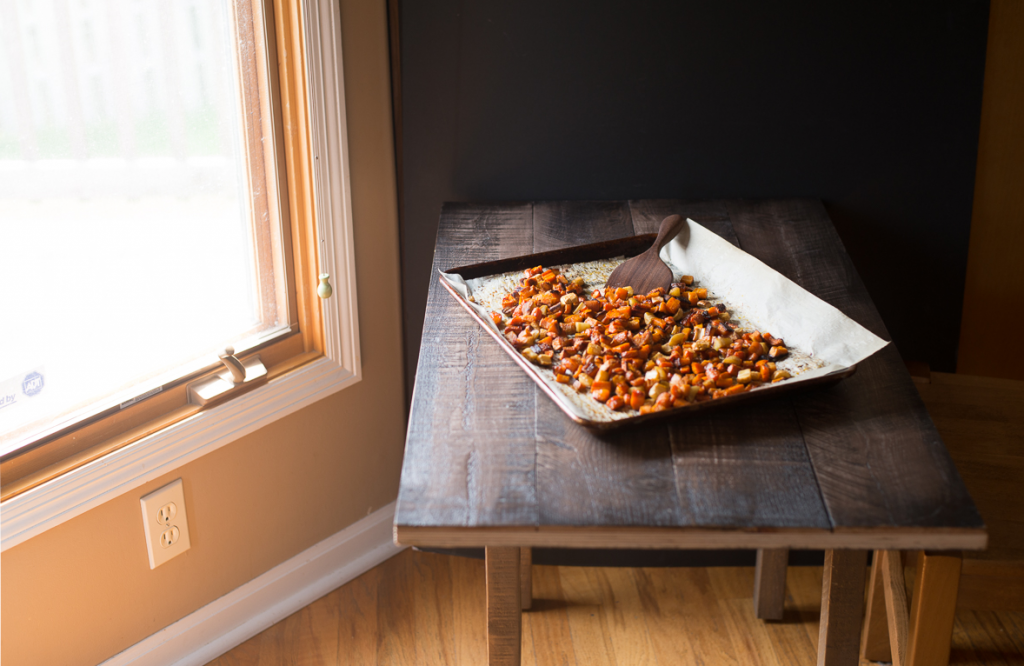
Natural light is your finest option for taking the ideal picture. You can accomplish this in one of two ways: placing something next to a window that receives indirect sunlight or simply having enough windows to light up the entire room.
When taking pictures, it’s crucial to check that there aren’t any overhead or nearby lamps because the sun’s rays will illuminate your subject and won’t produce any muddled orange artificial bulbs.
2. Choose the Right Camera and Settings
The first step in taking food photos is to choose the proper camera and camera settings. I would advise shooting in manual mode using a digital SLR camera. You’ll be able to manage the light more effectively as a result. Determine whether your point-and-shoot has an aperture priority setting or manual mode.
I typically use aperture priority mode with ISO 100 and a shutter speed of 1/125 sec for my food photography. Select the lowest feasible aperture (f-number) when shooting in aperture priority mode. You will have a greater depth of field as a result.
3. Placement and Angle of the Food Subject
When photographing food, it’s crucial to consider the mood we want to convey in our photographs. Photographing the food at a low angle will make viewers feel as though they are starving. On the other hand, we would shoot the dish from a higher angle if we wanted to make it appear more sophisticated.
I typically set the food on a plain white plate for my shots and strive to capture as much natural light as possible. A diffuser is another tool I like to employ to soften the light.
4. Use Props and Accessories Wisely
We may enhance our food photography using props and accessories. For instance, if we photograph dessert, we can drizzle some chocolate syrup or whipped cream on top of the dish. However, it’s crucial to exercise restraint. Keep props to a minimum and let the meal be the primary attraction.
5. The Final Product
Here’s a quick illustration of two methods for taking pictures of an English muffin. The photo taken from a higher perspective didn’t make me very happy because it appeared more delicious than the one taken from a lower angle.
6. Invest in a Light Box
Consider photographing food in complete darkness. You can do it with a DIY photo lightbox! This fantastic indoor choice will make any dish look as nice if not better than what it would have looked without one at all due to its soft enlighten that makes everything appear more appetizing. It is the ideal answer when sunshine is scarce, and no other options exist. { "@context": "https://schema.org/", "@type": "HowTo", "name": "Food Photography Lighting Tips", "description": "Food Photography Lighting Tips: Choosing food photography lighting is one of the most important decisions that you can make when it comes to food photography. Not only does food need to look appetizing, but it also needs to be well lit in order for your food photos not to look too dark or too bright.", "image": "https://photolightboxes.net/wp-content/uploads/2021/12/Food-Photography-Lighting-Tips-1024x666.png", "totalTime": "PT10M", "estimatedCost": { "@type": "MonetaryAmount", "currency": "USD", "value": "10$" }, "supply": [ { "@type": "HowToSupply", "name": "camera" } ], "tool": [ { "@type": "HowToTool", "name": "tripod" } ], "step": [ { "@type": "HowToStep", "text": "When it comes to getting the perfect photo, natural light is your best bet. There are two ways you can go about this: either by putting something near a window with indirect sun or just having some windows in general that provide enough illumination for all of those beautiful shadows and highlights on food!", "image": "https://photolightboxes.net/wp-content/uploads/2021/12/Food-Photography-Lighting-Tips-1024x666.png", "name": "Find Natural Light", "url": "https://photolightboxes.net/food-photography-lighting-tips/#1_Find_Natural_Light" }, { "@type": "HowToStep", "text": "The first step is to select the right camera and camera settings for photographing food. If you are using a digital SLR camera, I would recommend shooting in manual mode. This will allow you to have more control over the light. If you are only using a point-and-shoot, try to find out if it allows you to use manual mode or aperture priority mode.", "image": "https://photolightboxes.net/wp-content/uploads/2021/12/Food-Photography-Lighting-Tips-1024x666.png", "name": "Choose the Right Camera and Settings", "url": "https://photolightboxes.net/food-photography-lighting-tips/#2_Choose_the_Right_Camera_and_Settings" }, { "@type": "HowToStep", "text": "When shooting the food, it is important to keep in mind what type of feeling we want to portray with our photos. If we want people to feel like they are really hungry, we would photograph the food from a low angle. On the other hand, if we want to make the food look more elegant, we would photograph it from a higher angle.", "image": "https://photolightboxes.net/wp-content/uploads/2021/12/Food-Photography-Lighting-Tips-1024x666.png", "name": "Placement and Angle of the Food Subject", "url": "https://photolightboxes.net/food-photography-lighting-tips/#3_Placement_and_Angle_of_the_Food_Subject" }, { "@type": "HowToStep", "text": "Sometimes, we can use props and accessories to enhance our food photos. For example, if we are photographing a dessert, we can add some whipped cream or chocolate syrup on top of the food. However, it is important not to go overboard with it. Use props sparingly and let the food be our main focus.", "image": "https://photolightboxes.net/wp-content/uploads/2021/12/Food-Photography-Lighting-Tips-1024x666.png", "name": "Use Props and Accessories Wisely", "url": "https://photolightboxes.net/food-photography-lighting-tips/#4_Use_Props_and_Accessories_Wisely" }, { "@type": "HowToStep", "text": "Here’s a simple example of how you can photograph an English Muffin using two different approaches. I wasn’t too happy with the photo taken from a higher angle because it doesn’t look as appetizing as the one photographed from a lower angle.", "image": "https://photolightboxes.net/wp-content/uploads/2021/12/Food-Photography-Lighting-Tips-1024x666.png", "name": "The Final Product", "url": "https://photolightboxes.net/food-photography-lighting-tips/#5_The_Final_Product" }, { "@type": "HowToStep", "text": "Imagine taking your food shots in the dark. With a DIY photo lightbox, you can! The perfect solution for when sunlight is scarce and there are no other options but this great indoors option will make any dish look as good if not better than what it would have looked without one at all because of its soft illuminate that makes everything appear more appetizing.", "image": "https://photolightboxes.net/wp-content/uploads/2021/12/Food-Photography-Lighting-Tips-1024x666.png", "name": "Invest in a Light Box", "url": "https://photolightboxes.net/food-photography-lighting-tips/#6_Invest_in_a_Light_Box" } ] }
Conclusion
In conclusion, lighting plays a crucial role in food photography. By understanding the different types of lighting and how they can enhance or detract from a dish, photographers can create stunning and appetizing images that engage viewers. Each option brings unique qualities and challenges, from natural light to artificial sources. Experimenting with different setups and techniques can help photographers find their signature style and create captivating images that make mouths water. So, next time you’re preparing to photograph your culinary creations, remember to consider the role of lighting and how it can elevate your food photography to new heights. Happy shooting!
Note: Interested to know How to Take Pictures of Food Professionally? Read here.
Frequently Asked Questions about Food Photography
How do I make my food look more appetizing in photos?
There are a few things you can do to make your food look more appetizing in photos. First, make sure the food is clean and well-presented. You can also use props to add color and interest to the photo.
What are some tips for taking better food photos?
Some tips for taking better food photos include using natural light whenever possible, cleaning and styling the food carefully, and using interesting props to add color and interest to the photo. Finally, use natural light whenever possible to create a bright and inviting image.
What are some common mistakes people make when photographing food?
Some common mistakes people make when photographing food include using too much flash, not using enough light, and using the wrong props. It’s also important to make sure the food is properly framed and composed in the photo.


