How to Take Pictures of Clothes! Clothes are a huge part of how we present ourselves to the world. The way that you dress speaks volumes about how you feel about yourself, how much money you have, and how fashionable you are. It’s hard to find clothes that fit well, but it is even harder to find clothes that look good on camera! This article will teach you how to take pictures of your clothes so that they can be shared with friends or sold online.
I’ve been taking pictures of clothes for nine years now. In order to take good pictures of your clothes, you need to understand PRODUCTION, LIGHTING, SET UP YOUR PHOTO STUDIO, and MODEL’S POINT OF VIEW. This blog post will explain how I take pictures of clothes with just a simple point-and-shoot digital camera.
I want to emphasize that my method is not a unique way to take pictures, as there are many professional fashion photographers who have trained for years to be able to take the pictures you see in magazines and on other people’s blogs. Also, this method is good for clothes that look good from every angle; not all clothes can be photographed like that.
How to Take Pictures of Clothes
The best way to learn is to experiment, so I hope you will try it out when you photograph your own clothes! (If not, just read on!)
Now let’s get started!
1. PRODUCTION
This is one of the most important things in taking pictures of clothes. How you present your clothes is essentially what you want people to see when they look at your pictures. You want to have a clean and neat background and of course light.
- Background
Depending on the color of your clothes, you should choose a different background color. Bright colors stand out more than dark colors, so if you have bright colors it will be easier. I chose white as the background for this picture because it goes well with dark clothes and is also my favorite color! Also, by putting your hand on top of the clothes, or pinching them together at the waist, you can make your photo look more professional.
- Production
If you have a digital camera (point-and-shoot or SLR) I find that the macro mode works best. Also, if you put your camera on a surface and take pictures at eye level, your photo will come out much better than having to take pictures from above.
2. Lighting Setup
Your lighting should be nice and even. This is important if your pictures look too dark or light in some areas, not so much for other people’s computer screens since the pixels will take care of it. If you have a cheap camera without good control of the lighting, or if you have to take pictures from above, I recommend using a white piece of paper as a reflector. It will help eliminate gray shadows on your clothes and is also good for eliminating facial shadows.
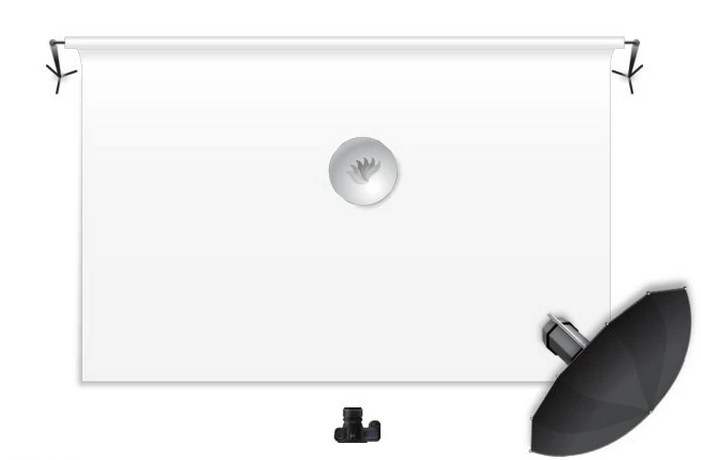
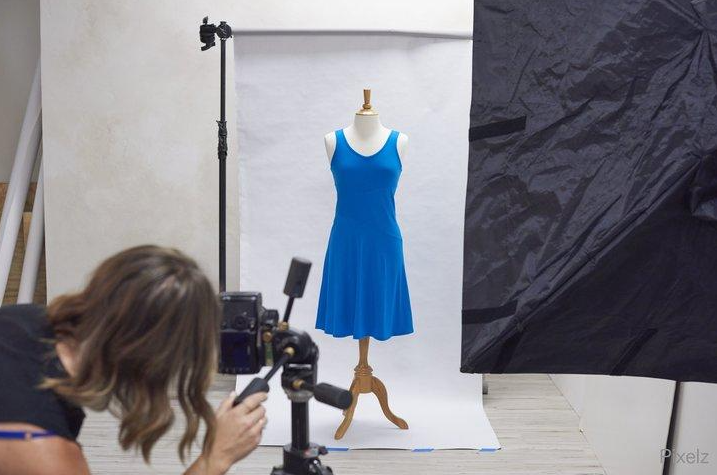
3. Set up Your Photo Studio
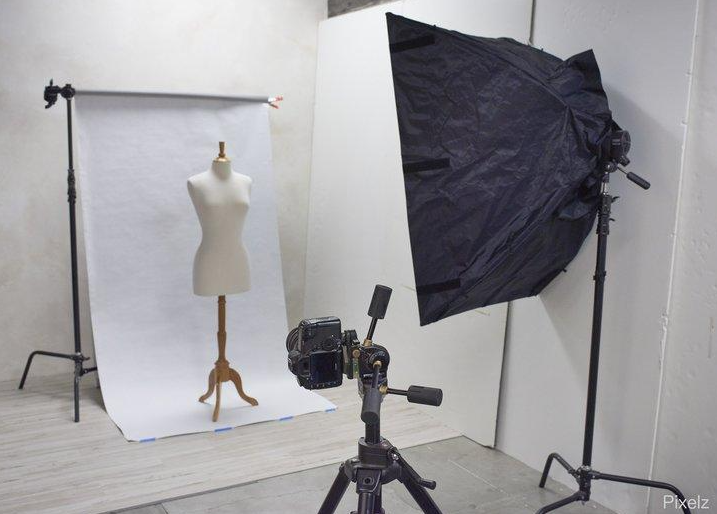
You don’t have to shell out the big bucks for a professional photographer’s studio. With just a few items, you can turn nearly any room with space into an instant photography backdrop! You’ll need a camera; a tripod (or C-stand); a white wall as your background and some natural light if it’s not already present in whatever setting this will take place on location or inside someone else building like our example here.
To make things really simple and inexpensive but still look good enough so viewers know there was no Photoshop involved when editing afterward – invest only about 20% more money at first until we go over how easy tips are found online right now
4. Product in Action
This is not something that I do regularly, but it’s good to try out! It helps show what clothes are really for and tells readers more about the product. For example, if you wear a cute skirt with tights or leggings on top, it might look like a skirt. Taking pictures of the same outfit with bare legs or stockings, however, will make it look more like what types of clothes to wear during those seasons.
5. Model’s Point of View
A model’s point of view while taking pictures of clothes can be quite different from the photographer’s. For one, the model is usually more focused on how the clothes look on them and how they feel wearing them. They also have to worry about their posture and making sure that the clothes are fitting well. All of these things can make it difficult for the model to really relax and enjoy the photo shoot. However, when everything comes together and the photos turn out great, it is all worth it in the end.
6. Take the photo
Double-click your shutter release button and snap away!
The moment you’ve been waiting for is finally here. Directing a camera can be difficult, but the more experience that comes with shooting makes it easier to produce great photos in any light or situation without guessing at settings on an unfamiliar device. Try focusing once before taking pictures as well so nothing gets lost because of shaky hands – let this new skill flow naturally from practice!
7. Shooting Clothes from Multiple Angles
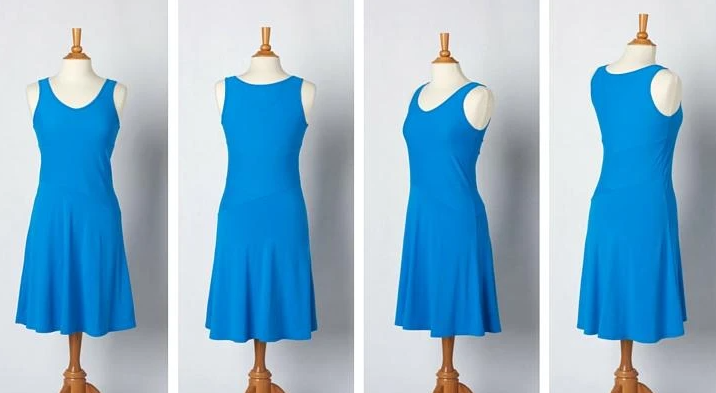
In order to take the best pictures of clothes, it is important to shoot from multiple angles. This will allow you to get a full view of the garment and capture all of the details.
When taking pictures from different angles, be sure to vary your distance from the subject as well. This will give you a variety of shots to choose from and help you capture the best possible image.
By taking the time to shoot from multiple angles, you will be able to get the perfect picture of any piece of clothing. This method takes a bit more time, but it is worth it in order to get professional-looking results.
Conclusion:
In conclusion, taking pictures of clothes can be easy and fun once you get the hang of it. By following the steps in this article, you can become a pro at taking pictures of clothes in no time! So go out there, grab your camera, and start snapping some fashion shots!
Also, Read>> Clothing Photography Lighting Setup?