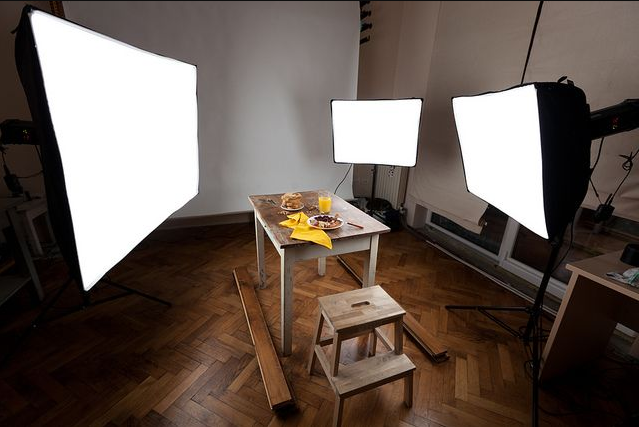
Lighting Setup for Food Photography! The lighting setup for food photography is one of the most important aspects to consider. The lighting should be soft, overhead lighting that is even across the whole surface of the dish. This will make sure that shadows are avoided and colors look their best.
Have you ever wondered how food photographers get the lighting just perfect? You may think that they are blessed with natural lighting, but in reality, it is often quite the opposite. Food photography lighting setups can be tricky – especially if you’re trying to create a beautiful shot on your own. This article will help teach you about food photography lighting and give some great tips for making your setup look professional!
Lighting Setup for Food Photography
I want to write a post about food photography lighting setup, but I’m not sure where to start.
I guess I’ll start with the basics: there are three main light sources you can use in food photography: natural light, artificial light, and mixed light.
Natural Light
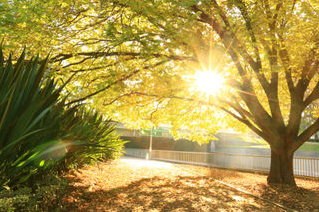
Natural light is great for food photography because it’s soft and diffused. It creates a warm, inviting atmosphere that’s perfect for food photography, but it’s not always reliable. Natural light changes depending on the weather, time of day, and season Are great because it’s soft and diffused. It creates a that’s perfect for, but it’s not always reliable. Natural light changes depending on the weather, time of day, and season.
Artificial Light
Artificial light is ideal because the quality of light stays consistent. Artificial lights are also able to produce more light than natural lighting. This allows you to shoot during darker months, but artificial lighting can be harsh. To create a warm atmosphere with artificial lights, install softboxes or diffuse other lamps.
is ideal because the. Artificial lights are also able to produce more light than natural lighting. This allows you to shoot during darker months, but artificial lighting can be harsh. To create a warm atmosphere with artificial lights, install softboxes or diffuse other lamps.
Mixed-Light
Mixed-light is a combination of natural and artificial light sources. This can be tricky because it’s difficult to control the quality and direction of light, but it can be a great way to add depth and dimension to your photos.
Explanation
Once you’ve chosen your light source, you need to decide on the placement of your lights. Place your main light above and to the side of your subject. This will create a natural-looking shadow below your subject. You can use a fill light to reduce the shadow, or you can place your light behind your subject to create a backlight effect.
above and to the side of your subject. This will create a natural-looking below your subject. You can use a to reduce the shadow, or you can place your light behind your subject to create an effect. Finally, you need to choose the right lens. A wide-angle lens will give you more depth of field, while a telephoto lens will compress your images and make them appear more dramatic.
While a will compress your images and make them appear more dramatic. Experiment with different light sources and lenses to create the perfect food photography lighting for your images.
With these tips, you’ll be ready to capture amazing photos of your culinary creations.
Conclusion
Remember, your light source is the most important factor in creating beautiful food photography. Experiment with different light sources to learn which one looks best on your blog. Once you’ve mastered your equipment and learned how to use it properly, you’ll be able to create stunning images of all your recipes! You can also use a photo lightbox for food photography, which gives us a bright electric setup. If you want to buy a photo lightbox and learn more about photography, Take a look at our site photo lightboxes. Good luck!
Thank you for reading this post…🙂
Note: Interested to know about How to Take Pictures of Food Professionally? Read here.
Frequently Asked Questions
Q1: Why is lighting essential in food photography?
A1: Lighting is crucial in food photography because it impacts how food looks in photos. Proper lighting enhances texture, colour, and visual appeal, making the food more appetizing.
Q2: What are the primary lighting setups used in food photography?
A2: The two primary lighting setups are natural light and artificial light. Natural light utilizes sunlight, while artificial light involves artificial sources like strobes, continuous lights, or speedlights.
Q3: What is diffused lighting, and why is it popular in food photography?
A3: Diffused lighting softens and evenly spreads light, reducing harsh shadows and highlights. It’s popular in food photography because it produces a flattering, natural look that highlights food details.
Q4: How can a reflector be used in food photography lighting?
A4: A reflector can bounce light onto the subject, filling in shadows and reducing contrast. It often adds highlights and lifts clouds, creating a balanced and appealing image.
Q5: What is the “golden hour,” and why is it favoured by food photographers?
A5: The “golden hour” refers to the period shortly after sunrise or before sunset when the sunlight is soft, warm, and diffused. Food photographers favour it for its gentle, flattering light that adds a beautiful, warm glow to food photos.


