Bird Photography Tips for Beginners! Are you a beginner bird-watcher with a passion for photography? Well, get ready to take flight into the world of bird photography! Capturing these feathered creatures in their natural habitat can be both challenging and rewarding. But fear not, dear reader, for I am here to provide you with some invaluable tips that will help you spread your wings and soar in this exciting new hobby. From selecting the right equipment to mastering composition and patience, this article will guide you through all the essential techniques needed to capture stunning photographs of our avian friends.
Bird Photography Tips for Beginners
If you’re new to bird photography, here are a few tips to help get you started.
Tip 1: Find the Right Location
When you are starting out in bird photography, the first thing you need to do is find the right location. This means finding a place where there are a lot of birds and where they are easy to photograph. Some good places to start are nature preserves, parks, and wetlands.
When looking for a location, keep in mind the time of year. Different birds will be more prevalent at different times of the year. For example, many water birds can be found near lakes and rivers during the spring and summer months, while warblers can be found in trees during the fall.
Tip 2: Use a Tripod
As a beginner bird photographer, you may be wondering how to keep your camera steady for sharp photos. One solution is to use a tripod. Tripods are especially important when photographing birds in flight, as even the slightest movement can cause your photo to be blurry.

There are many different types of tripods available, so you can find one that’s perfect for your needs. Tripods with ball heads are ideal for birds photography, as they allow you to quickly and easily adjust the angle of your camera.
When setting up your tripod, make sure it’s stable and level. You also want to make sure the center column is locked in place, as this will help prevent any unwanted movement. If possible, try to use a beanbag or sandbag to weigh down the tripod legs.
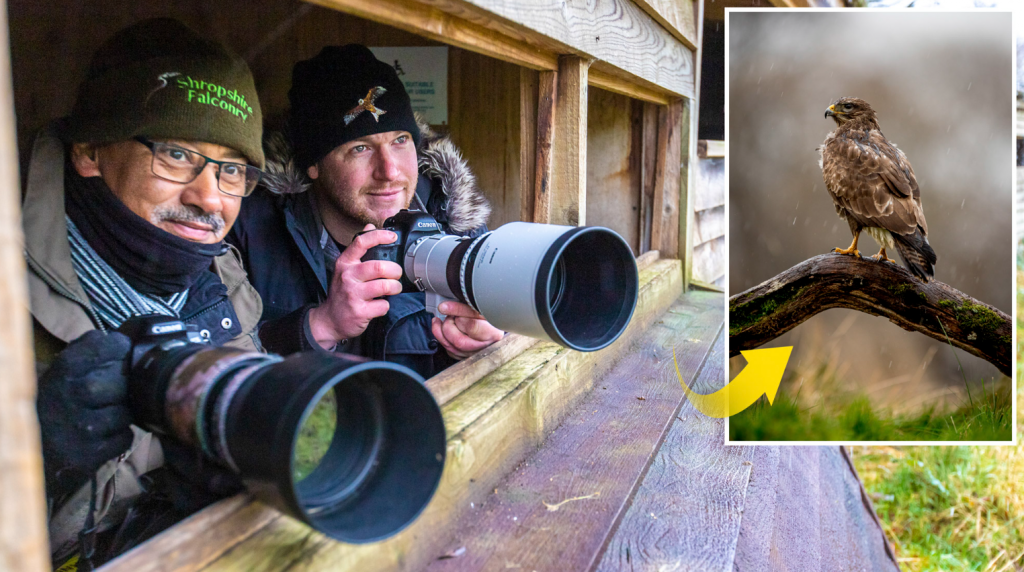
Tip 3: Use the Right Lens
As a beginner bird photographer, you may be wondering what lens to use. The truth is, there is no one perfect lens for bird photography. It all depends on what type of birds you are trying to photograph and the shooting conditions.
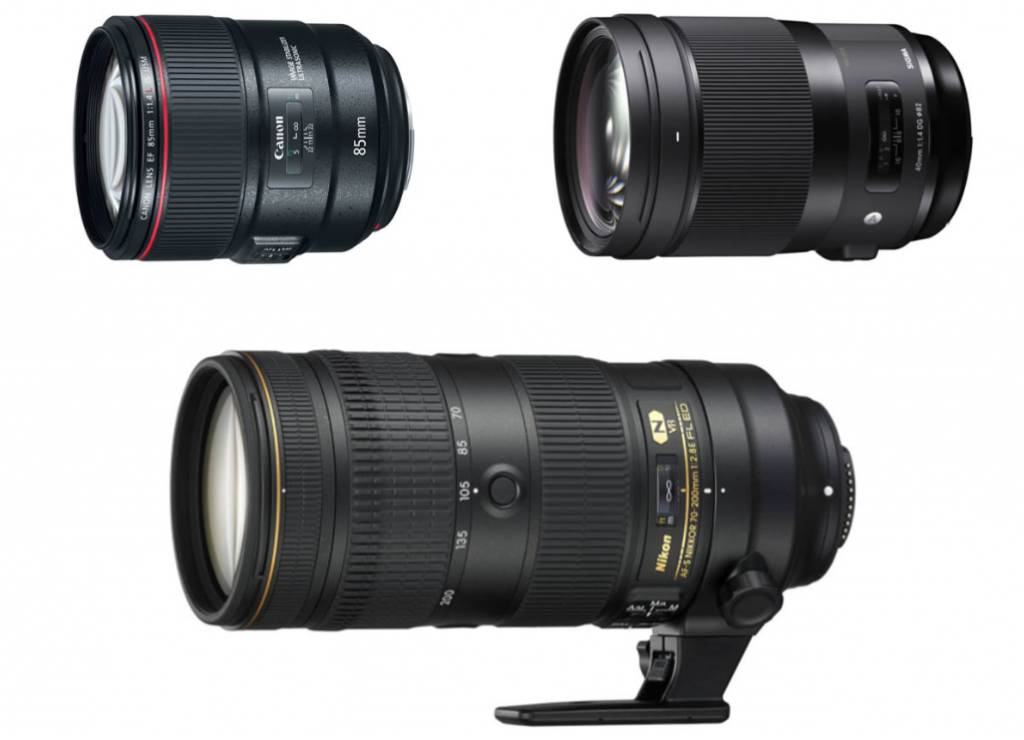
In general, a telephoto lens is the best option for photographing birds. This type of lens will allow you to get close to your subject without disturbing them. If you are photographing smaller birds, a 55-300mm lens should be sufficient. For larger birds, you will need a longer telephoto lens, such as a 300mm or 400mm lens.
Keep in mind that not all lenses are created equal. You will want to choose a lens with good optical quality if you want sharp photos of birds in flight.
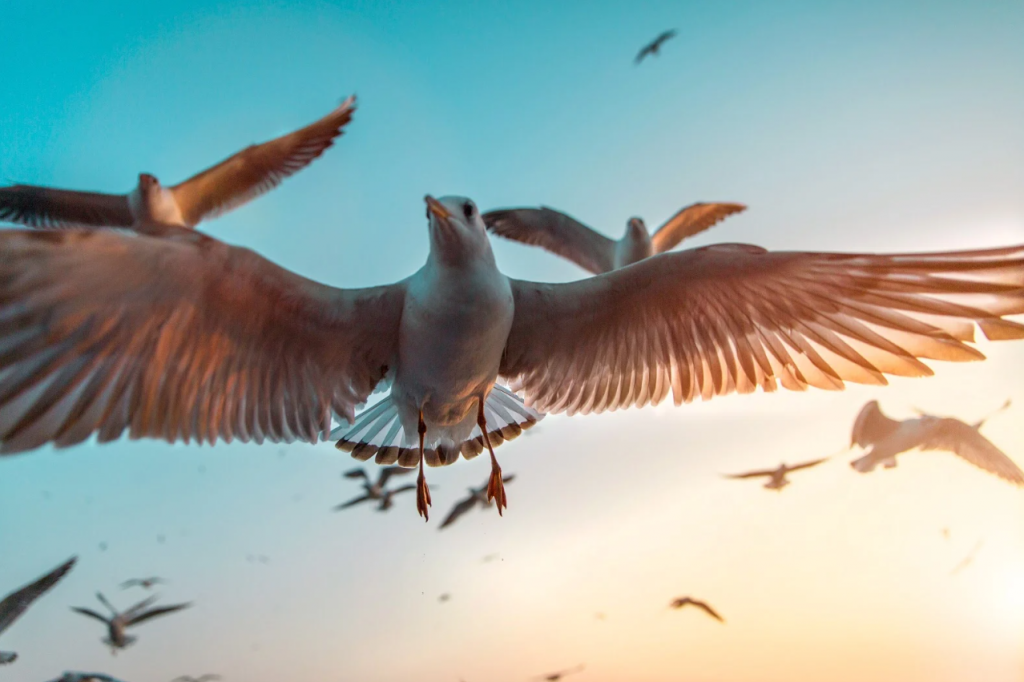
Tip 4: Use a Fast Shutter Speed
When photographing birds, it’s important to use a fast shutter speed in order to freeze the action. This will help you capture clear, sharp images of your subject. If you’re using a digital camera, try increasing the ISO setting to get a faster shutter speed. You can also try using a tripod to keep the camera stable and minimize camera shake. Next, use a fast shutter speed to freeze the action. For most birds, 1/1000th of a second or faster should be adequate.
Tip 5: Capture the Action
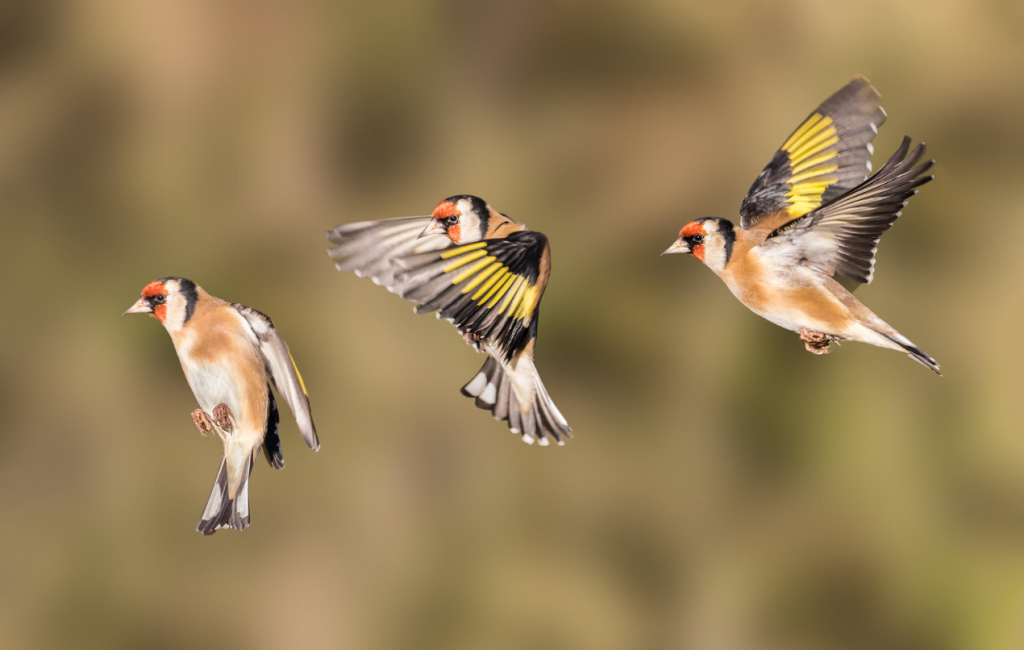
One of the joys of bird photography is capturing birds in action. Whether they’re taking flight, perched on a branch, or hunting for food, getting an image of a bird in motion can be very rewarding. To capture the best action shots, you’ll need to use some techniques that are specific to this type of photography.
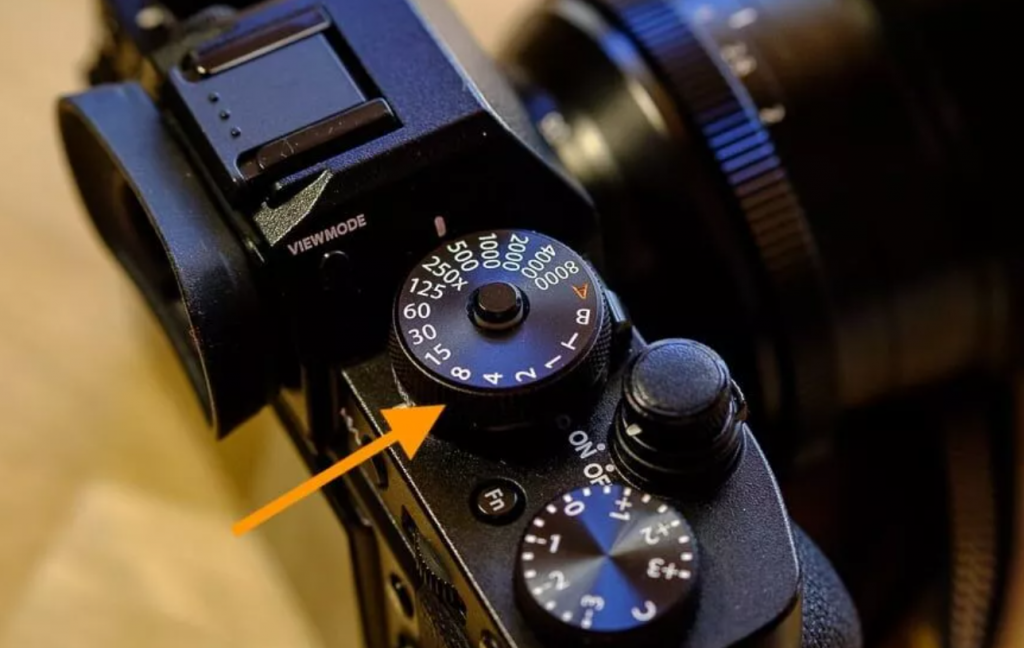
Tip 6: Use the Right Settings
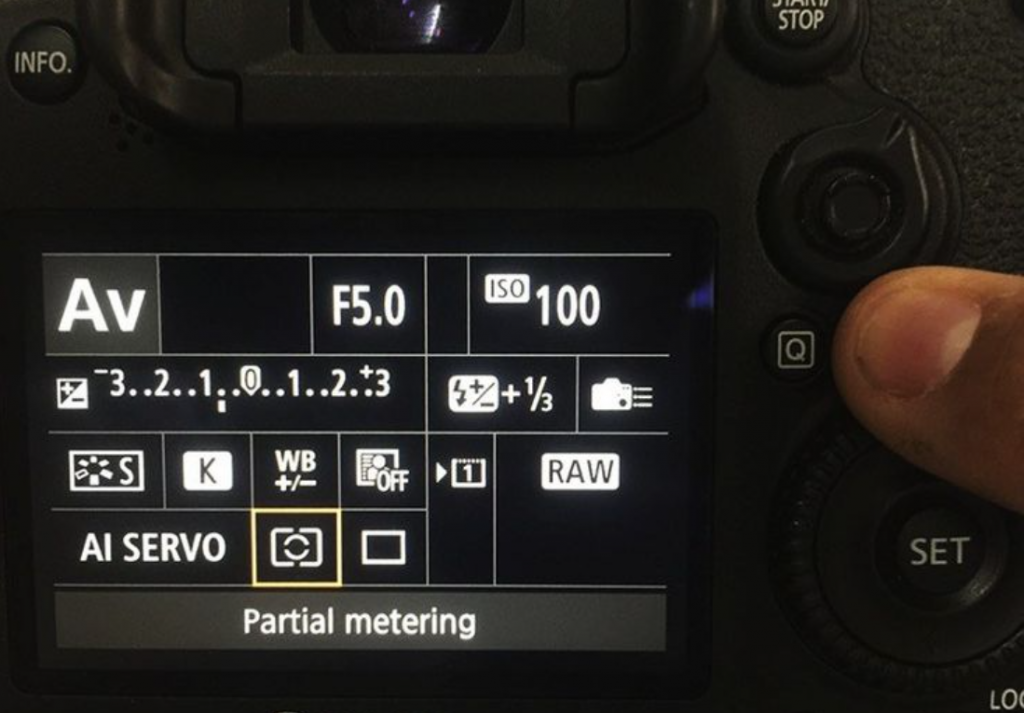
If you’re new to bird photography, there are a few things you need to know before you start snapping pictures. First, make sure your camera is set to “P” mode, which will keep your shutter open for longer periods of time to get better shots. Second, keep your ISO low so that the exposure is less bright and there’s more contrast in your photos. Third, use a tripod if possible to minimize movement and keep your shots sharper.
Tip 7: Keep Your Camera Steady
One of the most important aspects of bird photography is keeping your camera steady. This can be done in a number of ways, but a tripod is the best option. If you don’t have a tripod, you can use a beanbag or some other support to rest your camera on.
Another way to keep your camera steady is to use the mirror lock-up feature. This will help to reduce vibrations caused by the shutter. You can also use a cable release to minimize vibration.
Tip 8: Be Patient!
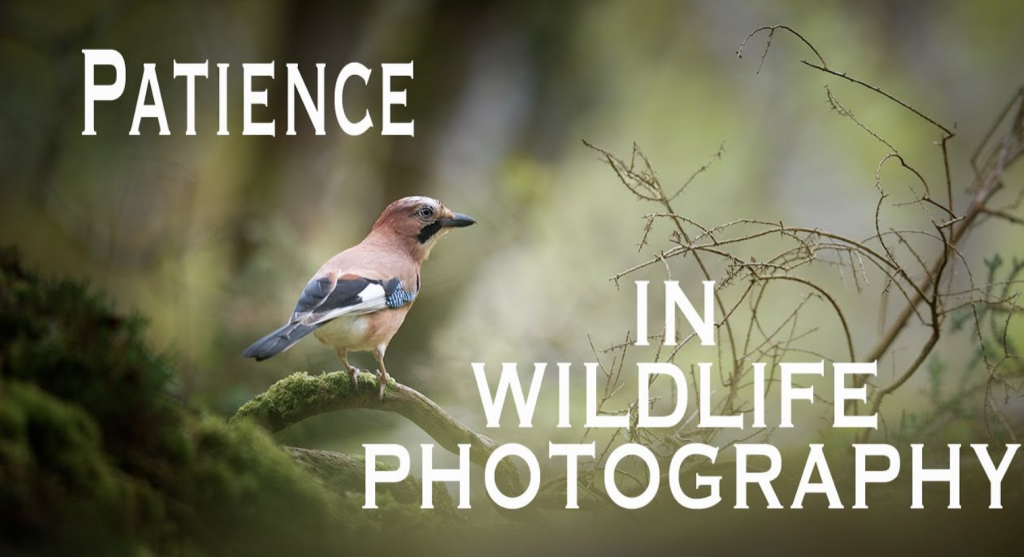
Patience is key when photographing birds. With patience, you will increase your chances of capturing a good photo. You may have to wait for the bird to perch in a good spot, or for it to fly close enough for a good shot. If you are too impatient, you may end up missing the shot altogether. { "@context": "https://schema.org/", "@type": "HowTo", "name": "Bird Photography Tips for Beginners", "description": "Bird Photography Tips for Beginners! Bird photography is one of the most popular genres of photography because it allows photographers to capture beautiful and unique images of birds in their natural habitats. Learning how to take good bird photos requires a bit of knowledge about bird anatomy and behavior, but with a little practice, anyone can produce excellent photographs.", "image": "https://photolightboxes.net/wp-content/uploads/2022/06/Bird-Photography-Tips-for-Beginners-1-1024x682.png", "totalTime": "PT10M", "estimatedCost": { "@type": "MonetaryAmount", "currency": "USD", "value": "10$" }, "supply": [ { "@type": "HowToSupply", "name": "Tripod" } ], "tool": [ { "@type": "HowToTool", "name": "camera" } ], "step": [ { "@type": "HowToStep", "text": "When you are starting out in bird photography, the first thing you need to do is find the right location. This means finding a place where there are a lot of birds and where they are easy to photograph. Some good places to start are nature preserves, parks, and wetlands.", "image": "https://photolightboxes.net/wp-content/uploads/2022/06/Find-the-Right-Location-1-1024x716.png", "name": "Find the Right Location", "url": "https://photolightboxes.net/bird-photography-tips-for-beginners/#Tip_1_Find_the_Right_Location" }, { "@type": "HowToStep", "text": "As a beginner bird photographer, you may be wondering how to keep your camera steady for sharp photos. One solution is to use a tripod. Tripods are especially important when photographing birds in flight, as even the slightest movement can cause your photo to be blurry.", "image": "https://photolightboxes.net/wp-content/uploads/2022/06/Use-a-Tripod-2-1024x666.png", "name": "Use a Tripod", "url": "https://photolightboxes.net/bird-photography-tips-for-beginners/#Tip_2_Use_a_Tripod" }, { "@type": "HowToStep", "text": "As a beginner bird photographer, you may be wondering what lens to use. The truth is, there is no one perfect lens for bird photography. It all depends on what type of birds you are trying to photograph and the shooting conditions.", "image": "https://photolightboxes.net/wp-content/uploads/2022/06/Use-the-Right-Lens-1024x740.png", "name": "Use the Right Lens", "url": "https://photolightboxes.net/bird-photography-tips-for-beginners/#Tip_3_Use_the_Right_Lens" }, { "@type": "HowToStep", "text": "When photographing birds, it’s important to use a fast shutter speed in order to freeze the action. This will help you capture clear, sharp images of your subject. If you’re using a digital camera, try increasing the ISO setting to get a faster shutter speed. You can also try using a tripod to keep the camera stable and minimize camera shake. Next, use a fast shutter speed to freeze the action. For most birds, 1/1000th of a second or faster should be adequate.", "image": "https://photolightboxes.net/wp-content/uploads/2022/06/Use-a-Fast-Shutter-Speed-1024x648.png", "name": "Use a Fast Shutter Speed", "url": "https://photolightboxes.net/bird-photography-tips-for-beginners/#Tip_4_Use_a_Fast_Shutter_Speed" }, { "@type": "HowToStep", "text": "One of the joys of bird photography is capturing birds in action. Whether they’re taking flight, perched on a branch, or hunting for food, getting an image of a bird in motion can be very rewarding. To capture the best action shots, you’ll need to use some techniques that are specific to this type of photography.", "image": "https://photolightboxes.net/wp-content/uploads/2022/06/Capture-the-Action-1024x650.png", "name": "Capture the Action", "url": "https://photolightboxes.net/bird-photography-tips-for-beginners/#Tip_5_Capture_the_Action" }, { "@type": "HowToStep", "text": "If you’re new to bird photography, there are a few things you need to know before you start snapping pictures. First, make sure your camera is set to “P” mode, which will keep your shutter open for longer periods of time to get better shots. Second, keep your ISO low so that the exposure is less bright and there’s more contrast in your photos. Third, use a tripod if possible to minimize movement and keep your shots sharper.", "image": "https://photolightboxes.net/wp-content/uploads/2022/06/Use-the-Right-Settings-1024x713.png", "name": "Use the Right Settings", "url": "https://photolightboxes.net/bird-photography-tips-for-beginners/#Tip_6_Use_the_Right_Settings" }, { "@type": "HowToStep", "text": "One of the most important aspects of bird photography is keeping your camera steady. This can be done in a number of ways, but a tripod is the best option. If you don’t have a tripod, you can use a beanbag or some other support to rest your camera on.", "image": "https://photolightboxes.net/wp-content/uploads/2022/06/Keep-Your-Camera-Steady-1024x572.png", "name": "Keep Your Camera Steady", "url": "https://photolightboxes.net/bird-photography-tips-for-beginners/#Tip_7_Keep_Your_Camera_Steady" }, { "@type": "HowToStep", "text": "Patience is key when photographing birds. With patience, you will increase your chances of capturing a good photo. You may have to wait for the bird to perch in a good spot, or for it to fly close enough for a good shot. If you are too impatient, you may end up missing the shot altogether.", "image": "https://photolightboxes.net/wp-content/uploads/2022/06/Be-Patient--1024x557.png", "name": "Be Patient!", "url": "https://photolightboxes.net/bird-photography-tips-for-beginners/#Tip_8_Be_Patient" } ] }
Conclusion
In conclusion, bird photography can be a fun and rewarding experience for beginners, but it takes practice and patience to get good shots. By following the tips in this article, you can improve your chances of capturing great photos of your favorite feathered friends. So get out there and start snapping!
Frequently Asked Questions
Q1: How do you photograph birds for beginners?
A1: To photograph birds as a beginner
Use a telephoto lens for close-ups.
Be patient and observe bird behaviour.
Shoot in good light conditions.
Use a fast shutter speed to avoid blur.
Focus on the bird’s eye for clarity.
Practice and study bird habitats.
Q2: How do you take good bird pictures?
To capture great bird pictures
Use a telephoto lens for close-ups.
Wait patiently for the right moment.
Shoot in good natural light.
Use a fast shutter speed to freeze motion.
Focus on the bird’s eye for sharpness.
Be mindful of the background and composition.
Q3: What are the best settings to photograph flying birds?
A3: For capturing flying birds
Use a fast shutter speed (1/1000s+).
Choose a medium aperture (f/5.6 to f/8).
Opt for a low to moderate ISO (200 to 800).
Use continuous autofocus and burst mode.
Adjust white balance as needed.
Practice and experiment for best results.
Q4: How do you get the sharpest bird pictures?
A4: To capture the sharpest bird pictures
Use a telephoto lens for close-ups.
Opt for a fast shutter speed (1/1000s or faster) to freeze motion.
Maintain a steady hand or use a tripod for stability.
Focus precisely on the bird’s eye for sharpness.
Shoot in good lighting conditions for clarity.
Consider using burst mode to capture multiple shots and increase the chance of getting a sharp image.
Practice and experiment to improve your technique.
Q5: Is bird photography difficult?
A5: Yes, bird photography can be challenging due to the need for specialized equipment, unpredictable bird behaviour, and the requirement for patience, skill, and knowledge of avian habits and habitats. Achieving great bird shots often demands practice, persistence, and an understanding of photography techniques specific to capturing birds in various environments and conditions.


