How to Set Up a Light Tent for Small Product Photography! A light tent is a great way to take beautiful photos of small products. By using a light tent, you can create professional-looking photos that will show off your product in its best light. You don’t need a large budget to buy a light tent; in fact, many of them are affordable and easy to set up. If you’re new to product photography or want to up your game, a light tent is a great tool to start with.
Setting up a light tent for small product photography can be a lot of work, but it’s well worth it. With the right setup, you can create beautiful photos that capture the details and nuances of your product in ways that a regular camera simply can’t. In this article, we will discuss how to set up a light tent for small product photography. { "@context": "https://schema.org/", "@type": "FAQPage", "mainEntity": [ { "@type": "Question", "name": "WHAT IS A LIGHT TENT?", "acceptedAnswer": { "@type": "Answer", "text": "A light tent or box is a simple and effective contraption that has translucent sides. It diffuses the light coming from multiple sources, so shadows aren’t visible on your subject’s face while also providing nearly shadowless lighting against any solid background – making it perfect for portraiture!" } }, { "@type": "Question", "name": "HOW DO YOU MAKE A LIGHT TENT?", "acceptedAnswer": { "@type": "Answer", "text": "Fit the inside of your box. So you’re lining the whole inside of the box with the poster board which will give you a nice reflective surface. And that’s pretty much it now for expediency’s sake." } }, { "@type": "Question", "name": "WHY USE A LIGHT TENT?", "acceptedAnswer": { "@type": "Answer", "text": "A light tent is a great way to take professional-looking product photos without having to learn how to use a complicated photo studio. By using a light tent, you can evenly distribute light around your subject, which results in a more polished photo." } }, { "@type": "Question", "name": "WHAT ARE THE LIMITATIONS OF THE LIGHT TENT?", "acceptedAnswer": { "@type": "Answer", "text": "The light tent is a great way to take photos of small objects, but it has some limitations. First, the object needs to be small enough to fit inside the tent. Second, the object can only be lit from the front, so you can’t get a good shot of the back of the object. Third, the lighting is usually quite even, so you can’t create shadows or highlights. Finally, the light tent can be difficult to set up and take down." } } ] }
How to Set Up a Light Tent for Small Product Photography
Here are some tips on how to set up your light tent for small product photography:
1. Choose the Right Light Tent
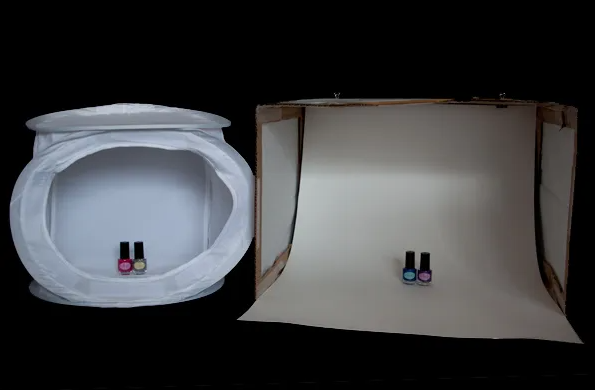
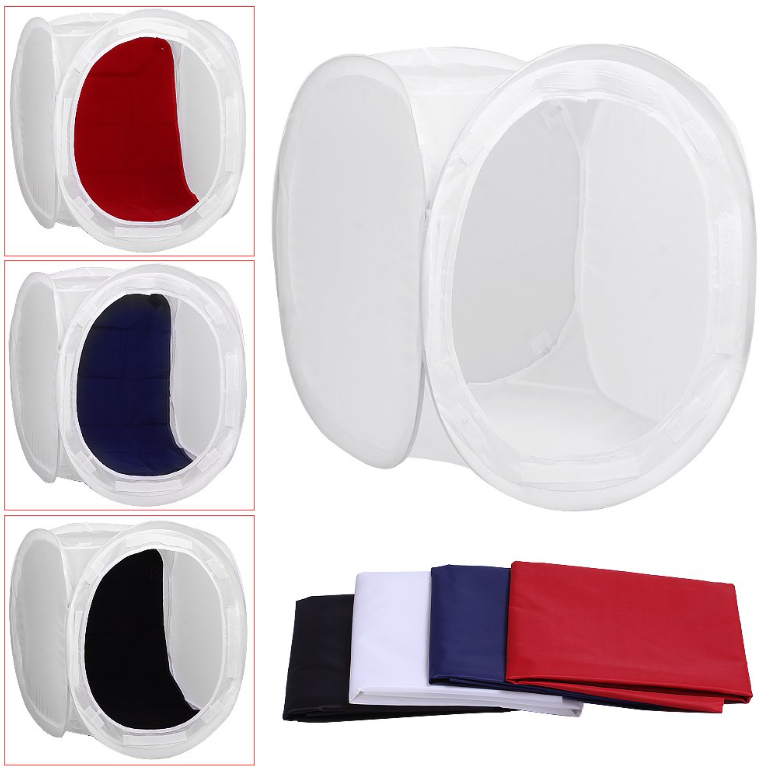
When choosing a light tent, there are a few factors to consider. The size of the product and the amount of light you need are important considerations. If your product is small, like a key chain or earrings, then you’ll need a light tent that’s smaller in size. If you’re shooting a larger product, like a watch or a dress, then you’ll need a larger light tent.
2. Size Your Light Tent Correctly
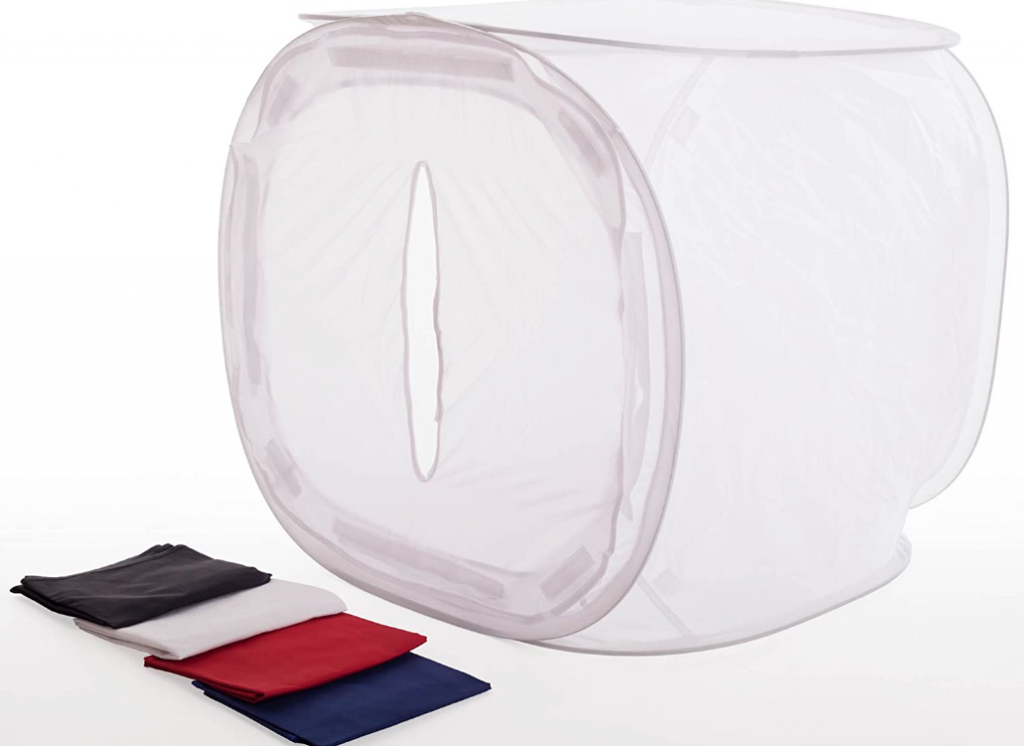
Lighting in your light tent is the basis for effective product photography. You will need to ensure that your tent is large enough to adequately light the products that you are photographing, but not so large that the lighting is too diffuse. If your light tent is too small, you may not be able to get the entire product in the frame because of where the lighting is concentrated.
3. Set Up Your Light Tent Correctly
In setting up the location of your tented illumination, consider the method of dispersing the light throughout it. If there are any dark areas, the product will likely appear darker there. You can counter this by keeping a diffuser or changing the position within which the light is distributed so that your tent becomes evenly illuminated by itself.
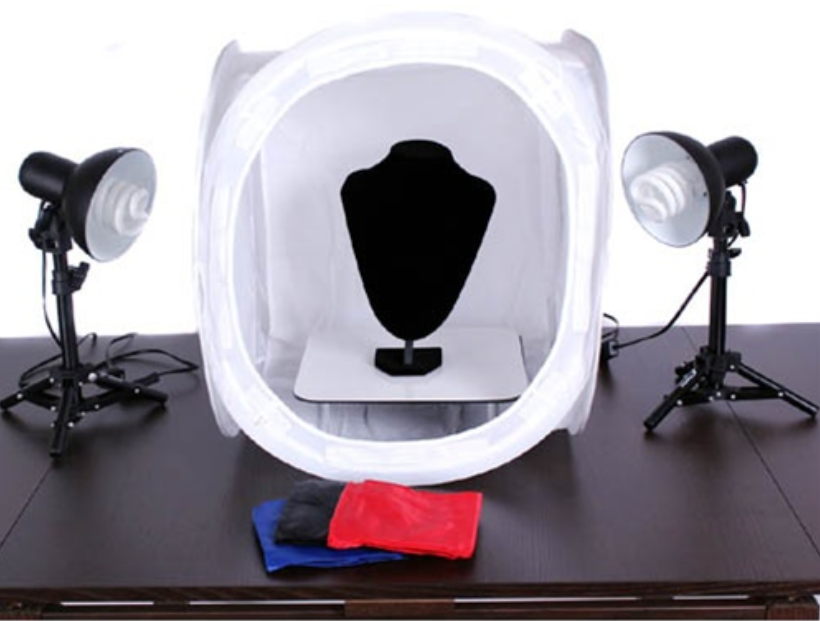
Another thing to keep in mind when setting up your light tent is the height of the light. If it is too high, your product will be cast in a shadow. Try to adjust the height of the light until it is at about eye level. This will help to ensure that your product is properly illuminated.
4. Choose the Right Lighting
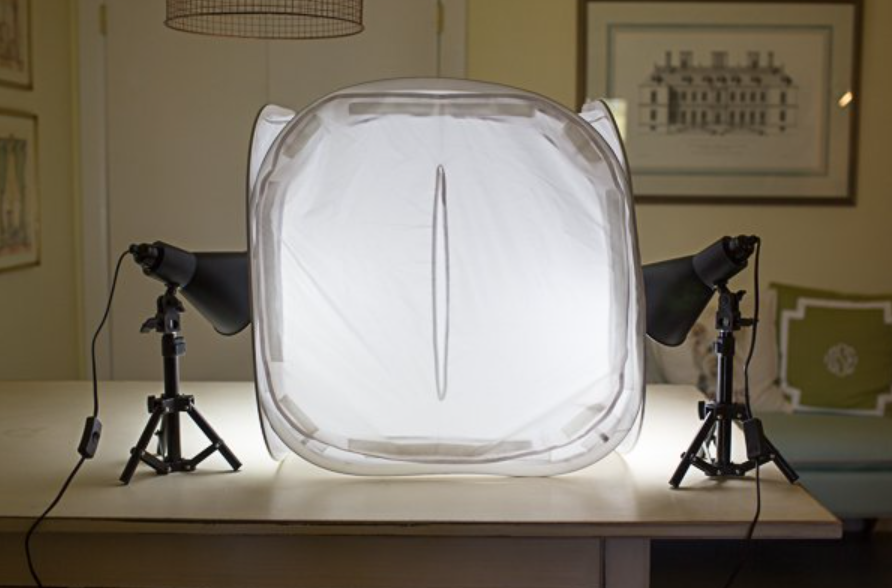
When photographing small products, it is important to use the right lighting. If you are using a light tent, be sure to set up your lights so that they are evenly distributed around the tent. You may also want to experiment with different types of lightbulbs to see which gives you the best results. If you are not using a light tent, try using a backdrop and positioning your lights so that they are behind the product and shining onto the product from the front. This will help create a more even and flattering light.
5. Use a Backdrop
When photographing small products, using a backdrop can be key in creating a pleasing image. By setting up a light tent, or even just using some white fabric as a backdrop, you can create a clean and simple look for your photos. This is especially important when photographing small items, as they can get lost against a busy or cluttered background.
6. Add Props
Adding props to your product photography set-up can help you create a more pleasing and professional-looking image. When choosing props, choose simple items that will accentuate your product without being visually distracting. { "@context": "https://schema.org/", "@type": "HowTo", "name": "How to Set Up a Light Tent for Small Product Photography", "description": "How to Set Up a Light Tent for Small Product Photography! A light tent is a great way to take beautiful photos of small products. By using a light tent, you can create professional-looking photos that will show off your product in its best light. You don’t need a large budget to buy a light tent; in fact, many of them are affordable and easy to set up. If you’re new to product photography or want to up your game, a light tent is a great tool to start with.", "image": "https://photolightboxes.net/wp-content/uploads/2021/09/How-to-Set-Up-Light-Tent-for-Small-Product-Photography-2.png", "totalTime": "PT10M", "estimatedCost": { "@type": "MonetaryAmount", "currency": "USA", "value": "$10" }, "supply": [ { "@type": "HowToSupply", "name": "light tent" } ], "tool": [ { "@type": "HowToTool", "name": "camera" } ], "step": [ { "@type": "HowToStep", "text": "When choosing a light tent, there are a few factors to consider. The size of the product and the amount of light you need are important considerations. If your product is small, like a key chain or earrings, then you’ll need a light tent that’s smaller in size. If you’re shooting a larger product, like a watch or a dress, then you’ll need a larger light tent.", "image": "https://photolightboxes.net/wp-content/uploads/2021/09/Choose-the-Right-Light-Tent-1024x746.png", "name": "Choose the Right Light Tent", "url": "https://photolightboxes.net/how-to-set-up-light-tent-for-small-product-photography/#1_Choose_the_Right_Light_Tent" }, { "@type": "HowToStep", "text": "The size of your light tent is important for product photography. You want to make sure that the tent is large enough to fit the products you are photographing, but not too large or the lighting will be too diffused. If the tent is too small, you may not be able to get the entire product in the shot and the lighting will be concentrated in a small area.", "image": "https://photolightboxes.net/wp-content/uploads/2021/09/Choose-the-Right-Light-Tent-1024x746.png", "name": "Size Your Light Tent Correctly", "url": "https://photolightboxes.net/how-to-set-up-light-tent-for-small-product-photography/#2_Size_Your_Light_Tent_Correctly" }, { "@type": "HowToStep", "text": "When you are setting up your light tent, it is important to make sure that the light is evenly dispersed throughout the entire tent. If there are any dark spots, your product will likely appear darker in those areas. You can avoid this by using a diffuser or by moving the light around until the tent is evenly lit.\n\nAnother thing to keep in mind when setting up your light tent is the height of the light. If it is too high, your product will be cast in a shadow. Try to adjust the height of the light until it is at about eye level. This will help to ensure that your product is properly illuminated.", "image": "https://photolightboxes.net/wp-content/uploads/2021/09/Set-Up-Your-Light-Tent-Correctly-1.png", "name": "Set Up Your Light Tent Correctly", "url": "https://photolightboxes.net/how-to-set-up-light-tent-for-small-product-photography/#3_Set_Up_Your_Light_Tent_Correctly" }, { "@type": "HowToStep", "text": "When photographing small products, it is important to use the right lighting. If you are using a light tent, be sure to set up your lights so that they are evenly distributed around the tent. You may also want to experiment with different types of lightbulbs to see which gives you the best results. If you are not using a light tent, try using a backdrop and positioning your lights so that they are behind the product and shining onto the product from the front. This will help create more even and flattering light.", "image": "https://photolightboxes.net/wp-content/uploads/2021/09/Choose-the-Right-Lighting-1.png", "name": "Choose the Right Lighting", "url": "https://photolightboxes.net/how-to-set-up-light-tent-for-small-product-photography/#4_Choose_the_Right_Lighting" }, { "@type": "HowToStep", "text": "When photographing small products, using a backdrop can be key in creating a pleasing image. By setting up a light tent, or even just using some white fabric as a backdrop, you can create a clean and simple look for your photos. This is especially important when photographing small items, as they can get lost against a busy or cluttered background.", "image": "https://photolightboxes.net/wp-content/uploads/2021/09/Use-a-Backdrop-1.png", "name": "Use a Backdrop", "url": "https://photolightboxes.net/how-to-set-up-light-tent-for-small-product-photography/#5_Use_a_Backdrop" }, { "@type": "HowToStep", "text": "Adding props to your small product photography setup can help you create a more pleasing and professional-looking photo. When selecting props, choose simple items that will compliment your product without competing for attention.", "image": "https://photolightboxes.net/wp-content/uploads/2021/09/Use-a-Backdrop-1.png", "name": "Add Props", "url": "https://photolightboxes.net/how-to-set-up-light-tent-for-small-product-photography/#6_Add_Props" } ] }
Conclusion
In conclusion, setting up a light tent is a great way to take high-quality product photos without expensive equipment or software. By following the simple tips in this article, you can create a professional-looking photo studio right in your own home. So what are you waiting for? Get started today!
Frequently Asked Questions
Q1: What is a light tent used for in small product photography?
A1: A light tent, also known as a lightbox or photo tent, creates soft, even, and diffused lighting for small product photography, eliminating harsh shadows and reflections.
Q2: What materials are typically used to construct a light tent?
A2: Light tents are often made of translucent fabric or material, such as nylon or polyester, which diffuses incoming light to create a uniform illumination.
Q3: How is a light tent set up for small product photography?
A3: A light tent is typically unfolded and assembled into a box-like structure with openings for the camera lens and product placement. Lighting sources are positioned outside the tent.
Q4: What lighting sources are commonly used with a light tent?
A4: Continuous lighting sources like softboxes, LED panels, or strobes are commonly used with light tents to provide even and controlled illumination.
Q5: What are the advantages of using a light tent for small product photography?
A5: Light tents help eliminate harsh shadows, reduce reflections, and create a consistent, neutral background, making them ideal for capturing professional-looking product images suitable for e-commerce and catalogues.


