Many people have asked me how to create a wooden lightbox for holding photographs, so I published an article on the subject. How to make one for use in professional photography or videography is a frequently requested question, but you can also use this method at home. You can create your unique lightbox for any reason after reading this guide!
A photo lightbox is a fantastic way to increase your room’s lighting. It can be used as a spot for photography, a comfortable place to read and write with a lamp, or even a decorative item to make your living room feel more cheerful. We’ll demonstrate how to build a wooden lightbox in this article! { "@context": "https://schema.org/", "@type": "HowTo", "name": "How to Make a Wooden Light Box", "description": "How to Make a Wooden Photo Light Box: I’ve had a lot of people ask how to make a wooden lightbox, so I decided to write an article about how to do just that. The question is often asked for how to make one for professional photography or videography purposes, but you can also use this technique in your home.", "image": "https://photolightboxes.net/wp-content/uploads/2021/12/How-to-Make-a-Wooden-Light-Box-5-680x350.png", "totalTime": "PT10M", "estimatedCost": { "@type": "MonetaryAmount", "currency": "USA", "value": "$10" }, "supply": [ { "@type": "HowToSupply", "name": "Bathroom cabinet" }, { "@type": "HowToSupply", "name": "White fabric" }, { "@type": "HowToSupply", "name": "Staple gun and staples" } ], "tool": [ { "@type": "HowToTool", "name": "Weatherstripping" }, { "@type": "HowToTool", "name": "Wire" }, { "@type": "HowToTool", "name": "Black gaffers tape" } ], "step": [ { "@type": "HowToStep", "text": "The first step in building a wood lightbox is cutting all the pieces to size. Then you need to assemble them and install pocket-hole screws so it’s easy! I use this process for each individual frame, which helps me keep everything aligned as well because of how fast things go together when using woodworking jigs like mine – less wasted time on installation that way.", "image": "https://photolightboxes.net/wp-content/uploads/2021/12/image1.png", "name": "MAKING THE CUTS", "url": "https://photolightboxes.net/how-to-make-wooden-light-box/#Step_1_Making_the_Cuts" }, { "@type": "HowToStep", "text": "When you’re finished with the frames, there should be 6 of them and one opening piece. This will serve as a backing for your fabric! The other loose end is what we’ll cover next; it’s time to make sure that these ends are secure from any wrinkles or folds by covering them up nicely with our final project.\nOnce all of the frames are assembled, it’s time to put them together. Take note that when securing one side against another with pocket holes facing out (so you can later fill these), use wood glue for best results! You may either secure using nails or screws depending on what works better in your situation–but don’t forget about safety first because anything pertaining to an eye needs two hands-frees at all times!\nNow installing the front of your chest, make sure to pocket holes are facing in. Next secure the top using two screws on each side for extra security.\nDid you know that pocket holes are actually on the inside of your trim? You can close up these exposed areas with plugs or wood filler. This will help to maintain a seamless design and avoid any unwanted surprises when it comes time for finishing off this project!", "image": "https://photolightboxes.net/wp-content/uploads/2021/12/image5.png", "name": "BUILDING THE BOX", "url": "https://photolightboxes.net/how-to-make-wooden-light-box/#Step_2_Building_the_Box" }, { "@type": "HowToStep", "text": "Put together a really quick and simple temporary background. This was made from some pieces of scrap and recycled pallets to give me more options when it comes to taking photos in the future!", "image": "https://photolightboxes.net/wp-content/uploads/2021/12/image8.png", "name": "BUILDING A BACKDROP", "url": "https://photolightboxes.net/how-to-make-wooden-light-box/#Step_3_Building_a_Backdrop" }, { "@type": "HowToStep", "text": "I place a piece of white hardboard 1/4-inch thick behind my subject to use it as a backdrop and also have the opportunity for overhead shots.", "image": "https://photolightboxes.net/wp-content/uploads/2021/12/image3.png", "name": "ADDING A BACK", "url": "https://photolightboxes.net/how-to-make-wooden-light-box/#Step_4_Adding_a_Back" }, { "@type": "HowToStep", "text": "I don’t want to lug around my studio lights every time I need a photo. So making this lightbox will make it easy for me and let’s say that at some point, there are LED panels on the side where you can permanently have lights built into them as well!\n\nDon’t forget about paper poster boards! You could use them for a more modern look.\n\nKEEP IT CLASSY: Pallets and all, you’re good to go with this backdrop just make sure it fits your needs beforehand so that when the time comes there are no surprises or regrets later down the line", "image": "https://photolightboxes.net/wp-content/uploads/2021/12/image4-1.png", "name": "SETTING UP", "url": "https://photolightboxes.net/how-to-make-wooden-light-box/#Step_5_Setting_Up" }, { "@type": "HowToStep", "text": "Now, it’s time to shoot your beautiful object. With the lightbox, your photos will have a different look and feel.", "image": "https://photolightboxes.net/wp-content/uploads/2021/12/image2-1-1024x572.png", "name": "SHOOTING", "url": "https://photolightboxes.net/how-to-make-wooden-light-box/#Step_6_Shooting" } ] }
How to Make a Wooden Light Box
It’s time to construct your light box, then. This is what you require:
- Bathroom cabinet
- White fabric
- Staple gun and staples
- Weatherstripping (optional, but recommended)
- Wire (optional, but recommended)
- Black gaffers tape (optional, but recommended)
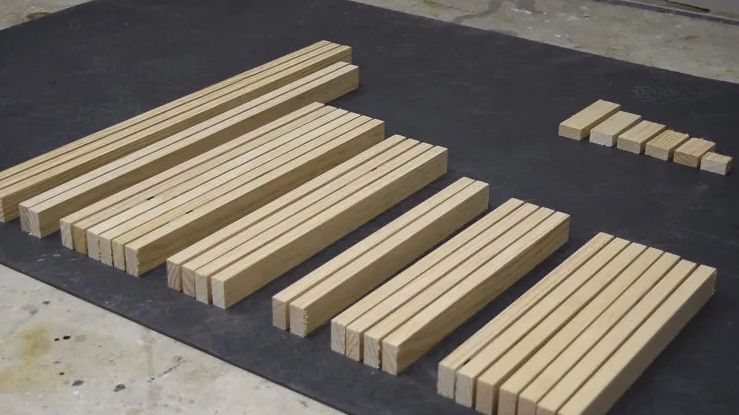
Step 1: Making the Cuts
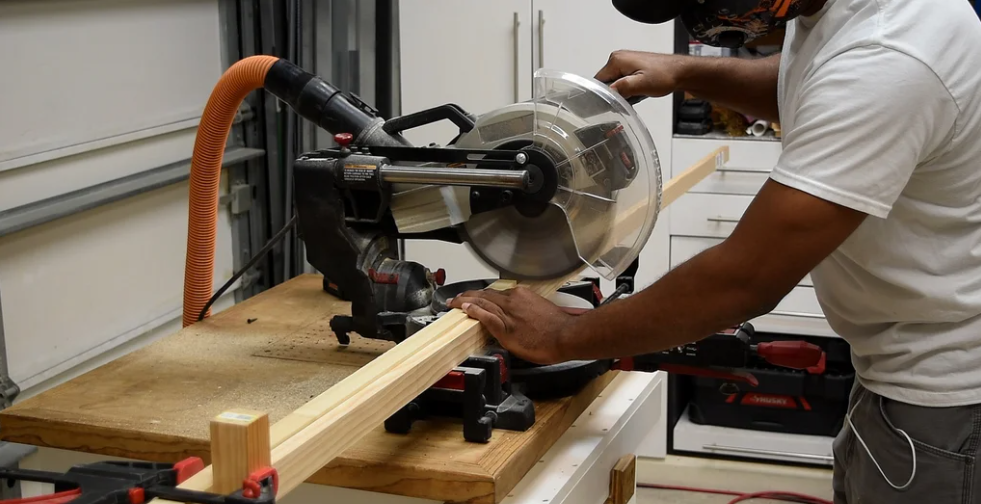
A wood lightbox is constructed by first cutting each component to size. After that, it’s simple to put them together and add pocket-hole screws! I follow this procedure for each frame, which helps me keep everything straight because using my woodworking jigs speeds up assembly and reduces installation time.
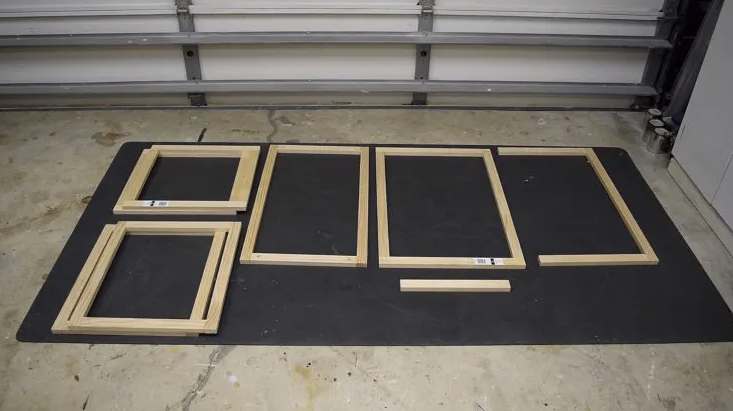
Step 2: Building the Box
There should be six frames and one opening piece when you are finished. This will act as the fabric’s backing. Next, we’ll take care of the other loose end; by neatly covering it with our final project, we’ll ensure that these ends are secure from any folds or wrinkles.
It’s time to construct all of the frames and put them together. Be aware that for optimal results, use wood glue when fastening one side to another with pocket holes facing out (so you may subsequently fill these). Depending on what works best for you, you can secure using screws or nails. But always put safety first because anything involving an eye requires two hands to be free.
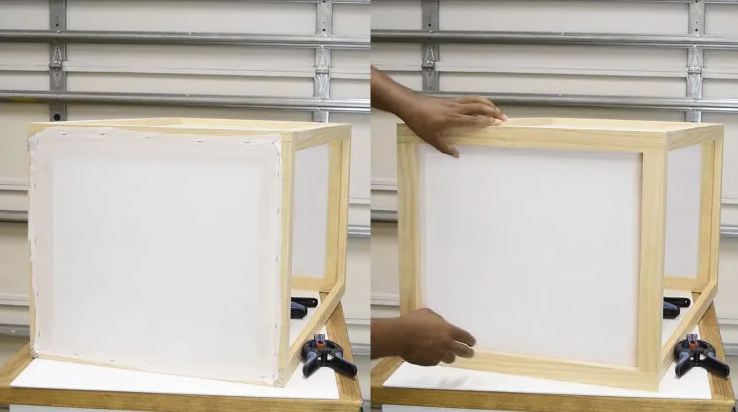
As you finish attaching the front of your chest, check that the pocket openings are pointed inward. Next, provide additional security by screwing two screws into each side of the top.
Did you realize that the inside of your trim is where the pocket holes are located? These exposed parts can be covered with plugs or wood fillers. When the project is finished, this will help to preserve a smooth design and eliminate any unpleasant shocks!
Step 3: Building a Backdrop
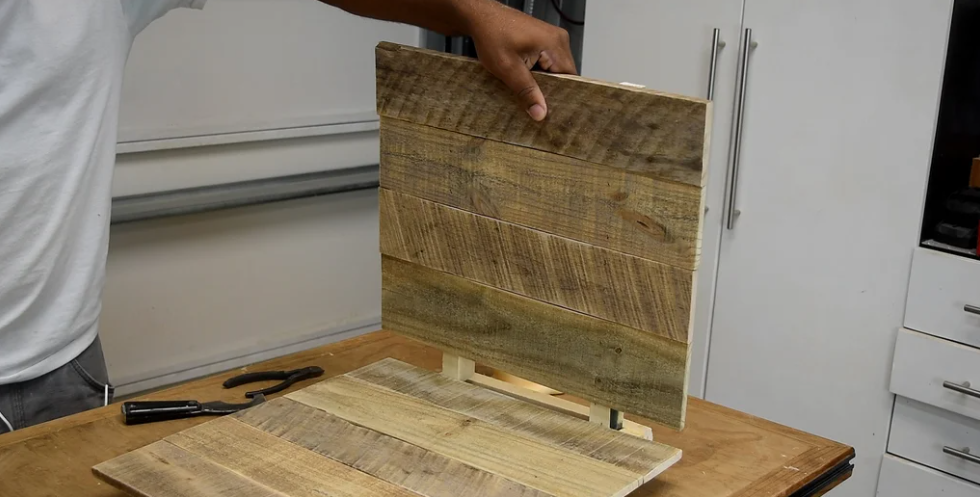
Quickly and easily put together a temporary background. This was constructed from some discarded materials and salvaged pallets to give me additional possibilities for future photo shoots.
Step 4: Adding a Back
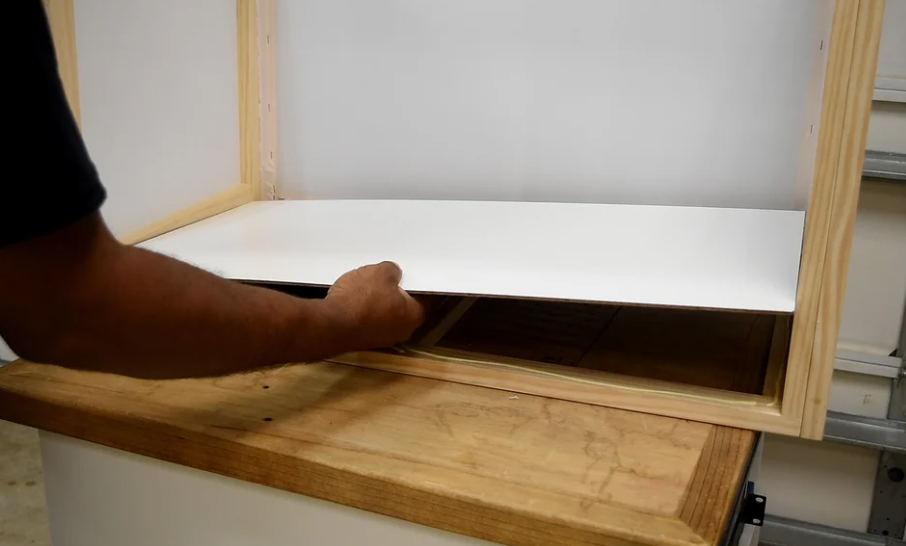
I set up a piece of white hardboard that is 1/4 inch thick behind my subject so that I may use it as a backdrop and take overhead pictures.
Step 5: Setting Up
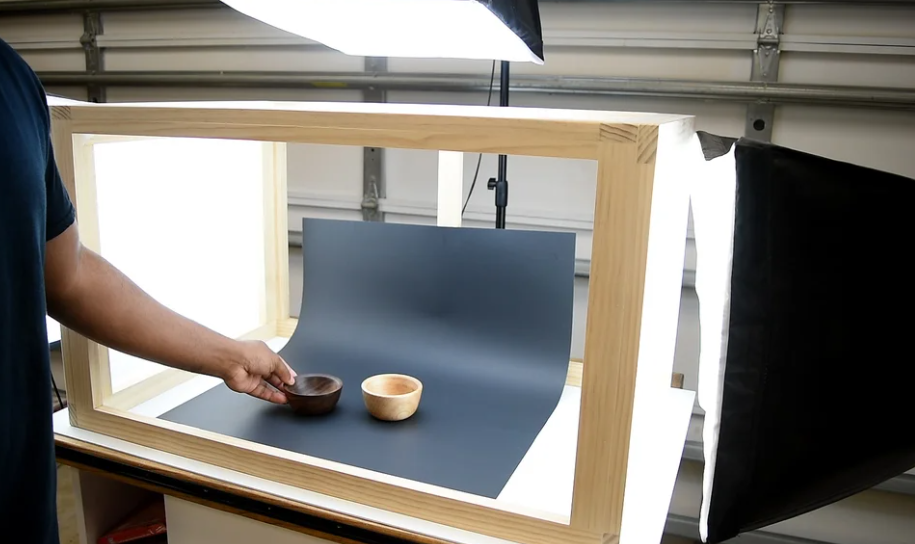
Whenever I need to take a picture, I want to worry about carrying about my studio lighting. Making this lightbox will make it simple for me, and let’s suppose that eventually, there will be LED panels on the side with built-in lights that are permanent.
Paper poster boards should be noticed! They could be used for a more contemporary appearance.
KEEP IT CLASSY: This background is used with or without the pallets. Make sure it meets your demands in advance so there are no shocks or regrets when the time comes.
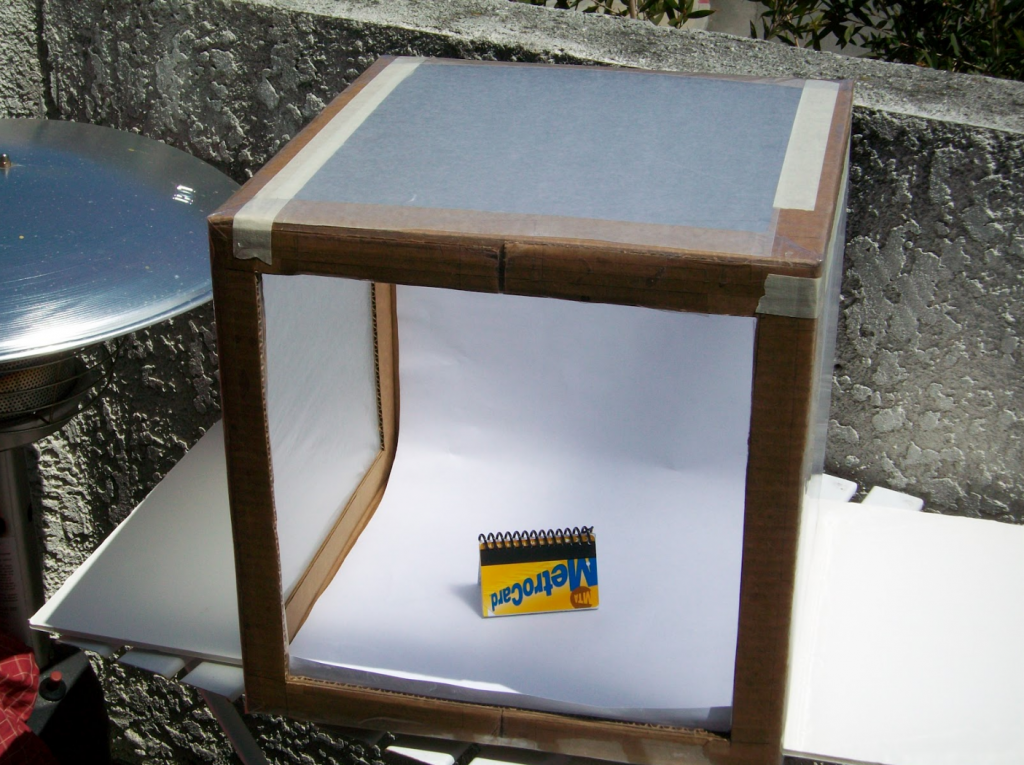
Step 6: Shooting

It’s time to take pictures of your lovely object now. Your photos will appear and feel different with the lightbox.
Conclusion
Small things can be displayed in a lovely and modern way with a lightbox. Some objects may reflect because of the wood design. However, that is easily fixed by painting! A photo lightbox can also be used for photography purposes, providing a bright electric setup. Visit our photo lightboxes website if you wish to purchase a photo lightbox.
Thank you for reading this post…🙂
Note: Interested to know about Taking Product Photos with iPhone?


