How to Use Artificial Light in Food Photography! Food photography is an art that requires attention to detail, creativity, and the skilful use of lighting. Lighting plays a crucial role in setting the mood, highlighting textures, and enhancing the colours of the food being photographed. While natural light is often preferred for its soft and flattering effects, artificial light can be a powerful tool in food photography, allowing for consistency and control over the lighting conditions. In this article, we will explore various tips and techniques for effectively using artificial light in food photography.

Understanding the Importance of Lighting in Food Photography
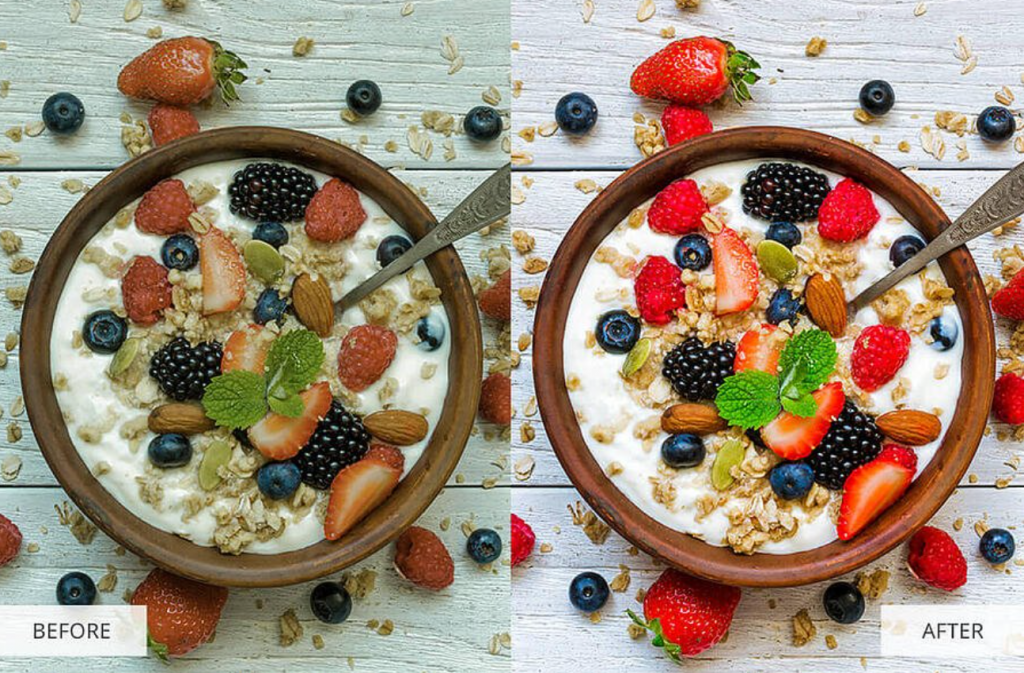
Lighting is a fundamental element in photography, and its significance is heightened in food photography. The right lighting can transform a seemingly ordinary dish into an enticing, mouth-watering masterpiece. It shapes the mood and tone of the photograph, accentuates the textures, colours, and details of the food, and ultimately influences the viewer’s perception and appetite.
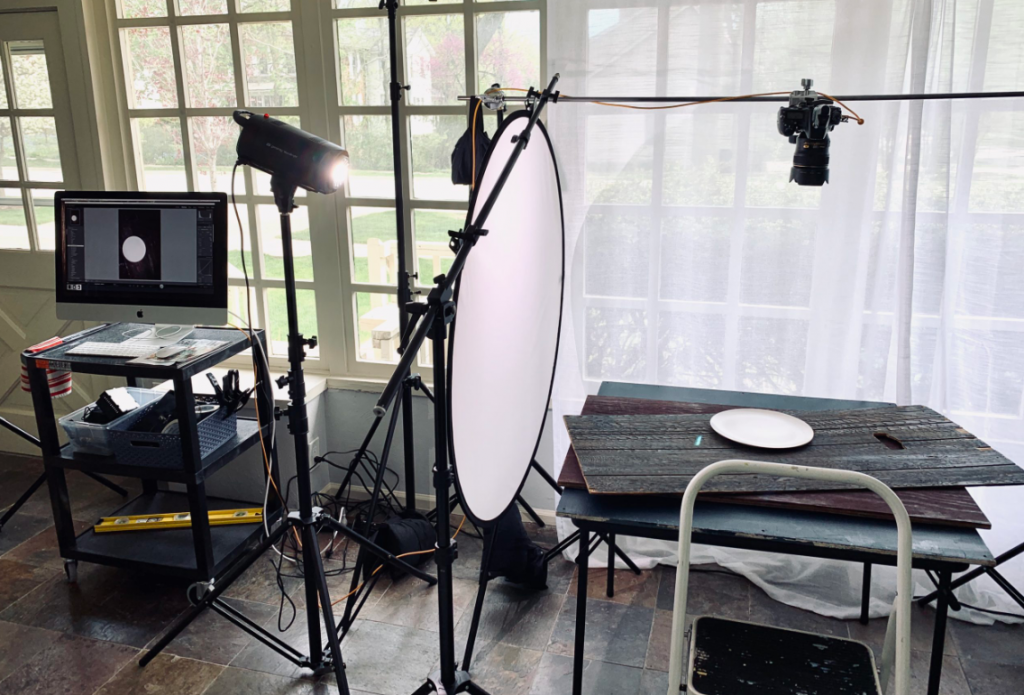
Artificial lighting provides photographers with the ability to control and manipulate the light to suit their artistic vision and the requirements of the shot. Whether it’s soft, diffused light or dramatic, directional light, understanding how to effectively use artificial light is essential for achieving professional-quality food photographs.
How to Use Artificial Light in Food Photography
Now that we have discussed the types of artificial lighting, let’s delve into some practical tips for effectively using artificial light in food photography:
1. Understand the Direction of Light

The direction of light significantly impacts the appearance of the food. Side lighting can enhance textures and create depth, while backlighting can produce a beautiful, glowing effect. Experiment with different light angles to find the most flattering and visually appealing setup for your particular dish.
2. Use a Light Diffuser

When using artificial light, especially if it’s harsh or directional, employing a light diffuser is essential. A diffuser softens and spreads the light, reducing harsh shadows and providing a more even and pleasing illumination of the food.
3. Adjust the Intensity and Temperature
Control the intensity and colour temperature of the artificial light to suit the mood and style of the photograph. Cooler tones can convey a fresh and modern look, while warmer tones create a cosy and inviting ambience. Experiment with different settings to achieve the desired effect.
4. Create Highlights and Shadows
Use artificial light to strategically create highlights and shadows on the food, adding dimension and depth to the image. This can help accentuate the textures and contours of the dish, making it more visually appealing.

5. Avoid Overexposure
Be cautious not to overexpose the image by using too much light. Adjust the light intensity to ensure the highlights are not blown out and that the details in the highlights and shadows are well-preserved.
6. Combine Natural and Artificial Light
Consider combining natural light with artificial light for a more dynamic and appealing look. Using natural light as a primary source and supplementing it with artificial light to fill in shadows or add highlights can often yield stunning results.
7. Experiment and Practice
The key to mastering the use of artificial light in food photography is experimentation and practice. Try different lighting setups, angles, and modifiers. Take test shots, review the results, and adjust accordingly. Over time, you’ll develop a keen eye for lighting and understand what works best for various food subjects.
Types of Artificial Lighting for Food Photography
Also here are a few types of artificial light in food photography
1. Continuous Lighting
Continuous lighting provides a consistent source of light that remains constant while you compose and capture the shot. It allows you to see how the light is falling on the subject in real time, making it easier to adjust and modify the setup. Continuous LED lights are popular in food photography due to their energy efficiency, ease of use, and ability to control brightness and colour temperature.
2. Strobe Lighting
Strobe lighting, such as studio flash or speed lights, produces brief bursts of intense light when triggered. These bursts illuminate the scene and freeze the action, making strobes ideal for capturing sharp, well-lit images. Strobes offer a high level of control over the light intensity, allowing for precise adjustments to achieve the desired look.
3. Light Modifiers
Light modifiers, like softboxes, umbrellas, and diffusers, are essential accessories used with artificial lights to control and shape the light. Softboxes create soft, even lighting by diffusing the light source, while umbrellas spread light across a larger area. Diffusers soften and reduce harsh shadows, resulting in a flattering and natural illumination of the food.
Conclusion
Artificial light is a versatile and powerful tool in food photography, allowing photographers to have complete control over the lighting conditions and achieve the desired look for their shots. Understanding the various types of artificial lighting, how to use them effectively, and implementing the right techniques can significantly enhance the quality and visual impact of your food photographs. Experiment, practice, and continuously refine your skills to master the art of using artificial light in food photography and create captivating, professional-quality images that make the viewer’s mouth water. { "@context": "https://schema.org/", "@type": "HowTo", "name": "How to Use Artificial Light in Food Photography", "description": "How to Use Artificial Light in Food Photography! Food photography is an art form that has been growing in popularity over the past few years. Many people want to learn how to take beautiful pictures of their food, but don’t know where to start. In this article, we will discuss the basics of using artificial light in food photography. We will cover topics such as choosing the right light, positioning the light, and adjusting the light’s intensity. We will also provide some tips on how to create a professional-looking photo shoot.", "image": "https://photolightboxes.net/wp-content/uploads/2022/06/How-to-Use-Artificial-Light-in-Food-Photography-1-1024x599.png", "totalTime": "PT10M", "estimatedCost": { "@type": "MonetaryAmount", "currency": "USD", "value": "10$" }, "supply": [ { "@type": "HowToSupply", "name": "camera" } ], "tool": [ { "@type": "HowToTool", "name": "tripod" } ], "step": [ { "@type": "HowToStep", "text": "When positioning the light in food photography, you’ll need to consider where the light is coming from in relation to the food. You can place the light source above or to the side of the food, but you don’t want it directly in front of or behind the food. If the light is in front of or behind the food, it will create a shadow on one side of the food and make it look unnatural. The best way to achieve a natural-looking photograph is to place the light source above or to the side of the food.", "image": "https://photolightboxes.net/wp-content/uploads/2022/06/Positioning-the-Light-1024x695.png", "name": "Positioning the Light", "url": "https://photolightboxes.net/how-to-use-artificial-light-in-food-photography/#1_Positioning_the_Light" }, { "@type": "HowToStep", "text": "There are a couple of different ways to adjust the brightness in your food photography. One way is to use the exposure compensation on your camera. This will allow you to make adjustments in increments of 1/3 or 1/2 stops. Another way to adjust the brightness is by using filters. You can use either a graduated ND filter or a solid ND filter. A graduated ND filter will have a dark band that runs from top to bottom and will help you to balance out the light in your photo. A solid ND filter will be completely dark and will help you to reduce the amount of light entering your lens.", "image": "https://photolightboxes.net/wp-content/uploads/2022/06/Adjusting-the-Brightness-1024x673.png", "name": "Adjusting the Brightness", "url": "https://photolightboxes.net/how-to-use-artificial-light-in-food-photography/#2_Adjusting_the_Brightness" }, { "@type": "HowToStep", "text": "When photographing food indoors, it is necessary to use artificial light to create the desired effect. There are a few different ways to do this, and one of the most popular methods is using a reflector. A reflector is simply a piece of metal or plastic that is used to direct light onto the food. It can be placed on top of or behind the food to reflect light onto it from different angles. This can help to create more depth and dimension in the photograph, and can also make the food look brighter and more appetizing.", "image": "https://photolightboxes.net/wp-content/uploads/2022/06/Using-a-Reflector-1024x625.png", "name": "Using a Reflector", "url": "https://photolightboxes.net/how-to-use-artificial-light-in-food-photography/#3_Using_a_Reflector" }, { "@type": "HowToStep", "text": "One of the easiest and most effective ways to add depth and dimension to your food photos is to use shadows. Shadows can help create the appearance of texture and add interest to an otherwise flat image. They can also be used to lead the eye towards or away from the subject of the photo.", "image": "https://photolightboxes.net/wp-content/uploads/2022/06/Taking-Advantage-of-Shadows-1024x651.png", "name": "Taking Advantage of Shadows", "url": "https://photolightboxes.net/how-to-use-artificial-light-in-food-photography/#4_Taking_Advantage_of_Shadows" }, { "@type": "HowToStep", "text": "When choosing the color temperature for your food photography, it’s important to consider what you will be photographing. If you are photographing a dessert, you will want to use a warmer light to enhance the colors of the food. If you are photographing a salad, you will want to use a cooler light to bring out the greens in the salad. It’s also important to consider the background of your photo. If you are using a dark background, you will want to use a warmer light so that the food pops out. If you are using a light background, you will want to use a cooler light so that the food doesn’t look too bright.", "image": "https://photolightboxes.net/wp-content/uploads/2022/06/Choosing-the-Right-Color-Temperature-1024x699.png", "name": "Choosing the Right Color Temperature", "url": "https://photolightboxes.net/how-to-use-artificial-light-in-food-photography/#5_Choosing_the_Right_Color_Temperature" } ] }
Note: Interested to know How to Make a Light Box for Food Photography?


