How to Photograph Sun Flares! Photographs of sun flares are some of the most beautiful images in the sky. These intense celestial explosions can be seen as bright clouds of light that shoot out from the sun’s surface. They can be a sign of something happening in the sun, or they can just be beautiful pieces of natural art. In this article, we will discuss how to photograph sun flares.
How to Photograph Sun Flares
Photographing sun flares can be a very rewarding experience, but it can also be quite challenging. Here are some tips on how to photograph them successfully.
1. Set Your Camera to Manual Mode
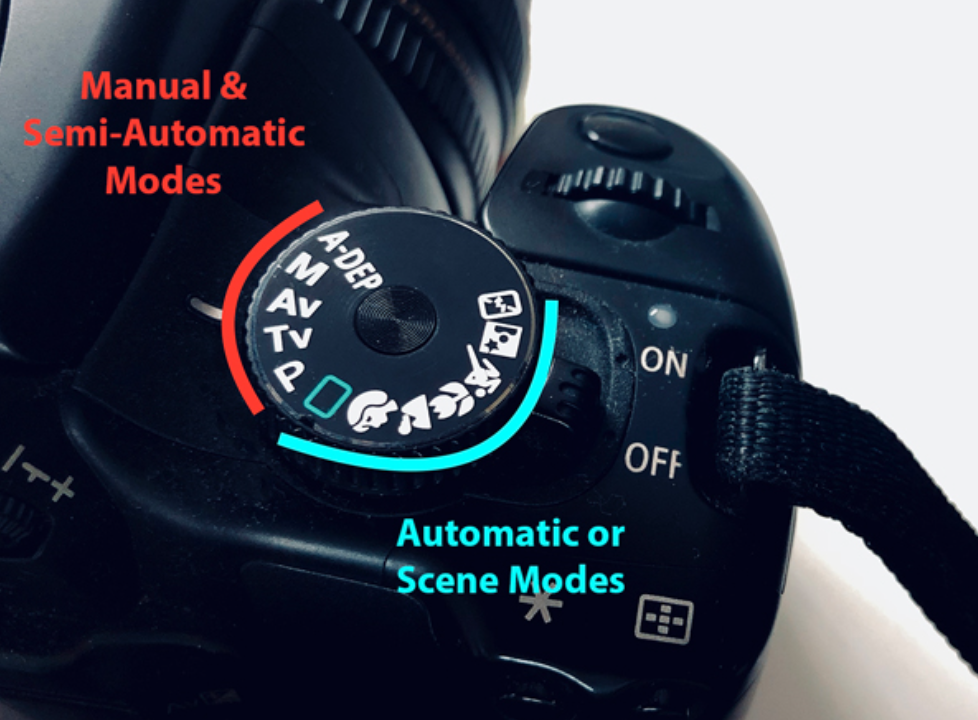
Sun flares can be captured in-camera by setting your camera to manual mode. This will allow you to have more control over the shutter speed, aperture, and ISO. To photograph sun flares, find an area where there is a lot of sunlight. Position yourself so that the sun is in front of you and slightly to the side. Use a wide-angle lens and set the aperture to around f/8. Set the ISO to 100 and use a shutter speed of 1/250th of a second or slower. If you are using a digital SLR, use the mirror lockup function to reduce vibrations caused by the mirror movement.
2. Find an Area With Bright Sunlight
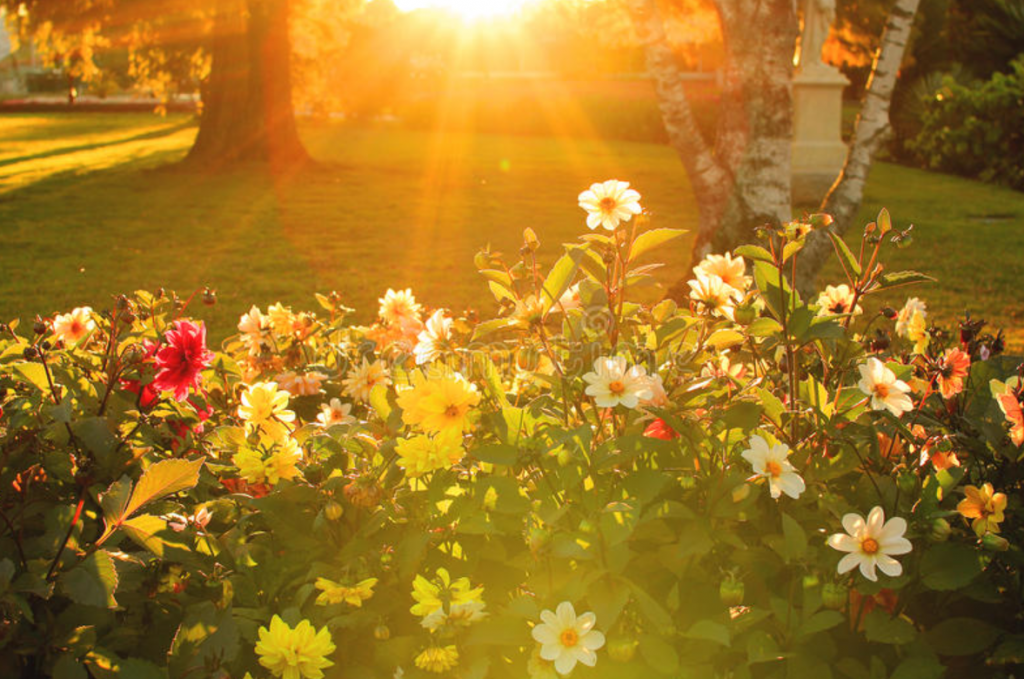
Sun flares can add an extra level of interest to a photograph. They can be used to create a sense of drama or to emphasize a particular element in the photo. To capture sun flares, you’ll need to find an area with bright sunlight. Position yourself so that the sun is behind your subject and look for areas where the light is shining around them.
3. Frame Your Shot and Focus on the Sun
Framing your shot is an important part of photography, and it becomes even more important when photographing the sun. Framing the sun in your shot can add interest and focus to your image. Additionally, framing the sun can help to reduce lens flare.
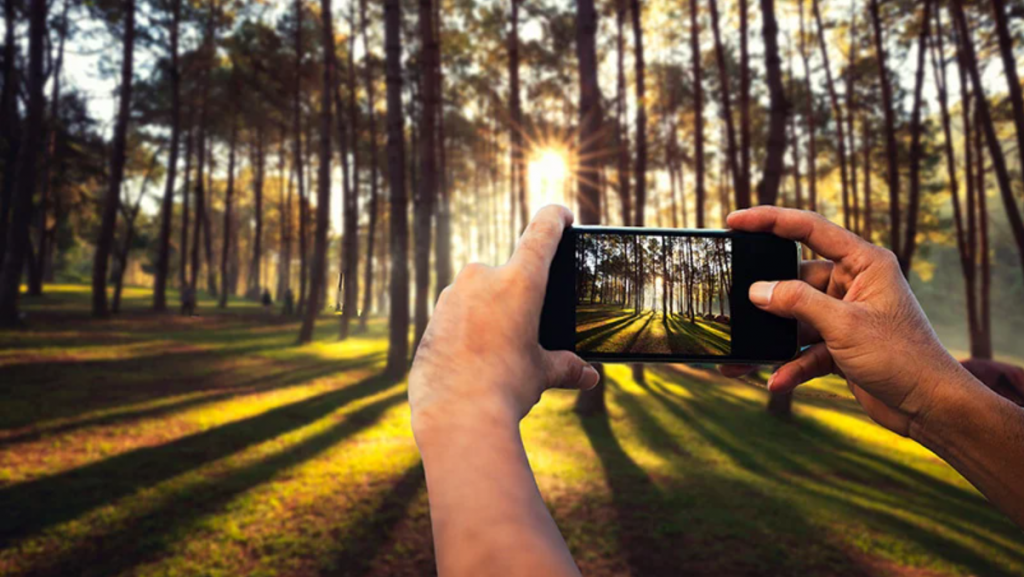
When photographing the sun, it is important to keep your focus on the sun itself. If you focus on something else in the frame, such as a tree or building, the sun will likely be out of focus. This can result in an uninteresting photograph.
Framing your shot and keeping your focus on the sun can help to create striking images that capture this natural phenomenon.
4. Increase Your Iso to Around 1000–2000
ISO is the sensitivity of your camera’s sensor to light. The higher the ISO, the more sensitive it is and the less light you need to take a picture. This can be handy in low-light situations or when you want to take pictures of fast-moving objects. However, increasing the ISO also increases noise, so you’ll want to find the right balance for your situation. For most sun flare photos, I increase my ISO to around 1000-2000. This allows me to get the shot without having to use a tripod or a slow shutter speed, which can often result in blurry photos.
5. Open Up Your Aperture to Around F/8
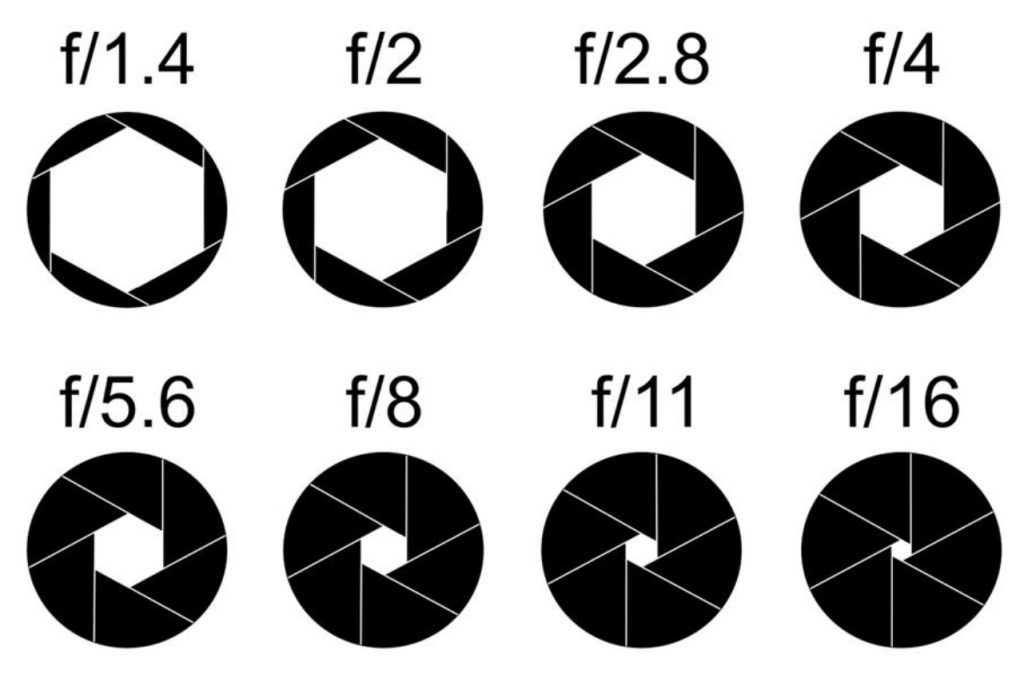
When taking pictures of the sun, it’s best to open up your aperture to around f 8. This will allow you to capture the sun’s flares while still having a sharp image. If you open up your aperture too much, you’ll get a lot of lens flare and your image will be less sharp. Keep in mind that the sun is always moving, so you’ll need to keep adjusting your focus as it moves.
6. Shoot in Raw Format
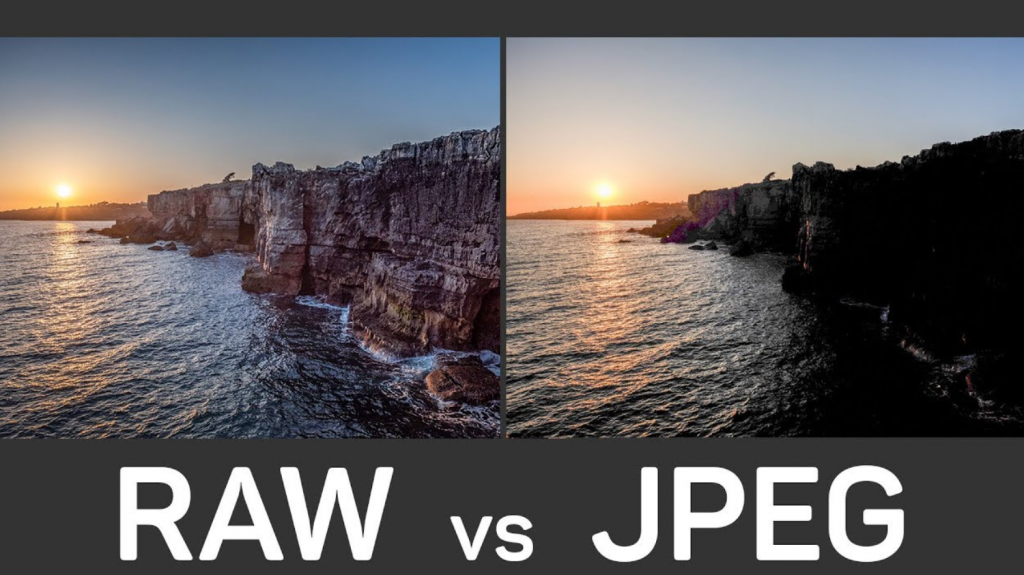
Shooting in RAW format is a great way to get the most out of your photos. RAW files contain more information than JPEGs, which means you have more flexibility when editing your photos. RAW files also tend to be sharper and have better color reproduction than JPEGs. { "@context": "https://schema.org/", "@type": "HowTo", "name": "How to Photograph Sun Flares", "description": "How to Photograph Sun Flares! Photographs of sun flares are some of the most beautiful images in the sky. These intense celestial explosions can be seen as bright clouds of light that shoot out from the sun’s surface. They can be a sign of something happening in the sun, or they can just be beautiful pieces of natural art. In this article, we will discuss how to photograph sun flares.", "image": "https://photolightboxes.net/wp-content/uploads/2022/06/How-to-Photograph-Sun-Flares-1-1024x614.png", "totalTime": "PT10M", "estimatedCost": { "@type": "MonetaryAmount", "currency": "USD", "value": "10$" }, "supply": [ { "@type": "HowToSupply", "name": "camera" } ], "tool": [ { "@type": "HowToTool", "name": "tripod" } ], "step": [ { "@type": "HowToStep", "text": "Sun flares can be captured in-camera by setting your camera to manual mode. This will allow you to have more control over the shutter speed, aperture, and ISO. To photograph sun flares, find an area where there is a lot of sunlight. Position yourself so that the sun is in front of you and slightly to the side. Use a wide-angle lens and set the aperture to around f/8. Set the ISO to 100 and use a shutter speed of 1/250th of a second or slower. If you are using a digital SLR, use the mirror lockup function to reduce vibrations caused by the mirror movement.", "image": "https://photolightboxes.net/wp-content/uploads/2022/06/Set-Your-Camera-to-Manual-Mode.png", "name": "Set Your Camera to Manual Mode", "url": "https://photolightboxes.net/how-to-photograph-sun-flares/#1_Set_Your_Camera_to_Manual_Mode" }, { "@type": "HowToStep", "text": "Sun flares can add an extra level of interest to a photograph. They can be used to create a sense of drama or to emphasize a particular element in the photo. To capture sun flares, you’ll need to find an area with bright sunlight. Position yourself so that the sun is behind your subject and look for areas where the light is shining around them.", "image": "https://photolightboxes.net/wp-content/uploads/2022/06/Find-an-Area-With-Bright-Sunlight-1024x679.png", "name": "Find an Area With Bright Sunlight", "url": "https://photolightboxes.net/how-to-photograph-sun-flares/#2_Find_an_Area_With_Bright_Sunlight" }, { "@type": "HowToStep", "text": "Framing your shot is an important part of photography, and it becomes even more important when photographing the sun. Framing the sun in your shot can add interest and focus to your image. Additionally, framing the sun can help to reduce lens flare.", "image": "https://photolightboxes.net/wp-content/uploads/2022/06/Frame-Your-Shot-and-Focus-on-the-Sun-1024x577.png", "name": "Frame Your Shot and Focus on the Sun", "url": "https://photolightboxes.net/how-to-photograph-sun-flares/#3_Frame_Your_Shot_and_Focus_on_the_Sun" }, { "@type": "HowToStep", "text": "ISO is the sensitivity of your camera’s sensor to light. The higher the ISO, the more sensitive it is and the less light you need to take a picture. This can be handy in low-light situations or when you want to take pictures of fast-moving objects. However, increasing the ISO also increases noise, so you’ll want to find the right balance for your situation. For most sun flare photos, I increase my ISO to around 1000-2000. This allows me to get the shot without having to use a tripod or a slow shutter speed, which can often result in blurry photos.", "image": "https://photolightboxes.net/wp-content/uploads/2022/06/Frame-Your-Shot-and-Focus-on-the-Sun-1024x577.png", "name": "Increase Your Iso to Around 1000–2000", "url": "https://photolightboxes.net/how-to-photograph-sun-flares/#4_Increase_Your_Iso_to_Around_1000-2000" }, { "@type": "HowToStep", "text": "When taking pictures of the sun, it’s best to open up your aperture to around f 8. This will allow you to capture the sun’s flares while still having a sharp image. If you open up your aperture too much, you’ll get a lot of lens flare and your image will be less sharp. Keep in mind that the sun is always moving, so you’ll need to keep adjusting your focus as it moves.", "image": "https://photolightboxes.net/wp-content/uploads/2022/06/Open-Up-Your-Aperture-to-Around-F8-1024x674.png", "name": "Open Up Your Aperture to Around F/8", "url": "https://photolightboxes.net/how-to-photograph-sun-flares/#5_Open_Up_Your_Aperture_to_Around_F8" }, { "@type": "HowToStep", "text": "Shooting in RAW format is a great way to get the most out of your photos. RAW files contain more information than JPEGs, which means you have more flexibility when editing your photos. RAW files also tend to be sharper and have better color reproduction than JPEGs.", "image": "https://photolightboxes.net/wp-content/uploads/2022/06/Shoot-in-Raw-Format-sun-Flares-1024x575.png", "name": "Shoot in Raw Format", "url": "https://photolightboxes.net/how-to-photograph-sun-flares/#6_Shoot_in_Raw_Format" }, { "@type": "HowToStep", "text": "When photographing landscapes and sunflowers, using a tripod will help to ensure sharp photos. The tripod will keep the camera stable, minimizing camera shake, which can cause photos to be blurry. If possible, use a tripod that has a ball head, which will allow you to easily adjust the camera’s position.", "image": "https://photolightboxes.net/wp-content/uploads/2022/06/Use-a-Tripod-If-Possible-1024x615.png", "name": "Use a Tripod If Possible", "url": "https://photolightboxes.net/how-to-photograph-sun-flares/#7_Use_a_Tripod_If_Possible" } ] }
7. Use a Tripod If Possible
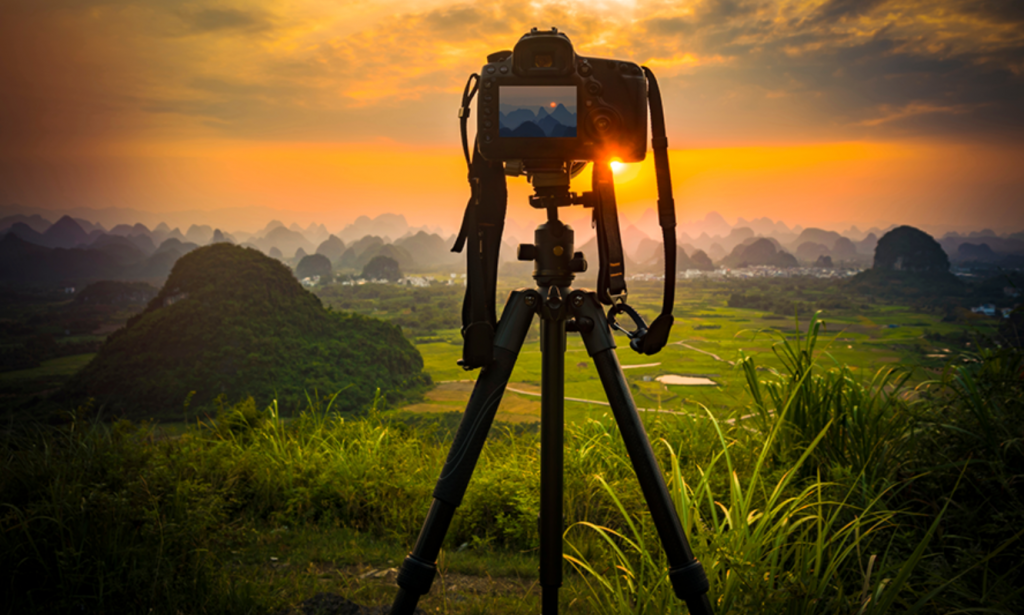
When photographing landscapes and sunflowers, using a tripod will help to ensure sharp photos. The tripod will keep the camera stable, minimizing camera shake, which can cause photos to be blurry. If possible, use a tripod that has a ball head, which will allow you to easily adjust the camera’s position.
Conclusion
In conclusion, photographing sun flares is a fun and interesting way to capture the power and beauty of the sun. With a little bit of practice, you can create amazing images that will amaze your friends and family. So get out there and start snapping some shots!


