DIY Tracing Light Table An excellent tool for tracing is a homemade light table, especially if you’re an artist. To make it simpler to see what’s going on, a DIY light table consists of a box with lights at the top and bottom that shine downward onto your paper or canvas. Here are some tips to get started if you’re interested in building your DIY light table.
This post is for you if you’re seeking a DIY light table for tracing. Discover how to construct a light table independently using two tools and one material. You can utilize it as an alternative to more expensive store-bought lightboxes. With prior electrical or woodworking experience, this DIY project may be finished in just 20 minutes. This DIY guide is ideal if you’re searching for a low-cost approach to start doing small-scale artistic endeavors like sketching or calligraphy.
You may trace images onto your surface with the help of a simple do-it-yourself project called a light table. This post will give step-by-step directions for building a homemade light table for tracing. The following supplies were available at my neighborhood hardware store:
Equipment needed for a DIY light table
1. 1/8-inch-thick sheets of glass or acrylic
2. An eight by 10-inch piece of white paper (I used tracing paper)
3. a wooden frame (mine was 25 x 30 cm) with a hole cut out and hinges
4. rubber cement and glass cutters
I hope this DIY tutorial has inspired you to work on your upcoming project!
Making a DIY Light Table for Tracing
One of the best things about working on projects like this is the many opportunities to be inventive and deviate from the norm. Use an old phone charger or power supply from a computer, but set it for the voltage your LEDs need—you could need more than one. Use batteries if neither of those alternatives works appropriately when using a standard supply. Make your light table by following these instructions.
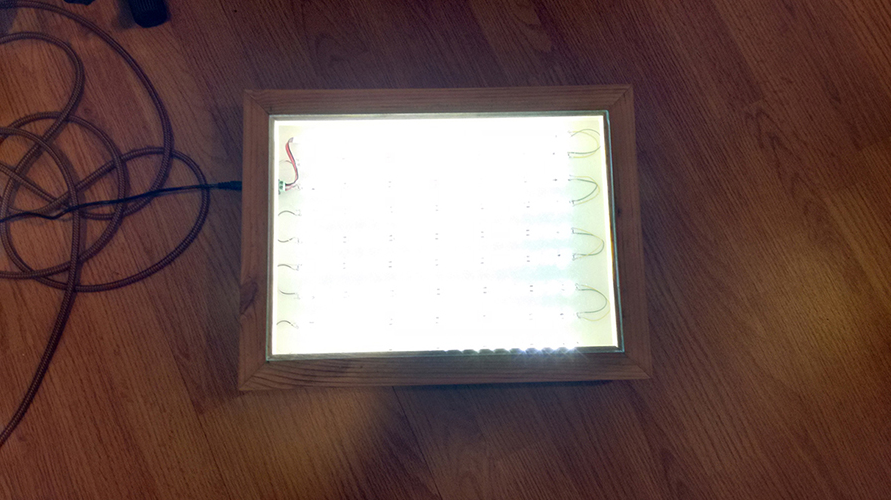
1. The Frame and Screen
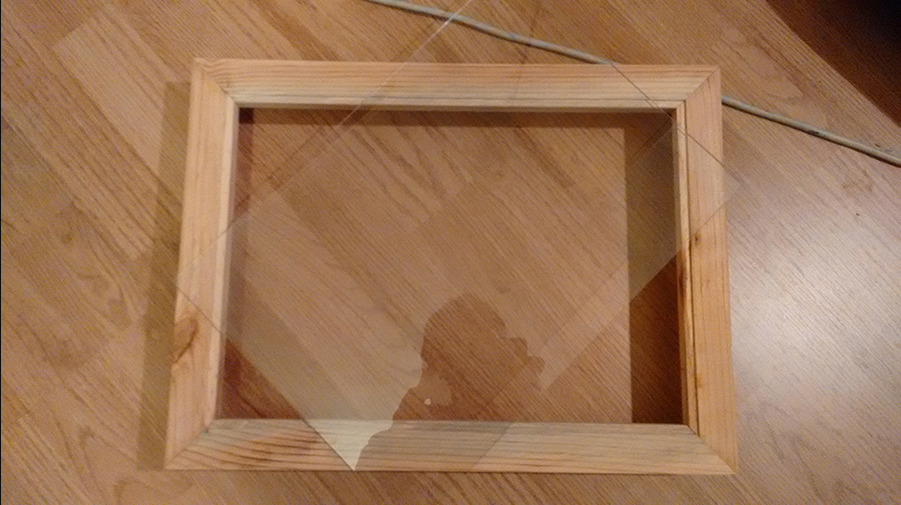
I built a wooden frame and covered the bottom with an insulating panel. To allow air to circulate freely around it and keep things cool enough to prevent overheating of the LEDs underneath, which is essential when using these tiny lights because they can get very hot over time without sufficient ventilation, I bored four holes into each side. This box is barely 5 cm thick, but you would only know it if everything else seems to be well-made. As usual, all pieces were meticulously measured before assembly began.
2. The LED Strips
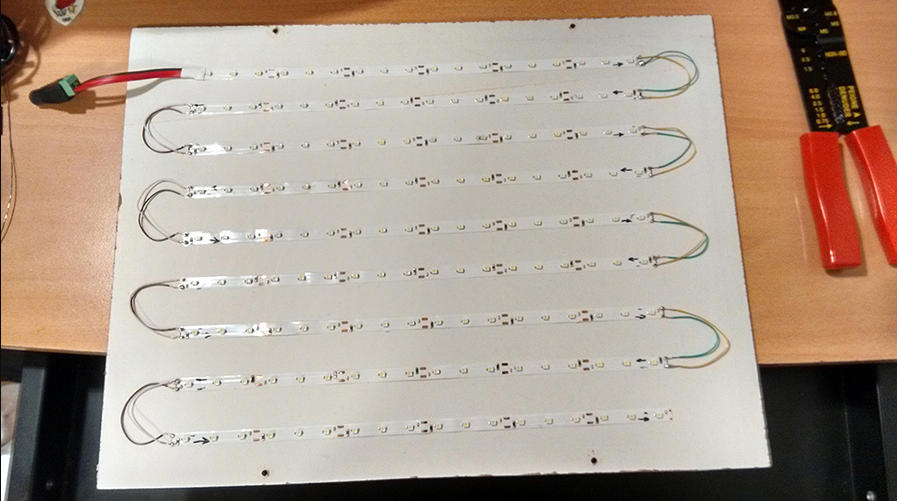
The led strip was then reconnected by having wires soldered across it. Since there were no polarity or orientation marks on this cheapo, cutting it up was already challenging! From my prints, it’s easy to see how it’s done, and then all that’s left to do is solder the pieces together in the pattern we want. If you don’t know what you’re doing, it might be simpler to take your time with each piece until it’s perfect, then put everything back in its proper place. Once that’s done, add any finishing touches, such as glue (I like things neat).
The leading edge strips were the first thing I glued down because I needed assistance holding them while I was working on top of them.
3. Almost Done
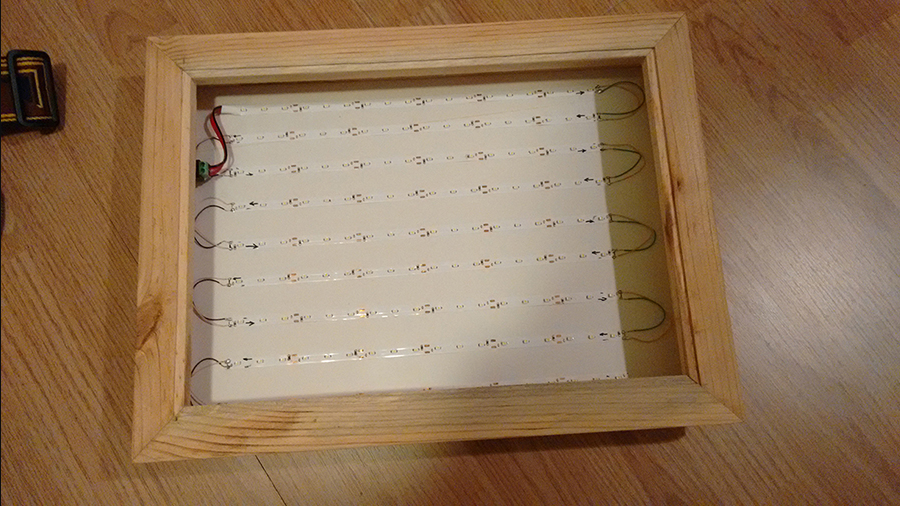
At this stage, I finished pasting each of the eight LEDs into the bottom of a box and fastened the bottom of the frame onto the frame. You can glue it, but it will be challenging if one of those parts fails, so please keep that in mind. This enables me to choose whether to eliminate any uncertainty in the wiring in my box at any particular time.
4. The Power Plug
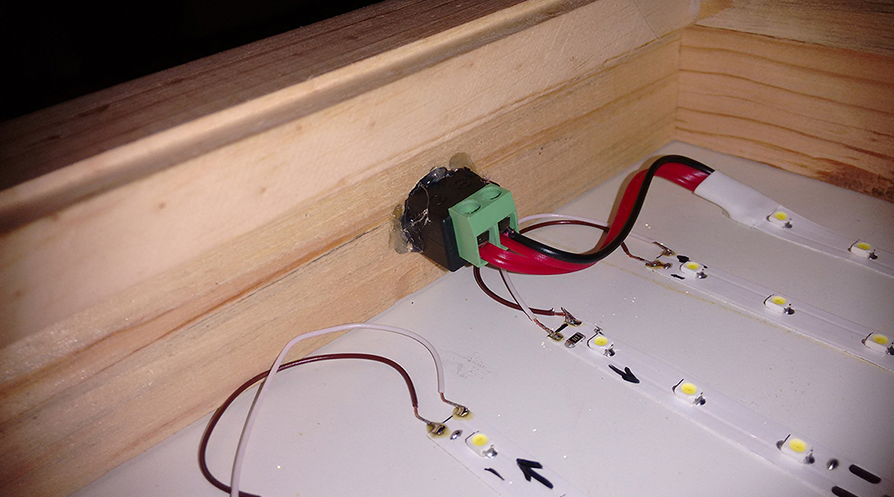
It works perfectly since I superglued the power plug into one of the four holes on either side.
5. Super Bright
The styrofoam plate was then trimmed to size to fit inside my wooden frame. I connected the power supply and BAM! It’s like gazing into an HDTV without blurry lines or missing pixels because the screen is so brilliant without any paper.
6. Just Right
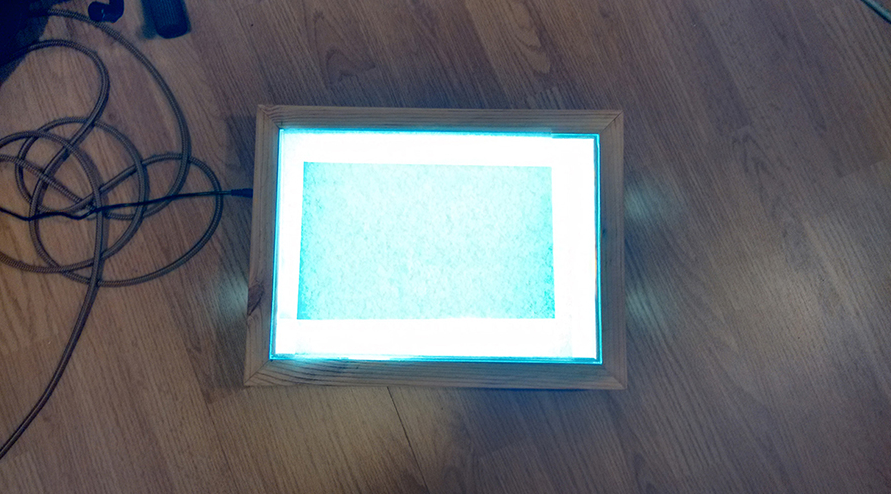
After installing my new LED lights, I was astounded by how different my store looked. It’s not overly vibrant, and the colors are ideal for a professional setting!
Conclusion
Also, Read>> How to Use a Lightbox for Tracing


