Tips for Better Lighting in Your Photography Although there are numerous techniques to capture the beauty of photography, one of the most crucial elements is the lighting. There are numerous varieties of photo lighting, and each has benefits and drawbacks of its own. Finding the proper lighting for your photographic style and topic is crucial.
Lighting is one of the most crucial aspects of photography. You can snap better pictures and make better compositions by improving your lighting. This post will go over 09 ideas to help you become a better photographer by showing you various methods to use lighting.
9 Lighting Tips to Improve Your Photography
Here are some lighting suggestions to help you take better photos.
Understand the Qualities of Light
Consider where the illumination is coming from to get the lighting you desire. Is your topic illuminated from behind? Is the camera’s angle going to change how brilliant the background looks?
Golden Hour and Blue Hour
To get the most fascinating shot when shooting a topic, it’s vital to experiment with different angles. You can accomplish this by repositioning your camera or moving closer to or farther away from your subject. Utilizing a height gap between yourself and your subject might also be helpful at times.
You may use various angles to take images with better lighting and more intriguing subjects. You can also take pictures from a high or low vantage point. While photographing from a low perspective can make your subject appear small or helpless, shooting from a high angle can make your subject appear stronger or larger than life.
Use Natural Light Creatively

Look for well-lit areas or situations in nature to see if they can assist you in taking better photos just by being there. The most remarkable illustration I could come up with was a wedding celebration held outside, even if it might only be sunny.
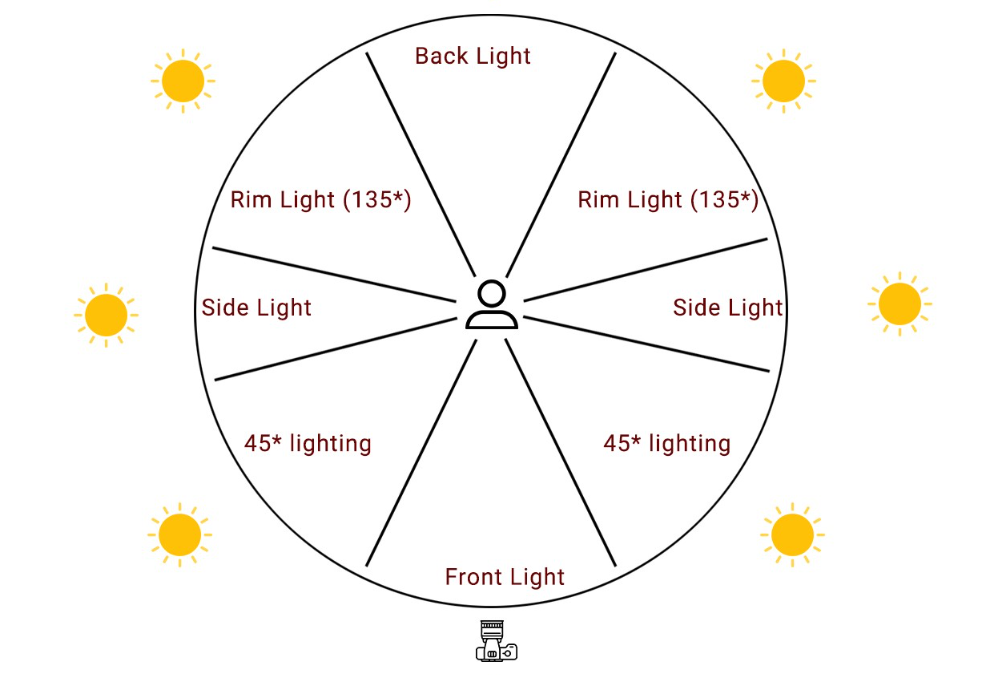
Consider the Direction of Light

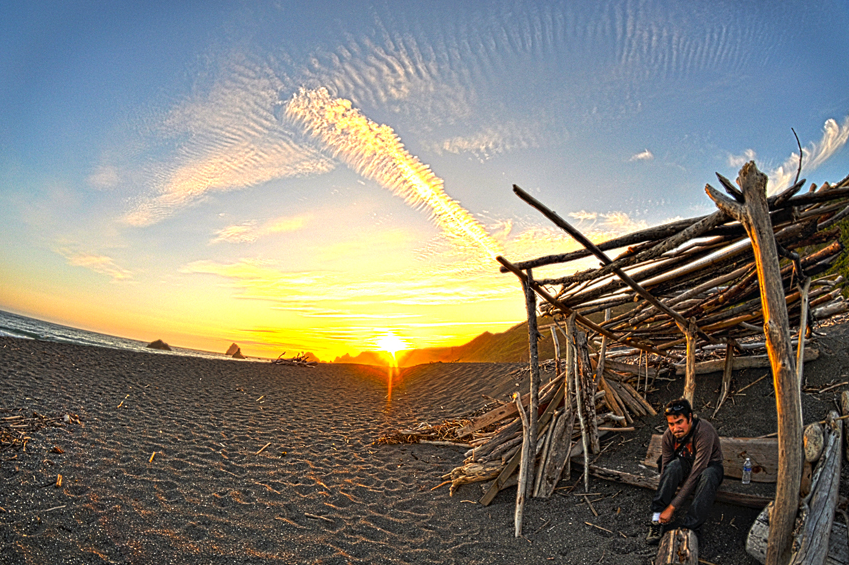
The direction of light is critical in photography. Front lighting, where the light source is behind the camera, provides even illumination and minimizes shadows. Side lighting, where the light source comes from the side, creates depth and texture, revealing details and contours. Backlighting, with the light source behind the subject, can create silhouettes or a beautiful halo effect. Experiment with different directions to achieve your desired outcome.
Diffuse Harsh Light
Harsh, direct sunlight can cast unflattering shadows and create overly contrasty images. Using diffusers or modifiers to soften and

diffuse the light to mitigate this. Techniques like using a reflector or shooting during overcast days can help achieve softer, more flattering lighting conditions.
Fill Flash for Portraits
In outdoor portrait photography, harsh sunlight can create unflattering shadows on the subject’s face. To balance the exposure and fill in shadows, consider using fill flash. This technique involves adding a burst of artificial light to illuminate the subject’s face while maintaining a natural look. Use a flash diffuser or bounce the flash for softer results.
Use Reflectors and Bounce Cards
Reflectors and bounce cards are valuable tools for manipulating light in various situations. Reflectors bounce natural or artificial light onto the subject, filling in shadows and creating even illumination. Bounce cards can redirect and diffuse light, reducing harsh shadows and creating a more flattering look.
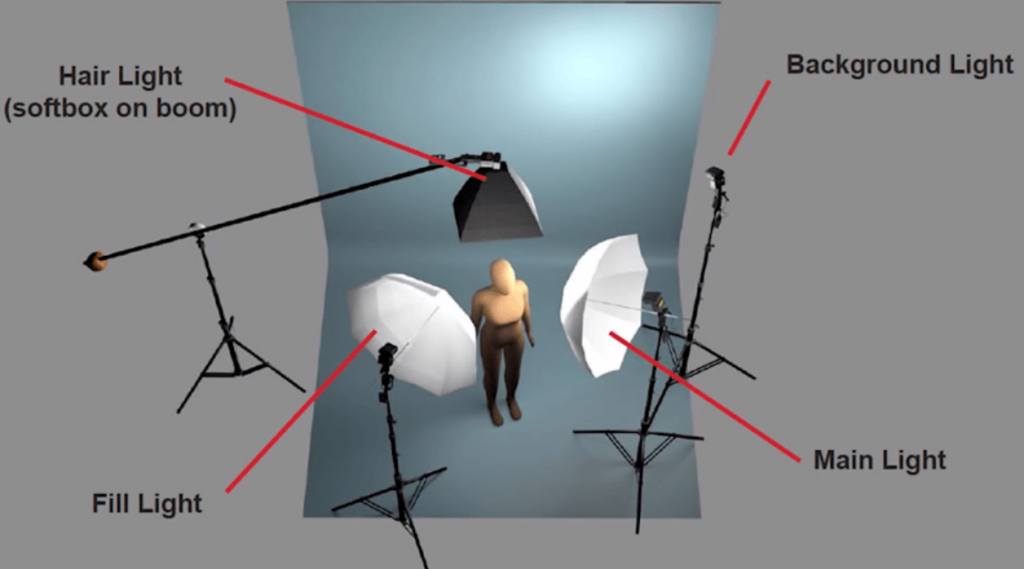
Experiment with Artificial Lighting
While natural light is beautiful, artificial lighting offers precise control over the scene. Experiment with various artificial light sources, including strobes, continuous lighting, and off-camera flashes. Learn how to set up and modify artificial lighting to achieve your desired results, whether studio portraits, product photography, or creative lighting effects.
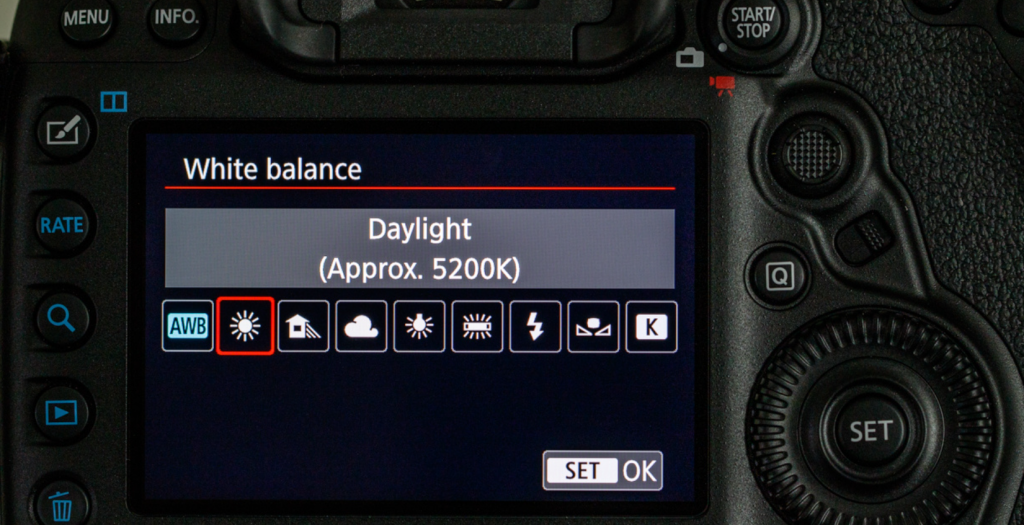
Balance Color Temperature
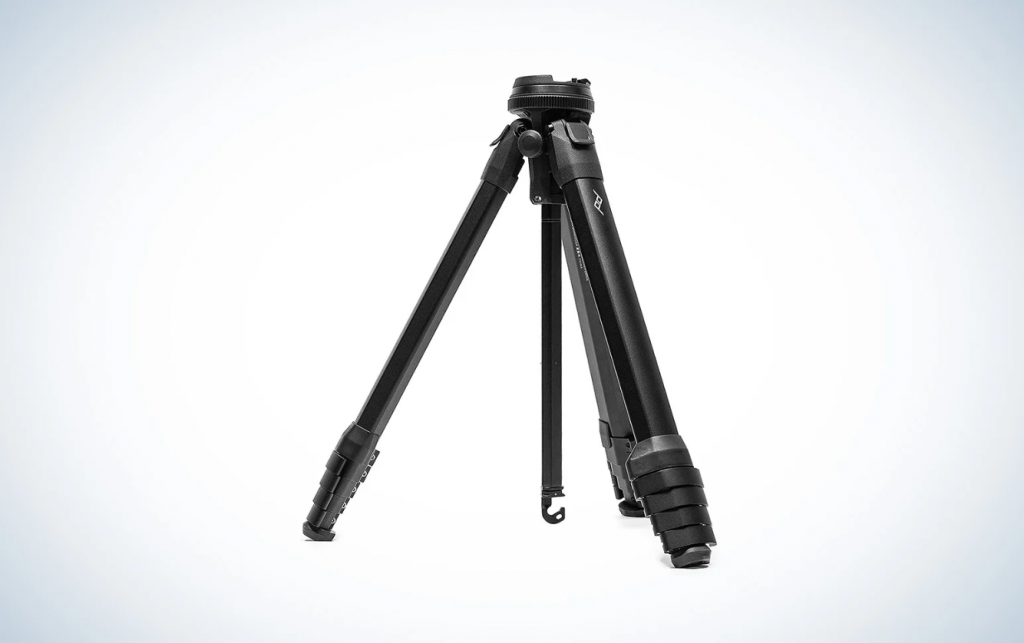
Different light sources have varying colour temperatures, which can affect the overall colour balance of your photographs. Understanding colour temperature and how to adjust white balance settings in your camera or during post-processing is essential. Proper white balance ensures that the colours in your images appear accurate and natural. { "@context": "https://schema.org/", "@type": "HowTo", "name": "How to Style Food Photography", "description": "9 Lighting Tips to Improve Your Photography", "image": "https://photolightboxes.net/wp-content/uploads/2021/09/Lighting-Tips-to-Improve-Your-Photography-2.png", "totalTime": "PT10M", "estimatedCost": { "@type": "MonetaryAmount", "currency": "USA", "value": "10$" }, "supply": [ { "@type": "HowToSupply", "name": "flowers" } ], "tool": [ { "@type": "HowToTool", "name": "camera" } ], "step": [ { "@type": "HowToStep", "text": "In order to get the lighting you want, think about where it is coming from. Is there a light source behind your subject? Is this position of the camera going to affect how bright the background appears?", "image": "https://photolightboxes.net/wp-content/uploads/2021/09/Know-Where-Light-Is-Coming-From-1024x569.png", "name": "Know Where Light Is Coming From?", "url": "https://photolightboxes.net/lighting-tips-to-improve-your-photography/#Tip_1_Know_Where_Light_Is_Coming_From" }, { "@type": "HowToStep", "text": "When photographing a subject, it’s important to use different angles to capture the most interesting shot. This can be done by moving around your subject, or by changing the position of your camera. Sometimes it’s also helpful to use a height difference between yourself and your subject.\n\nBy using different angles, you can create more interesting photos with better lighting. You can also try photographing from high or low angles. Shooting from a high angle can make your subject look powerful or larger than life while shooting from a low angle can make them look vulnerable or small.", "image": "https://photolightboxes.net/wp-content/uploads/2021/09/Use-Different-Angles.png", "name": "Use Different Angles", "url": "https://photolightboxes.net/lighting-tips-to-improve-your-photography/#Tip_2_Use_Different_Angles" }, { "@type": "HowToStep", "text": "Find natural settings or locations that are well-lit and see if they can help improve your photo’s quality by simply being around them. The best example I could find was an outdoor wedding reception – even though there may only be sunlight out.", "image": "https://photolightboxes.net/wp-content/uploads/2021/09/Find-Natural-Location-1024x642.png", "name": "Find Natural Location", "url": "https://photolightboxes.net/lighting-tips-to-improve-your-photography/#Tip_3_Find_Natural_Location" }, { "@type": "HowToStep", "text": "Lighting tip number four is to use a broad light source. If you are shooting outside, move further away from your subject so that the sun does not look too bright in the frame. Adjust your aperture accordingly and if it’s necessary, shoot with a faster shutter speed.", "image": "https://photolightboxes.net/wp-content/uploads/2021/09/Use-a-Broad-Light-Source.png", "name": "Use a Broad Light Source", "url": "https://photolightboxes.net/lighting-tips-to-improve-your-photography/#Tip_4_Use_a_Broad_Light_Source" }, { "@type": "HowToStep", "text": "Lighting tip number five is to place your subject in front of a bright background. This way, you can adjust the exposure accordingly and avoid dark photos with deep shadows that look dull. It’s also a good idea to shoot during the early hours of the morning or late afternoon Light Source Close to Your Subject.", "image": "https://photolightboxes.net/wp-content/uploads/2021/09/Place-Your-Subject-in-Front-of-a-Bright-Background-1024x675.png", "name": "Place Your Subject in Front of a Bright Background", "url": "https://photolightboxes.net/lighting-tips-to-improve-your-photography/#Tip_5_Place_Your_Subject_in_Front_of_a_Bright_Background" }, { "@type": "HowToStep", "text": "Lighting tip number six is to use front lighting judiciously. Front lighting can create dramatic shadows that give your photographs a lot of depth and texture. You just need to be careful not to overdo it or the photo will look too flat.", "image": "https://photolightboxes.net/wp-content/uploads/2021/09/Place-Your-Subject-in-Front-of-a-Bright-Background-1024x675.png", "name": "Use Front-lighting Judiciously", "url": "https://photolightboxes.net/lighting-tips-to-improve-your-photography/#Tip_6_Use_Front-lighting_Judiciously" }, { "@type": "HowToStep", "text": "Lighting tip number seven is to include shadows for a three-dimensional look. Shadows add depth and dimension to your photos so be sure not to get rid of them completely. \n\nThese lighting techniques can help you take better pictures no matter whether you’re photographing people, landscapes, or objects. Remember that lighting plays an.", "image": "https://photolightboxes.net/wp-content/uploads/2021/09/Place-Your-Subject-in-Front-of-a-Bright-Background-1024x675.png", "name": "Include Shadows for a Three-dimensional Look", "url": "https://photolightboxes.net/lighting-tips-to-improve-your-photography/#Tip_7_Include_Shadows_for_a_Three-dimensional_Look" }, { "@type": "HowToStep", "text": "An important role in the final results. Therefore, it’s always better to get the lighting right from the beginning rather than trying to fix things later on during post-processing photos.", "image": "https://photolightboxes.net/wp-content/uploads/2021/09/Keep-Color-Temperature-in-Mind-While-Shooting-1024x525.png", "name": "Keep Color Temperature in Mind While Shooting", "url": "https://photolightboxes.net/lighting-tips-to-improve-your-photography/#Tip_8_Keep_Color_Temperature_in_Mind_While_Shooting" }, { "@type": "HowToStep", "text": "When taking photos, you’ll want to make sure that you’re using the best technique possible to get the clearest, most crisp shots. One way to improve your photography is by using a tripod. Tripods can help keep your photos stable and clear, especially in low-light situations. If you’re looking to take your photography skills up a notch, using a tripod is a great way to do it!", "image": "https://photolightboxes.net/wp-content/uploads/2021/09/Use-a-Tripod-to-Keep-Your-Photos-Stable-1024x643.png", "name": "Use a Tripod to Keep Your Photos Stable", "url": "https://photolightboxes.net/lighting-tips-to-improve-your-photography/#Tip_9_Use_a_Tripod_to_Keep_Your_Photos_Stable" } ] }
Conclusion
Mastering lighting in photography is a continuous learning process that can significantly enhance the quality and impact of your images. Whether you’re shooting portraits, landscapes, or still life, harnessing and manipulating light is crucial in the final result. Experiment with these lighting tips and techniques, practice regularly and pay close attention to the qualities of light to refine your skills and create captivating photographs that tell stories and evoke emotions. As you become more attuned to the nuances of lighting, you’ll discover new creative possibilities and improve your photography exponentially.


