How to Use Lighting Bulbs! In the realm of photography, light reigns supreme as the brushstroke on the canvas of visual artistry. While natural light possesses an ethereal beauty, the controlled and purposeful use of artificial lighting is an indispensable skill for photographers seeking to craft images that resonate with emotion, depth, and professionalism. Lighting bulbs, in all their diverse forms, are the tools that allow photographers to master the interplay of light and shadow, to accentuate details and convey stories. In this comprehensive guide, we embark on a journey through the art and science of using lighting bulbs for photography, illuminating the path to capturing captivating images that are a testament to the photographer’s creative vision and technical prowess.

How to Use Lighting Bulbs in Photography: Techniques and Tips
Here’s a step-by-step guide on utilizing lighting bulbs effectively in photography.
Step 1: Understand the Different Types of Lighting Bulbs
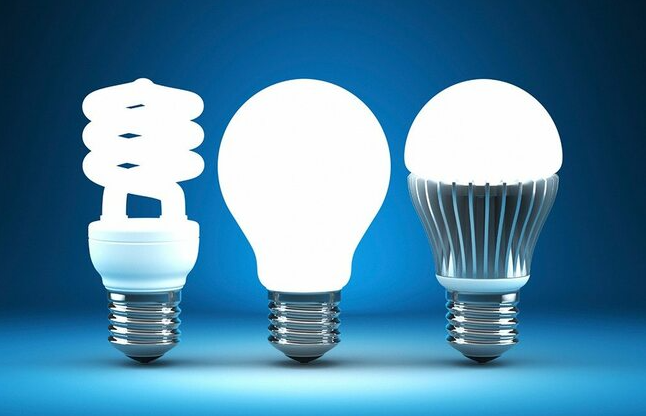
Before delving into the practical aspects of using lighting bulbs, it’s crucial to understand the various types of bulbs commonly used in photography. Here are some of the most common options:
- Incandescent Bulbs: These traditional bulbs produce warm, continuous light and are often used for portrait photography. However, they can generate a lot of heat and have a relatively short lifespan.
- Fluorescent Bulbs: Fluorescent bulbs emit a cooler, daylight-balanced light. They are energy-efficient and generate less heat than incandescent bulbs. Fluorescent lighting is popular in commercial and product photography due to its even and flicker-free illumination.
- LED Bulbs: Light Emitting Diode (LED) bulbs are highly versatile and energy-efficient. They come in various color temperatures, making them suitable for different photography genres. LED lights are also durable, generate minimal heat, and have a long lifespan.
- Halogen Bulbs: Halogen bulbs offer a bright and consistent light source. They are often used in studio lighting setups and are known for their color accuracy. However, they can get hot, so caution is necessary during use.
- Compact Fluorescent Lamp (CFL) Bulbs: CFL bulbs are energy-efficient and produce a soft, diffused light. They are cost-effective and have a longer lifespan compared to incandescent bulbs.
Step 2: Gather Your Lighting Equipment
Once you’ve decided on the type of lighting bulbs that best suit your photography needs, gather the necessary equipment. This may include lighting stands, modifiers (such as softboxes or umbrellas), light sockets, and any additional accessories like dimmers or color gels.
Step 3: Choose the Right Color Temperature
Determine the color temperature (measured in Kelvin or K) that matches the mood or environment you want to create in your photo. For example, daylight-balanced bulbs (around 5500K) are ideal for achieving a natural look, while warmer bulbs (around 3200K) can create a cozy and inviting atmosphere.
Step 4: Set Up Your Lighting Bulbs
Now, it’s time to set up your lighting bulbs for your photography session. Here’s a basic setup you can follow:
- Key Light: This is your primary light source and plays a crucial role in illuminating your subject. Position the key light at a 45-degree angle to the side of your subject, slightly above eye level. Adjust its intensity to control the overall brightness of your subject.
- Fill Light: The fill light helps reduce shadows and provides even illumination. Place it on the opposite side of the key light, also at a 45-degree angle, and set it at a lower intensity than the key light to soften shadows without eliminating them entirely.
- Background Light (Optional): If you want to separate your subject from the background, consider adding a background light. This should be directed at the backdrop and positioned behind your subject. Adjust its intensity to achieve the desired separation effect.
Step 5: Control Intensity and Modify as Needed
Depending on the effect you want to achieve, you may need to control the intensity of your lighting bulbs. Some bulbs come with dimmable features or brightness control options, allowing you to adjust the intensity to achieve the desired level of illumination for your shot. Dimming can also help control contrast and mood.
Additionally, consider using modifiers such as softboxes or umbrellas to soften and diffuse the light, reducing harsh shadows and creating flattering portraits.
Step 6: Set White Balance
To ensure accurate color reproduction in your photographs, set your camera’s white balance to match the color temperature of your lighting bulbs. This step helps prevent color shifts and the need for extensive post-processing.
Step 7: Experiment with Angles and Positions
Photography is as much about experimentation as it is about technique. Don’t be afraid to experiment with different angles, distances, and positions when it comes to your lighting bulbs. Changing the placement and angle of your bulbs can dramatically affect the mood, shadows, and highlights in your photographs
Step 8: Test and Adjust
Before your actual photo shoot, it’s advisable to do some test shots to assess the lighting setup and make any necessary adjustments. This can help you fine-tune the lighting to achieve the desired look and feel for your photos.
Step 9: Practice and Refine Your Skills
As with any aspect of photography, mastering the use of lighting bulbs takes practice and continuous learning. Keep experimenting with different setups, modify your bulbs, and assess the results to refine your skills and develop your unique style.
Tips for Using Lighting Bulbs to Enhance Your Photos
Here are some tips for using lighting bulbs to enhance your photos, presented in bullet points:
- Choose the Right Color Temperature: Select lighting bulbs with the appropriate color temperature to match your desired mood and environment for the photo.
- Experiment with Diffusion: Use modifiers like softboxes or diffusion panels to soften and diffuse the light emitted by bulbs, reducing harsh shadows and creating a flattering look.
- Position Lights Strategically: Experiment with different angles and distances when positioning lighting bulbs to control shadows and highlights for desired effects.
- Adjust Intensity: Use dimmable bulbs or brightness control to adjust the light’s intensity, allowing you to fine-tune your illumination and mood.
- Set White Balance: Ensure your camera’s white balance matches the bulb’s color temperature for accurate color reproduction.
- Combine Multiple Bulbs: For versatility and creativity, consider using multiple bulbs of different types in your lighting setup to create unique effects.
- Practice and Experiment: Mastery comes with practice, so don’t hesitate to try various setups, modify your bulbs, and assess results to refine your skills and style.
Conclusion
In conclusion, mastering lighting bulbs in photography enhances image quality and creative potential. Whether capturing portraits, still life, or landscapes, controlling light is key. Experiment with bulb types, understand their traits, and craft unique compositions. Embrace new techniques, grab your camera and bulbs, and explore light’s limitless photographic possibilities. Illuminate your subjects, and witness your images come alive with brilliance.
